tomatoes

Fermented Fresh Salsa

by Guest blogger, herbalist, and RWP Staffer, Sophie Cassel

This is a salsa you make to eat fresh and eat in the fridge, not canned for storage.

This is a salsa you make to eat fresh and eat in the fridge, not canned for storage.

Ask anyone in my house or social circle what the big culinary wonder was last summer, and they’ll all tell you: “Fermented salsa!”. Far removed from the cooked salsa in jars, fermented salsa is like a tangy, juicy version of the popular pico de gallo type of dip. This was a technique I learned about years ago on a homestead in Maine, but started preparing last summer when faced with a constant glut of tomatoes and absolutely no desire to turn the oven on for canning.

By mid-August, I was making a half- to whole-gallon of fermented salsa per week, and we were eating it just as fast. It makes a great snack and is a tasty conversation starter when brought to backyard cookouts. Suddenly, adding fermented foods to your diet is as easy as breaking out the tortilla chips! It also makes the best topping for tacos and grilled meats. 

Below is the basic recipe. I change the proportions a little each time, based on what I have ripening in my garden or on the kitchen counter at that moment, and how much I could fit into the half-gallon jar. 

Ingredients:

  • 2-3 lbs ripe tomatoes 

  • 1 small onion

  • 1-3 cloves of garlic

  • 2-3 bell peppers

  • Hot peppers of your choice (I like my salsa more mild, so I use 1 jalapeno or 2 hungarian hot wax peppers, but the sky's the limit!)

  • Cilantro (stems included), or a mix of cilantro, pepiche, and papalo leaves

  • Salt to taste

Method:

  • Finely chop all ingredients into similar sizes and layer into a half-gallon mason jar. Add salt and taste; it should be just shy of “too salty”. Stir well (a long-handled cocktail stirrer works well), and cover loosely with the jar lid. Place jar on a plate to catch any overflow during fermentation, and leave on your kitchen counter. 

  • Shake jar (with lid tight) 2-3 times per day, loosening the lid to allow for gas to escape through the course of the day. You will start to see bubbles rising to the surface, but shaking ensures that all ingredients stay below the liquid.

  • After a day or two, taste to evaluate how the tanginess is developing. Depending on weather, it could take anywhere from 2-5 days to achieve desired levels of fermented flavor. You get to decide when you think it’s ready!

  • Eat immediately, or funnel into smaller jars and store in the fridge. It will store indefinitely, slowly building its fermented flavor, but good luck getting it to last long enough!

  • Note: If your tomatoes are really juicy, you may want to strain some of the excess liquid when transferring to storage jars. This fermented tomato juice is a refreshing drink, and makes a great addition to gazpacho or cocktails! 

Please try this at home.

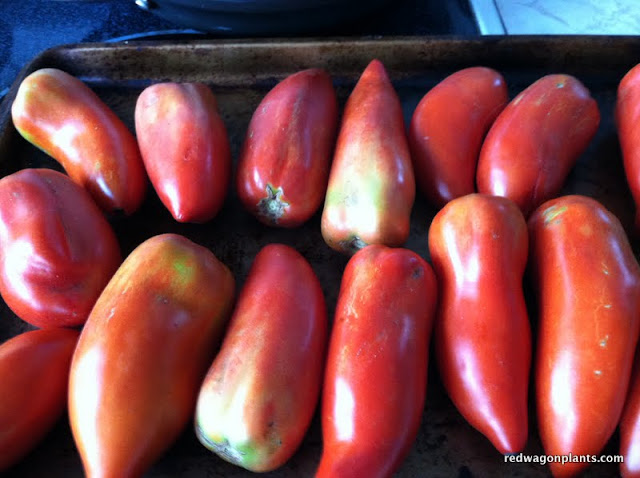
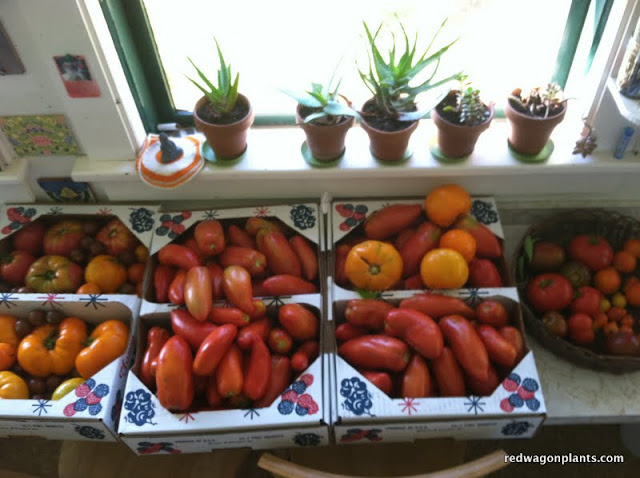
Does your counter look like this during tomato season? Do you feel pressed for time, don't want to be indoors too much with the canning pot, yet hate to see a single precious tomato go unused? Well, I can relate. I love to eat tomatoes in winter, the ones from our garden at least, but I don't love spending all that time indoors, canning and fussing. I have been trying something new this year, and I want to share it with you just because I think you will really like it.

I have been roasting the tomatoes in a hot oven, peeling them, and then throwing them in ziploc bags for the freezer. This gives maximum taste for minimal work. I know you can just throw raw tomatoes in bags and throw those in the freezer, but then you are left with watery, ice shattered, flavorless blobs. I prefer to let the oven do a little work to concentrate the flavors and then have an item to pull out of the freezer that tastes special, an item that has some flavor layers already built in. I used to make this with olive oil and garlic and herbs, but realized that I can do a simpler version with naked tomatoes that is quick, easy, and lends itself well to the preserving process.

Roasting tomatoes is super easy.

You just lay out some paste tomatoes (it works with other tomatoes too, but the cooking time will be longer since they are more watery) in a single layer on a cookie sheet. Pre heat the oven to 400F.  Don't add anything - no oil, salt or anything else. We are just going for tomato flavor here. This will allow you to really customize your dish the way you want it when it is time to use the tomatoes in winter. Slide them into the hot oven. Wait 30 minutes.

After 30 minutes, take them out of the oven and flip them over. Tongs are handy for this process. If they have released a lot of water, you can drain off some of it, carefully, in the sink at this point.

Then they go back in the oven for another 30 minutes. The beauty of this recipe is that you don't have to watch over them. There is alot of what is called "passive time" in cooking and this method is chock full of passive time- I love that I can be doing other things while this is going on.

When they are done roasting, I turn off the oven, walk away and ignore them for a while until they have cooled down or I am done whatever project I started or wait until even later that night, when it is dark and the late summer sunshine is no longer tempting me out of doors. Then it is time to peel them. Just cut the tops of with a small serrated knife, and the skins just slip off in one or two quick motions. It is super simple. The fleshy, juicy, thick tomatoes have been reduced to a lovely consistency and can just go into freezer bags at this point.  I usually get two quart bags out of one cookie sheet;s worth of tomatoes.

So then what do you do with all those frozen tomatoes? Sauces, soups, stews,vegetable sautees, pizza, lasagna, and more will all benefit from these. Anytime a recipe calls for whole canned tomatoes, you can substitute these. I will be posting recipes using these tomatoes throughout the winter, so if you find yourself with a good supply and a lack of ideas of how to use them, check bag for some tips. Enjoy!


FAQ #1 - Late Blight on Tomatoes and Potatoes

1. Can I do something to avoid the tomato blight (early and/or late season) and what should I do if my tomatoes (or potatoes) are infected?

For tomatoes, try growing blight resistant varieties and space plants 30" to 36" apart for good air circulation. Destroy infected plants ASAP to limit spread of the disease which needs living tissue to survive - plants should go into trash bags and taken to a land fill - not the compost pile. Organic treatment requires that a copper fungicide be applied before the disease appears and every 5-7 days in persistent wet weather.

Each year, plant breeders come out with varieties that are more resilient to blight. Of the varieties we grow, we recommend Juliet and San Marzano Gigante III. They both seem to have naturally occuring resistance to the disease.

For potatoes,  try planting potatoes in hills, rather than trenches for better air flow around foliage, and cut off infected leaves on a hot, dry day before the blight moves to the stem. Wait 2 or 3 weeks to dig tubers to reduce the chance for spores in the soil from infected foliage and in potentially nicked tubers. Also, make sure that you are buying potato seed that is certified disease free and comes from a reputable source.

Thanks to Ann Hazelrigg, Plant Pathologist, UVM Extension,  above adapted from "2011- Late Blight Reappears in Vermont".

Websites:  www.hort.cornell.edu/lateblight for disease ID and webinar. www.uvm.edu/mastergardener to submit samples for LB confirmation www.nevegetabl.org for info on fungicides labeled for late blight control

Best-dressed pasta goes for the layers

Turn on the oven - 400F. Go to the garden and look for cherry tomatoes.

Take lots of said cherry tomatoes and cut them in half and dump them into a glass or pyrex baking dish, a big one, so that they are in a single layer.

Add some finely chopped cipollini onion. Or red onion, or sweet onion, or any kind of onion really.

Add a few or more tablespoons of olive oil. A good one. Don't skimp here, you want everything well coated, slippy-slide like.

Grab some herbs like savory, rosemary, oregano, sage, (and/or) thyme and chop them up finely or coarsely, depending on the look you want and your tolerance for stems in food.

Add plenty of good sea salt.

Toss together and slide pan into a pre-heated 400F oven. Forget about it for a good 45 minutes. Check and stir / flip once, about half way through. It will start to get caramelized and yummy. You can do this ahead of time and just let it sit in the turned-off oven for a while. Gets better with time, promise.

Meanwhile, do the second flavor layer......

Heat up a generous amount of olive oil in a heavy saute pan (1/2 cup or so).  I used cast iron and it was lovely.

Chop up some sweet onion, red pepper, hot pepper.  (If you need quantities, try 1 medium onion, 1 large red pepper or 2 small, 1 jalapeno or cherry bomb or 2 thai hot peppers, or more to taste. No rules here.)

Add onion and peppers to hot olive oil, and let it fry for a while. Stir every now and then. These will sizzle gently for about 10  minutes. They will soften, get fragrant, etc.

Chop up about 6 cloves of garlic.

Chop up about 4 tablespoons of herbs - a combo of oregano, sage, rosemary, thyme is nice. But really, any woody, fragrant herb will do here.

Find some paprika. My favorite is Pimenton (the smokey kind) but if you don't have that, you can use sweet or hot (if you can take the heat.) If you don't have any paprika at all, just skip it; the dish will be good without it.

Add garlic, paprika, herbs, and about 1/2 tsp salt to olive oil and peppers in the pan.  Stir, and turn down the heat. This will simmer together another five minutes or so over low heat. More time is fine. But 5 minutes is the minimum. Again, expect fragrance here.

You can get the pasta water going at this point.  You know...big pot, lots of water, salt.

Once pasta water is boiling, add the pasta. However much you need and while it cooks finish off the sauce.

Here is how:

Squeeze a lemon. Turn sauce # 2 off ( the one on the stove, not the one in the oven) and take it away from the heat. Add the lemon juice. It may sizzle a bit, so stand back. Stir together. Add some chopped parsley or basil (one or the other, not both, please).

Take roasted cherry tomatoes out of oven. Add the sauteed peppers and herbs to the tomatoes, scraping up every savory bit. gently and lovingly merge the two sauces. Serve in a bowl with a nice small ladle.

This is a rich, olive oil intense sauce. Use sparingly over the pasta with lots of freshly ground black pepper. The flavors add up to more than the sum of the parts. Really.

Some possible additions, if you must:

  • anchovies ( with the peppers and onions on the stove)
  • olives (pitted and chopped, added at the end with the lemon juice)
  • capers (can be added at the beginning or at the end. Gives you two different flavors either way, experiment with which you like best).
  • scallions (toward the end of the cooking time in either of the two sauces)
  • freshly grated parmesan (to pass around at the table)

But really, the beauty of this sauce duo is the simplicity. Don't overdo the flavors right off the bat. Try it as is. Just swoony and simple.


New Plants in 2011

'Zion Copper Amethyst' Osteospermum

We are so excited about our new selection of plants! Many of you have requested a wider array of edible and ornamental landscape plants, and we are happy to oblige. Below you will find a few of the new plants we love. Descriptions, growing information, and suggestions for companion plants can be found under "Our Plants".

'Zion Copper Amethyst' Osteospermum: Upright, daisy-like annual flowers in awe-inspiring amethyst/pink/orange. Plant in part to full sun 12-18" apart. Slightly trailing habit. Low maintenance, no deadheading required! Does well in containers. Allow top of soil to dry out between waterings.

'Holy Red and Green' Sacred Tulsi Basil: Striking purple and green leaves have a musky scent and mint-clove flavor. Tulsi basil has been sacred to Hindus for at least 3,000 years. It has excellent medicinal properties as a stress reliever and anti-inflammatory and makes a refreshing tea. Allison, our seed master, says it makes a wonderfully-scented oil for salves and skin creams.

'Reliance' Grape: A very hardy, vigorous variety that produces clusters of beautiful pink seedless grapes excellent for fresh eating as well as jellies and juices. Plant in full sun and moist, well-drained soil where the plant will have at least 10’ of climbing space. Prune in winter, train in summer. Makes a great privacy screen or seasonal shade.

'Banana Cream' Leucanthemum: An unusual perennial daisy that opens lemon yellow and slowly turns white as it matures. Full flowers bloom in abundance all summer. Ideal for cut flowers due to long, straight stems and extended shelf life. Looks lovely with just about anything, but especially lavender, liatris, and gaillardia. Very vigorous plants multiply easily, making a great filler. Plant in full sun 18-24” apart. Attracts butterflies.

'Niger' Black Mondo Grass: A compact, clumping grass-like plant. Foliage turns jet black when grown in full sun. Small light purple to white flowers on short stalks appear in early summer and give way to black berries in the fall. Plant in full sun to part shade 12” apart. Pair with succulents, lobelia ‘Fan Scarlet’, or Lamb’s Ear for dramatic color and texture combinations.

A note on the 'Julia Child' Heirloom Tomatoby the renowned tomato breeder, Gary Ibsen:

"Early in 2001, while having lunch with Julia Child at Bernardus Lodge in Carmel Valley, California, I told her about my having in my tomato seed trials several un-named varieties. I followed by asking her, "If I'm able to grow an heirloom tomato that's good enough to name after you, what kind would you like it to be?" I suspected she would say, "Red", or "Beefsteak", or "Yellow." However, after just a moment's hesitation, Julia looked at me and replied, "Tasty, my dear"

"'Julia Child' is an open-pollinated, heirloom tomato. The tall, indeterminate, potato-leaf plant produces lots of 4-inch, deep-pink, lightly-fluted, beefsteak fruits that have the kind of robust tomatoey flavors and firm, juicy flesh that invites tomato feasting and seed-saving. It's not a simple, sugary sweet variety, but has a bold, straight-forward character in its taste, with more than enough acidity and earthy nuances to balance its sweet, fruity flavors."

'Paul Robeson': A well loved tomato on many people’s “favorites” list. A “black beefsteak” with dark red fruit tinged with black, brown and purple flesh and skin. Rich flavor with hints of spice and red wine. Vary widely in size, but average 10 to 12 oz. each. Does well in colder temperatures. 74 days. Indeterminate, provide support. Won “Best of Show” at Carmel TomatoFest!

Impatient Tomato Tastings

The first tomatoes of the season are always a bit of an anti-climax. We wait all year for the fruit to come out of the back yard as opposed to some distant clime, and then take a bite. It's not as sweet as the memory, not as drippingly hot and gushy as the movie running through my brain. The first tomatoes aren't the best ones. That is all there is to it. I tend to pick them a little early, eager for a bite and am met with a disappointing crunch when there should be a mush. In a week or two, I won't be so impatient, the vines will be dripping with ripe fruit, and I will eat them three meals a day, going from scarcity to abundance in a flash. Soon, every slice of bread will be adorned with a smear of mayo (the junky kind, not the healthy kind. Sorry) a thick, red, juicy slice of tomato and a sprinkle of good salt. This will be all I eat for a while. I know it's coming. But for now, I decided to document the earlier tomatoes and taste them, giving them a ritualistic importance of sorts. I try to put blinders on in the face of their slight un-ripeneness and photograph them, carefully laid out on the counter. Soon there will be baskets of tomatoes, heaping, unnamed and tangled together. But for now. We will carefully label, taste, and report. Here goes.

Pink Beauty is just an iconic tomato - it always perfectly shaped, blemish free and has an almost electric dark pink hue. The Purple Russians tend to crack a little, but nothing too detrimental (their good sides are showing for the photo shoot). The Juliet, as many of you know, is my favorite all-around tomato. It has huge yields of oval fruit that are great raw, for snacking, salads, sandwiches, and salsa (not too watery); but the real charm is that they work really well as a cooked sauce tomato too. The Viva Italia is a very pretty paste tomato - early and blemish free and very disease resistant. The Glacier is an heirloom, super early, does well in very cold climates (Huntington, Lincoln, Ripton - no problem), and is the one tomato you will be eating weeks before others ripen.

We tried them all, carefully slicing, chewing, thinking.....

All were slightly under-ripe and slightly lacked that "I've been baking in the hot sun" flavor and texture. We have had some rain the past couple of days, and the flavor is affected by that. But they were good - not middle of August good, but good. The Pink Beauty has a really nice balance of sweet and acid flavors, a slippery, silky texture and makes beautiful shiny slices.

The Purple Russian was a winner, flavor wise and texture wise. It is juicy, especially for a paste tomato, and has the most buttery complex taste that lingers on the tongue and leaves me wanting more. The plants are nothing pretty - they always look shaggy and stringy somehow, so I have never gotten too excited about putting them in my garden, but customers rave about them, and now I know why. Sweet, unctuous and complex. A new favorite and you will hear me raving about this one in the greenhouse next year. It would be perfect raw or cooked, and I am sure any sauce made from these would be a deep purple red color.

The Juliets were a little bland compared to the first two, but still full of good, bright flavor - lively on the tongue and a nice meaty texture.

Viva Italia were lacking in distinctive flavor (a little too acidic for my taste), but in all fairness,  they are much nicer when cooked. We will have to do another taste test with just paste tomatoes, cooked simply in some olive oil and lightly salted.

The Glacier is cute as a button: plump little orbs, slightly mis-shapen and full humble darlingness. The flavor is great for an early tomato - they are a little bigger than a cherry tomato, can be sliced for salads or sandwiches or cooked down for a quick sauce. They tend to ripen 3 or 4 at a time, a nice feature since they are so small and just one of them won't take you far. I would put this at the top of the list for early tomatoes. But if you only have room for a couple of plants, there could be some better choices.

I would love to hear what you are loving or not loving in your tomato selections. Any varieties you want to recommend for next year? Any you think should be discontinued? Let us know. And we love pictures! I will do this taste test again, later, when the plants are loaded and the fruit is at peak flavor!

Garden Tips: Tomato Planting

Now that tomato planting weather is upon us, I want to write a little about some questions we often receive from customers. One of them is "When can I plant tomatoes?"

Tomatoes are best planted when the soil is warm (night time temperatures are 50F or above) and all danger of frost has gone by. In Burlington that is generally the end of May or the first week in June.  The best planting method for tomatoes involves digging a shallow trench and laying them in it. You can break off the leaves on the bottom 2/3 of the plant and bury the whole stem horizontally in the warm top layer of soil. The buried stem will turn into a huge and healthy root system. The top of the plant is gently bent upwards and soil is patted around the base.  Tomatoes must be trellised for best results; it keeps the plant healthy, off the ground, and the fruit stays clean.

Here are some photos of a tomato planting that happened recently in our display garden:

The language that describes tomato plants can be a little confusing. Here are a few tomato terms explained: Hybrid - a tomato that is a cross between two different types of tomatoes. Seeds from these tomatoes will not grow out true to type, but will revert back to one of the parent tomato varieties. Hybrids are not genetically modified, they are just a simple cross between two types. For example, one tomato with good disease resistance is crossed with another variety that is known for good flavor in hopes of producing a healthy yet tasty tomato. Some of our favorite hybrids are Big Beef and Early Girl. Open Pollinated - a tomato that is the product of two parents that are the same variety. The seeds from these tomatoes will be true to type. All of our "heirloom" tomatoes are open pollinated and the seeds could be saved from those fruit. Heirloom - a variety with a story. These are plants which have been handed down, brought to the new world in various ways, found in distant parts, or in your neighbors back yard. These are all open pollinated. Heirloom is not a botanical terms, it just means that it is an older variety with a lot of flavor or other appealing characteristic like color of shape. Sometimes heirlooms are less disease resistant than hybrids, but they make up for it with flavor. Heirlooms are sought after by home gardeners since those types of tomatoes are not found in conventional grocery stores. Around here they are easily purchased at farmers markets, but it is always nice to eat something harvested just seconds ago from your own garden. Determinate - a tomato that only grows to a certain height and then all of the fruit ripen at once and then the plant dies. This is a good option for people who can or freeze tomatoes so that they will have a big batch ready to use all at once. Some of our favorite determinate tomatoes are Glacier (which is also an heirloom and very early to boot) and Celebrity. Indeterminate - a tomato that grows and grows, with the fruit ripening in various stages. The plant grows until it is killed by frost or disease. In a warm climate these plants would grow into woody vines.  Most of the tomatoes we grow are indeterminate. They require staking or cages, and there are many different methods for doing so. I've seen hockey sticks used in community gardens in Montreal!  Concrete reinforcement wire can be cut into 6 foot sections and bent into a tube shape - this makes once of the strongest and largest cages possible. There are lots of great trellising and caging systems available at Gardeners' Supply Company and your local hardware store will have simple wooden stakes and twine. Professional vegetable growers oftenuse a method called "bakset weaving" which is simple, efficient and affordable.  Here is a description from the University of New Hampshire Extension Service:

•Remove suckers (new shoots that develop in the leaf axils) before they reach an inch in length. • Leave the first sucker that grows below the first flower cluster, removing all others below the first flower cluster; allow suckers above first flower cluster to grow. • Pinch off tops once plants reach a few inches above stake. • Use 4 ft. sturdy wooden stakes, with double stakes at end of each row for strength. • Set stakes six inches deep, one stake for every two plants, as soon as seedlings are transplanted. • Begin supporting tomato seedlings after they have set the first flower clusters. • Tie sturdy, untreated twine at one end of row, about 18” up from soil level. Weave twine between tomato plants, wrapping twice around each stake down the row. After reaching the end- stakes, weave twine back up the row in the opposite direction, alternating with the weave-pattern of the first strand so each plant stem is encircled by twine. • As plants grow, weave another layer of twine every 6-8 inches to keep plants well supported. Four layers of twine will support most varieties.

Hope this information helps, and as always feel free to stop by our greenhouses where our staff can always talk to your about your tomato growing concerns. Happy gardening!

Tomato Varieties, Old and New

This past season was pretty hard on tomatoes.  Lots of rain, cool temperatures, and very high disease pressure made for less than ideal conditions.  At Red Wagon, we grow varieties that taste really good and that produce well.  Sometimes those two things don't always go together, and flavor is sacrificed for high yields, or the other way around. Our tomato variety list has always favored flavor; in other words, we grow lots of open-pollinated, heirloom varieties that don't always produce high yields, but whose flavor is far superior to those hard lobes lurking on grocery store shelves.  All of the 'heirloom' varieties you see in catalogs or in our plant displays have stopped being commercially produced by large farms, and while enjoying a renaissance among small, local and organic farms, their lack of shipability (too delicate) and irregular shapes and sizes will likely make sure they remain a stranger to the tractor trailer. For the sake of clarity, let me explain something about the language used to describe plant varieties. 'Heirloom' and 'hybrid' are not exactly parallel terms.  Their is no botanical definition of an 'heirloom' - that is just a folksy way of saying a certain variety has been around a long time, it is open pollinated (more on that in a second) and there is often some sort of story associated with how the seed has been saved over many generations.  The heirlooms often taste better--but not always--and sometimes the propaganda around an heirloom's attributes eclipses the reality.  A hybrid variety is a plant that has been bred from two different tomato varieties.  This gives it, in theory, hybrid vigor.  For example, one parent is known for its resistance to pathogens but has the mouth-feel of a doorknob while the other parent is famous for flavor, but withers at the sight of a fungal spore. A hybrid variety is bred with a higher degree of human intervention, than an open pollinated variety.  This simple plant breeding has been going on since the beginning of agriculture and is not to be confused with recombinant DNA breeding which is inter-specific (think fish genes in a tomato).  Open-pollinated varieties are plants with the same exact parents and are bred with the simple aid of wind, insect, or plant mechanics--i.e. humans don't have to get involved other than to isolate the plants from other varieties, and to collect the seed etc.  All 'heirloom' varieties are open-pollinated, but again, remember that 'heirloom' is not a scientific term, it's more of a literary term - think "plants with stories."

A while back, a New York Times editorial by chef and restauranteur, Dan Barber, confirmed what I had been thinking: that in order for our agriculture-and on a small scale, our back yard gardens-to thrive, we need to diversify. This past summer, those gardens that included a mix of heirloom tomatoes and hybridized tomatoes probably had better luck over all.  I know that in my garden, that was true, but I was still a little surprised that the margin between the two was pretty slim.  In spite of the harsh conditions, my tomatoes did pretty well. I gave them lots of mulch and lots of space between the plants and I regularly clipped off yellowing vegetation.  Surprisingly, some of the hybrids died really early on (they are bred for resistance to certain pathogens, but not all), and some of the heirlooms clung on for dear life until our first (very early) frost. So the lesson I learned is that the best thing to do is to have a mix of varieties, and hope for the best.  I would not suggest growing only one favorite heirloom; if there is room in your garden, grow a plant or two from each category - heirloom and hybrids of slicers, cherry, paste, early producers, late producers, etc.  I know this is not practical for small spaces, but just a guideline to use in your garden planning.

We are adding some new tomatoes for the 2010 season, and so far, here is what I have come up with.  Please feel free to leave me suggestions, that is our favorite way of trying something new.

Pink Beauty - a hybrid with firm, delicious fruit.  Pink, medium-size, 6-8 oz.  74 days to maturity.

Fantastic - A customer request. A hybrid with 3 to 5 inch round, firm slicing fruit with good shape and crack resistance. Meaty, bright red and with exceptional flavor. Indeterminate. 85 days to maturity.

Goliath - a hybrid with smooth, bright red fruit that is huge - 10 to 15 ounces each. Sweet luscious flavor and blemish free exterior. High yielding and great disease resistance. 65 days to maturity (EARLY for such large fruit)

Rutgers - a hybrid with pinkish-red saladette (2-3" diameter) size fruit with outstanding flavor that is always a favorite in taste tests.  The earliest tomato that keeps producing all season long. Cold tolerant. Determinate. 50 days

Orange Blossom -a hybrid determinate (means they don't get as tall as others and all of the fruit ripens at once)  with medium-firm, globe-shaped fruits average 6-7 oz., have a nice texture, and are mildly flavored, balanced with a little acidity. 60 days to maturity

Black Cherry -A small and pretty cherry tomato with rich, sweet flavor.  Nice in mixed tomato salads. Black tomatoes are really a deep mahogany and are known to have superior flavor.  Open-pollinated. 64 days.

Paul Robeson - An heirloom. A well loved tomatoes on many people’s “favorites” list.  Dark red fruit tinged with black, brown and purple flesh and skin. Rich flavor with hints of spice and red wine. Varies widely in size, but averages 10 to 12 ounces each. Does well in colder temperatures; seed is from Siberia. 74 days.