Blog — Red Wagon Plants

Succession Gardening for Success

savoy cabbage.jpg

Garden Planning for the Seasonal Kitchen

Growing vegetables in your backyard, community garden or in containers by the kitchen door is a great way to feed yourself - whether it be just a few ripe tomatoes in August or a full-fledged homesteader's garden, you are on the path to feeding yourself and your family. Gardening is a great way to improve how you eat while spending some contemplative time outside. With all of these benefits in mind, it is easy to jump into gardening enthusiastically, and you will reap even more rewards with a little bit of planning. In Vermont, our gardening season seems short but can be stretched almost year round with a few simple tips. I always recommend that people take a look at how their vegetable gardens have been in the past and find just one or two things they would like to improve so that they can grow more of it for a longer season. For example a common question I hear is "how can I keep cilantro from bolting?" Well, in short, you can't. But with a few changes in your gardening practices, you can grow it all spring, summer, and fall without ever seeing it go to seed.    The trick is to understand the life cycle of each vegetable or herb and how to best plant it to maximize its harvest. With certain crops, like zucchini, it is best to understand how prolific they are and to plant them conservatively so that the entire garden (and thereby your diet and your neighbors' diet) is not taken over with just one thing. It is also helpful to plant things seasonally so that the harvest is not so overwhelming in August with little to eat before or after. Or sometimes we just want fresh salads all summer, but don't replant and are left salad-less after July 1st.

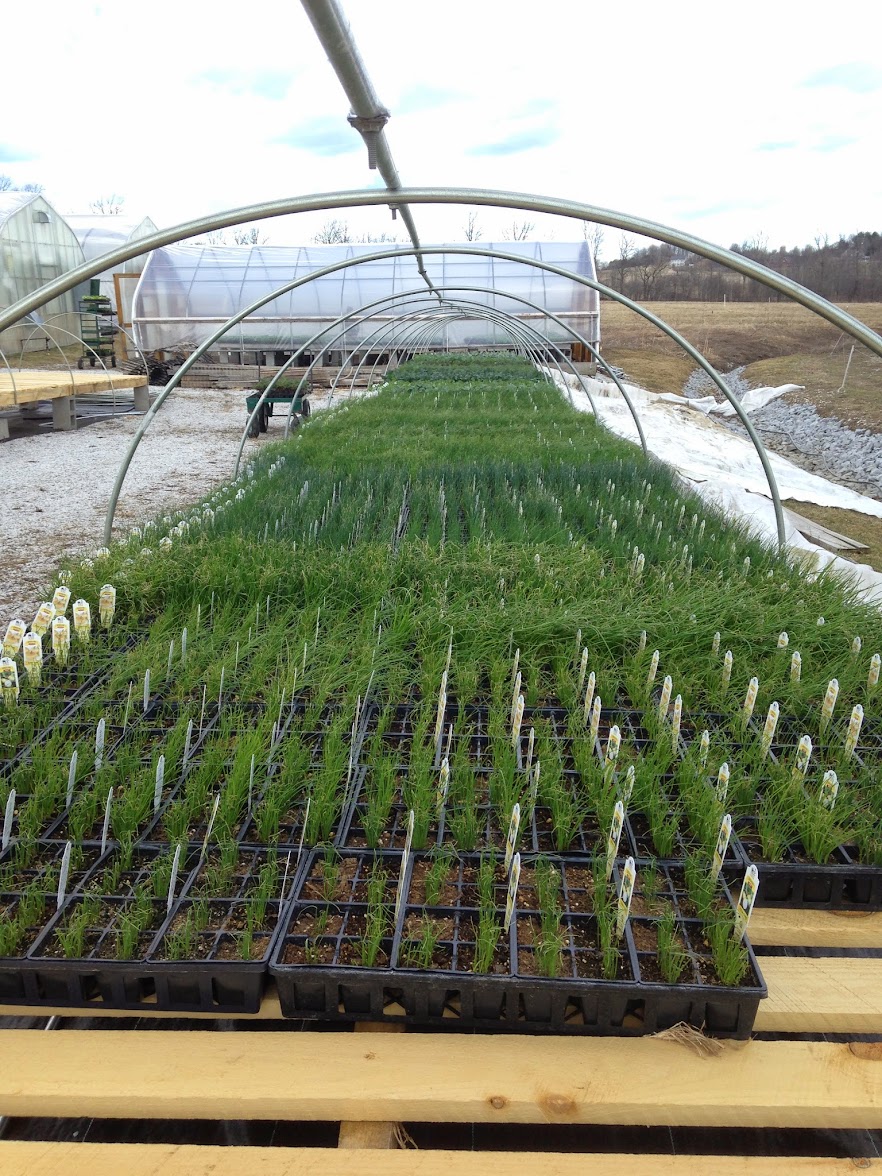
Succession Planting for Successful Gardening

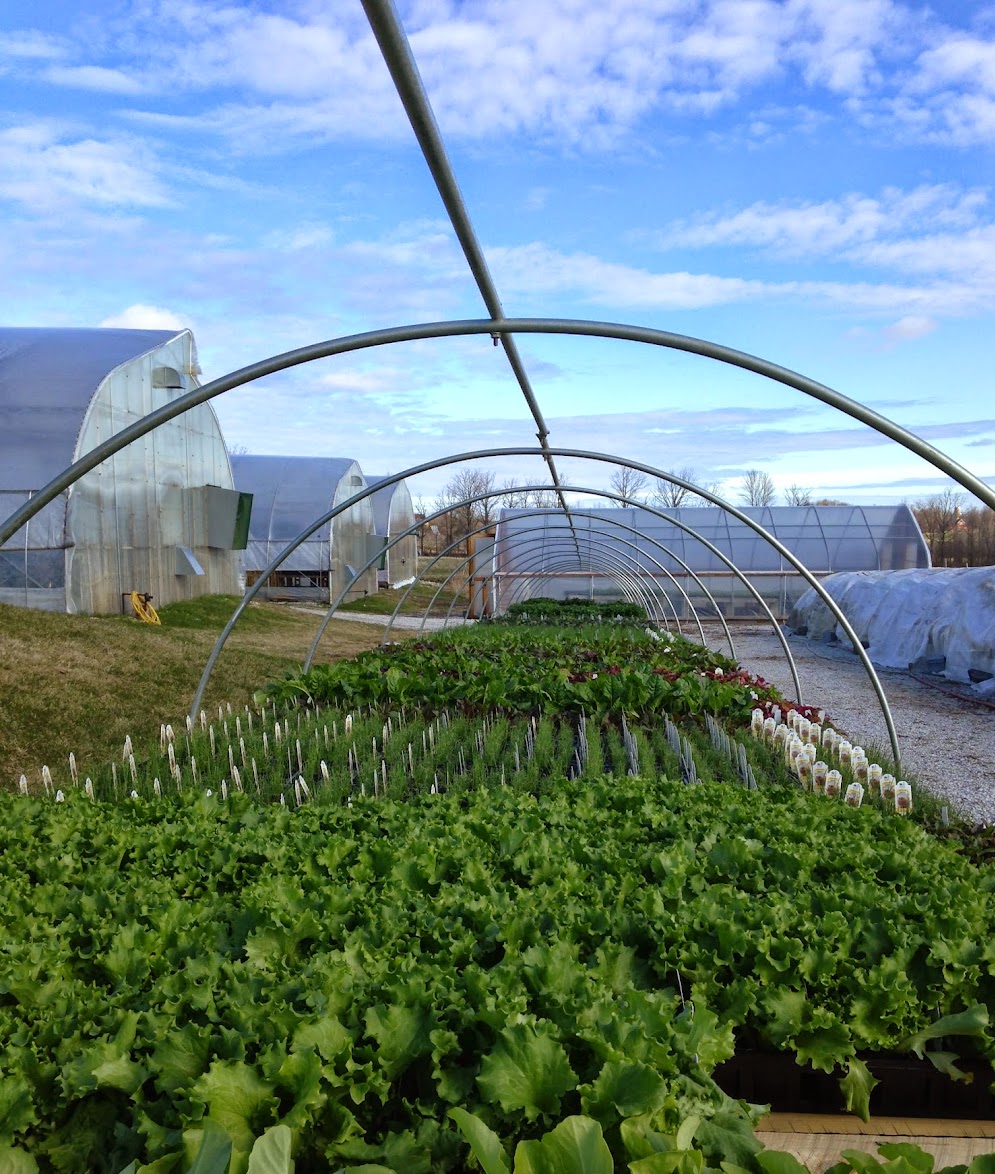
Certain crops should be planted multiple times throughout the season to ensure a continuous harvest. This is called succession planting. How often you plant is a matter of taste and space and time. The following list describes the maximum you could do with each crop, but adjust according to your needs and priorities - this is just a guide. If you want to make sure you have a certain vegetable all summer long, then you can follow the guidelines. If you want it a little less, then create your own modified planting schedule.

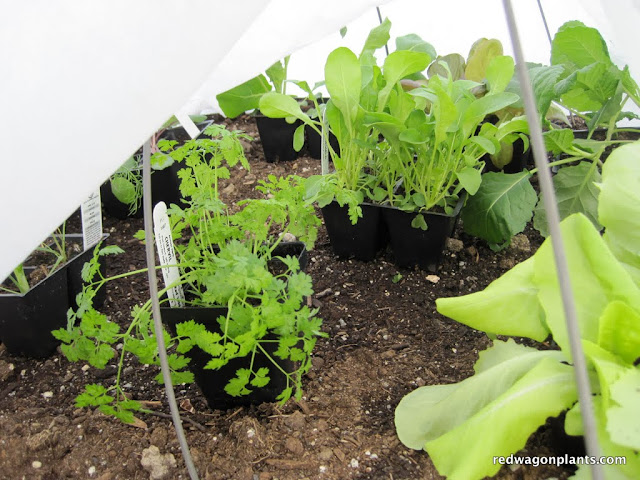
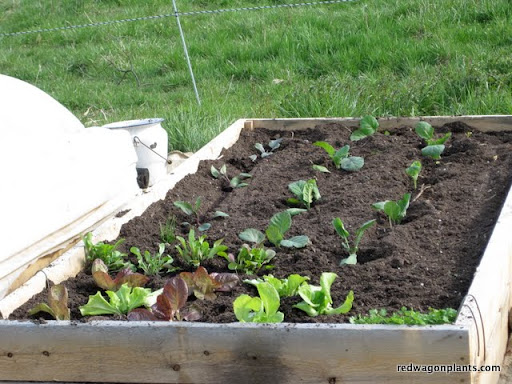
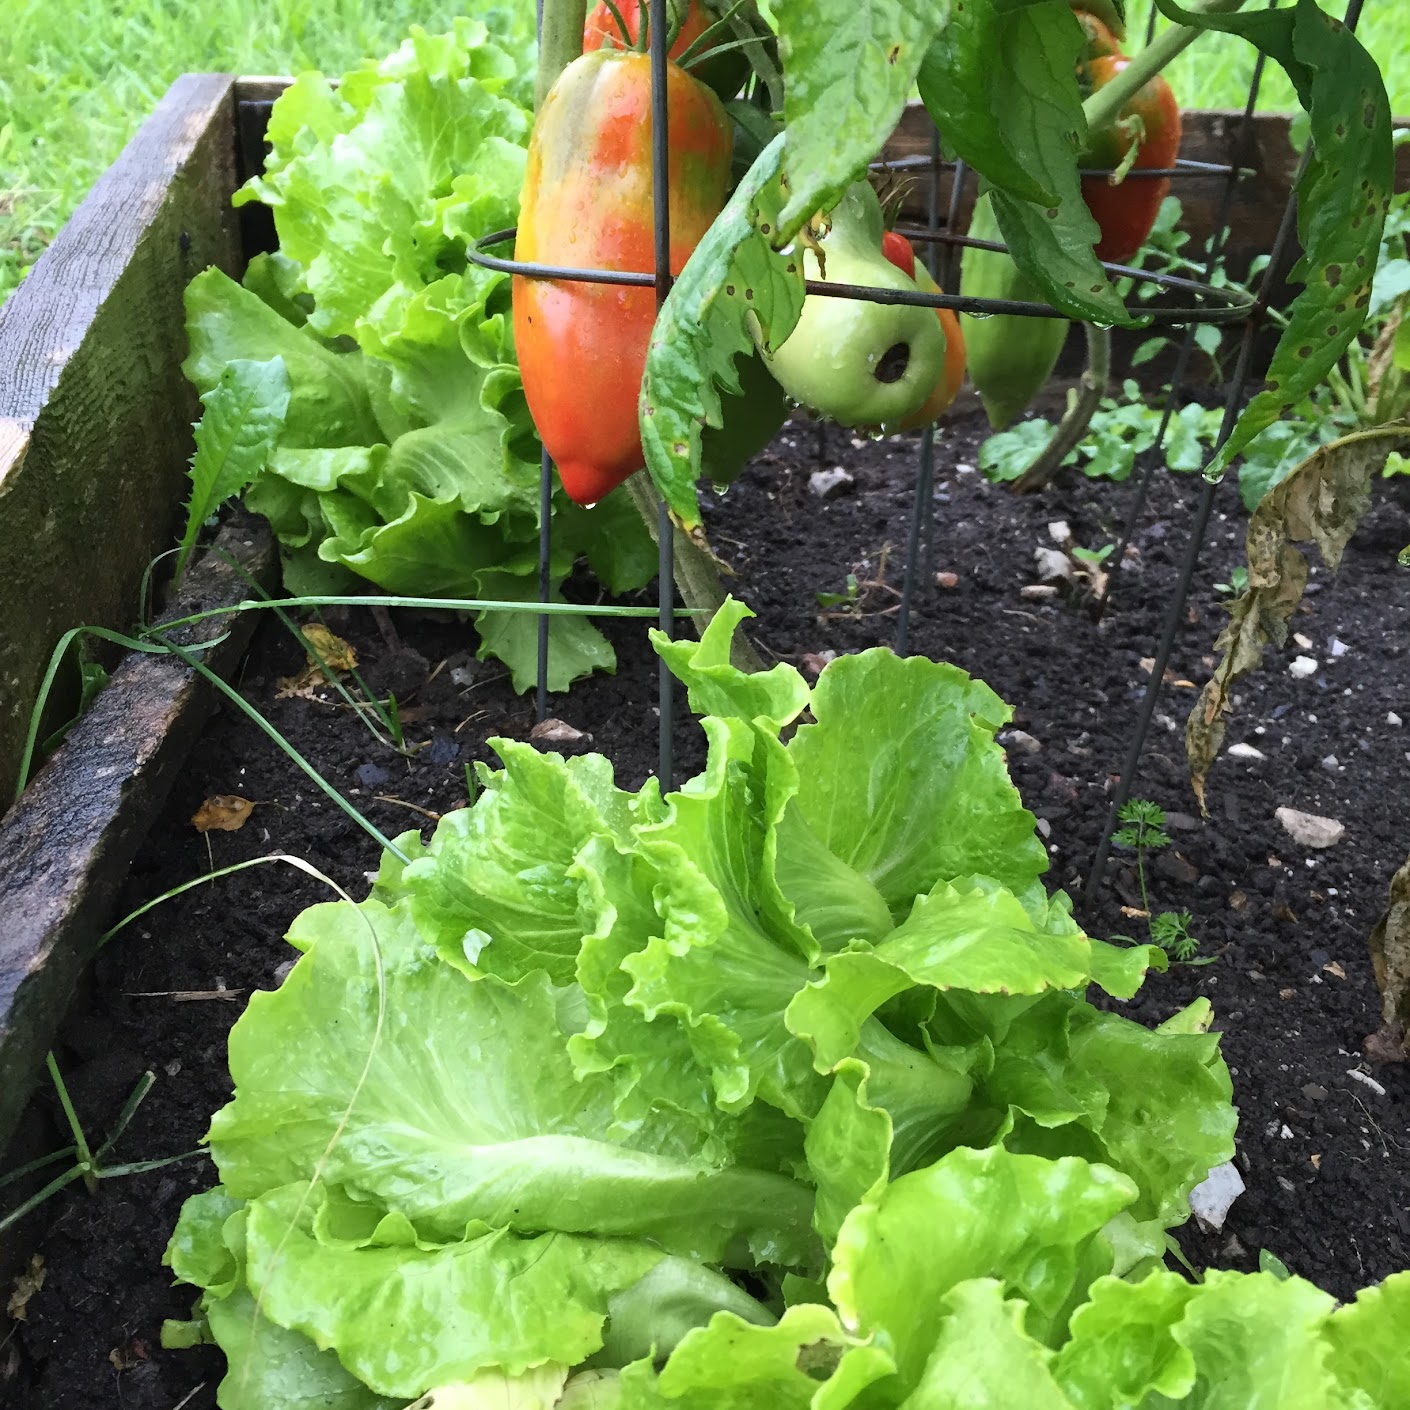
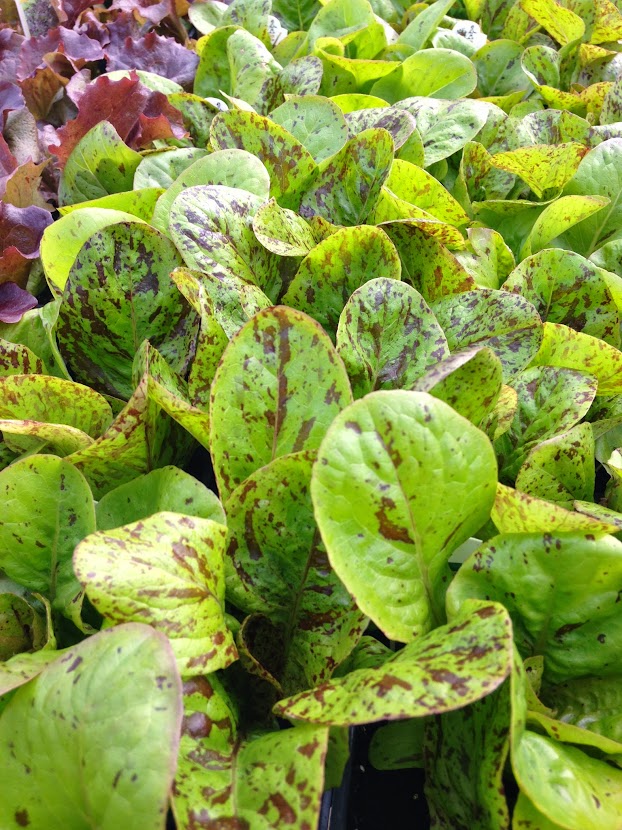
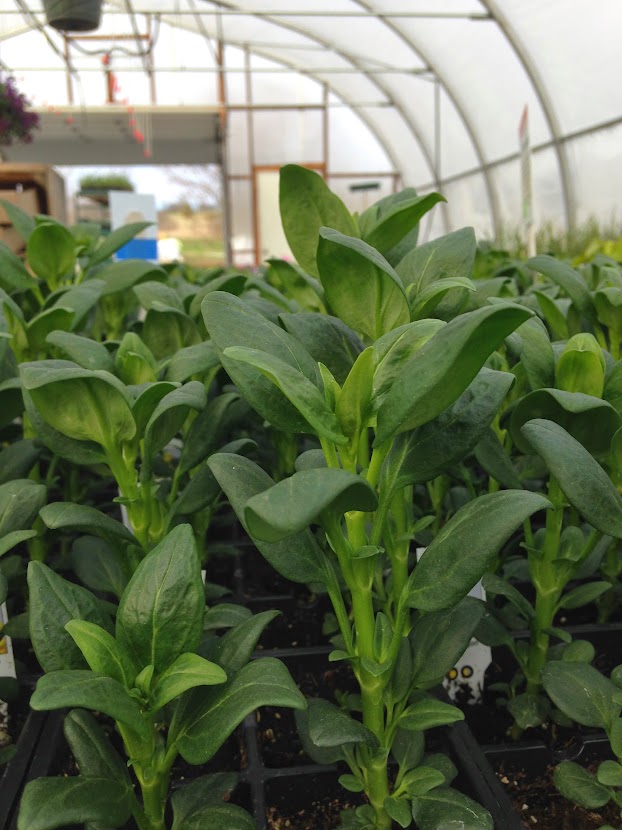
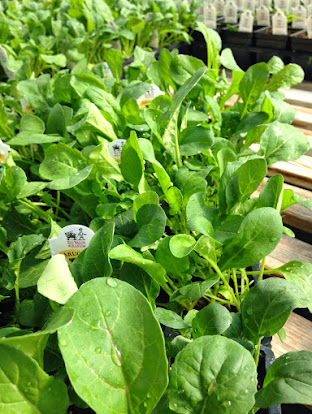
  • Lettuce can be grown from seed or from transplants. Seed grown lettuce is often grown in a row that can be cut and will re-grow a few times - think of mesclun. Transplanted lettuce can be grown to produce full heads like what you find in the store. Both methods require regular planting every week or two for a continuous harvest. It can be planted from seed in mid-April to mid-August for cut greens and transplanted for full heads from late April / early May through early August. Some people will transplant a few plants and plant some seeds at the same time in a different area; this method provides two generations of lettuce and two types of salad greens. Once the cut lettuce becomes bitter in the heat of summer, it is best to pull it up, recondition the soil with compost, and plant something else. If the goal is to always have fresh lettuce, it is very simple to do if you remember to replant it. You can even purchase a number of plants and hold some in their pots in a shady spot and only plant out a few each week. You can seed it yourself in trays or pots and follow this same method. Having several varieties, cold-tolerant ones for spring and fall plantings, and heat-tolerant ones for mid-summer, will produce the best flavor.

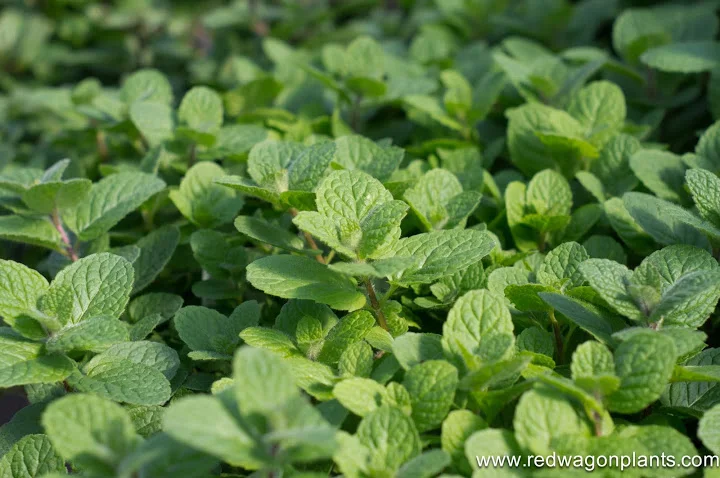
  • Cilantro is very similar to lettuce in its growing habits. It will grow up to a point and then goes to seed, called bolting. It will bolt more quickly in summer heat and, conversely, will stand ready to harvest for many weeks in the cool weather of fall - even early winter. It is good to time plantings so that cilantro is ready to harvest before June 21 (the solstice), and then plant more afterward. It can be transplanted or grown from seed. Like lettuce, it is simple to do both at the same time, thereby giving the gardener two generations. Cilantro seed is coriander, so it does have a use if you enjoy that flavor. There is nothing you can do to prevent cilantro from bolting entirely, but you can slow the process down by placing your mid-summer plantings in a partly-shady spot.

  • Dill can be treated just like cilantro, and, like coriander seed, dill seed heads have a use in the kitchen, so it is fine to let some of the dill patch go to seed. The seed heads can be used in pickles. you can also let them self-sow or save the fully dried seeds in a paper bag for replanting.

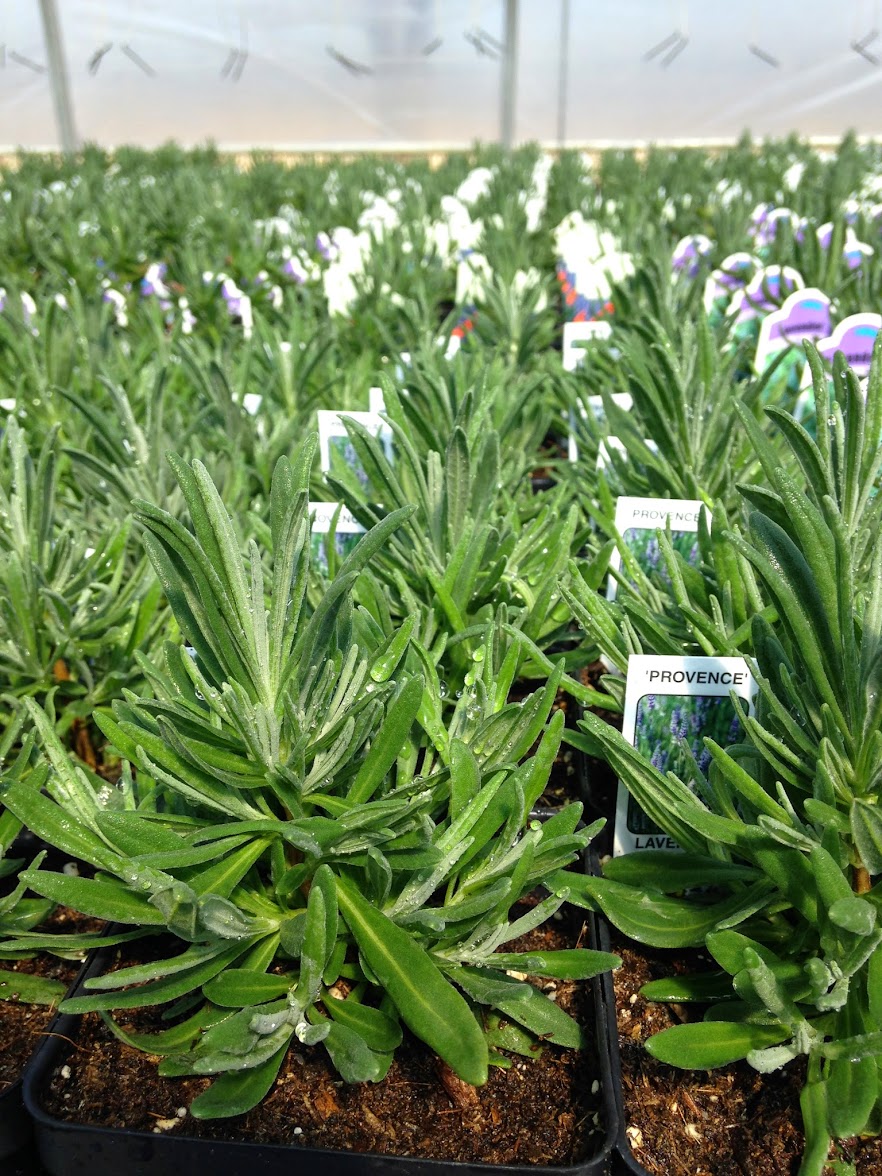
  • Basil can be planted multiple times for best results. Plants can be pinched to slow down the flowering, but best flavor will come from newly replanted basil plants. This is a heat loving plant. Should only be planted once soil temps are in the upper 50's - usually last week in May or first week in June. Basil's flavor is at its peak right before it starts to make flowers.

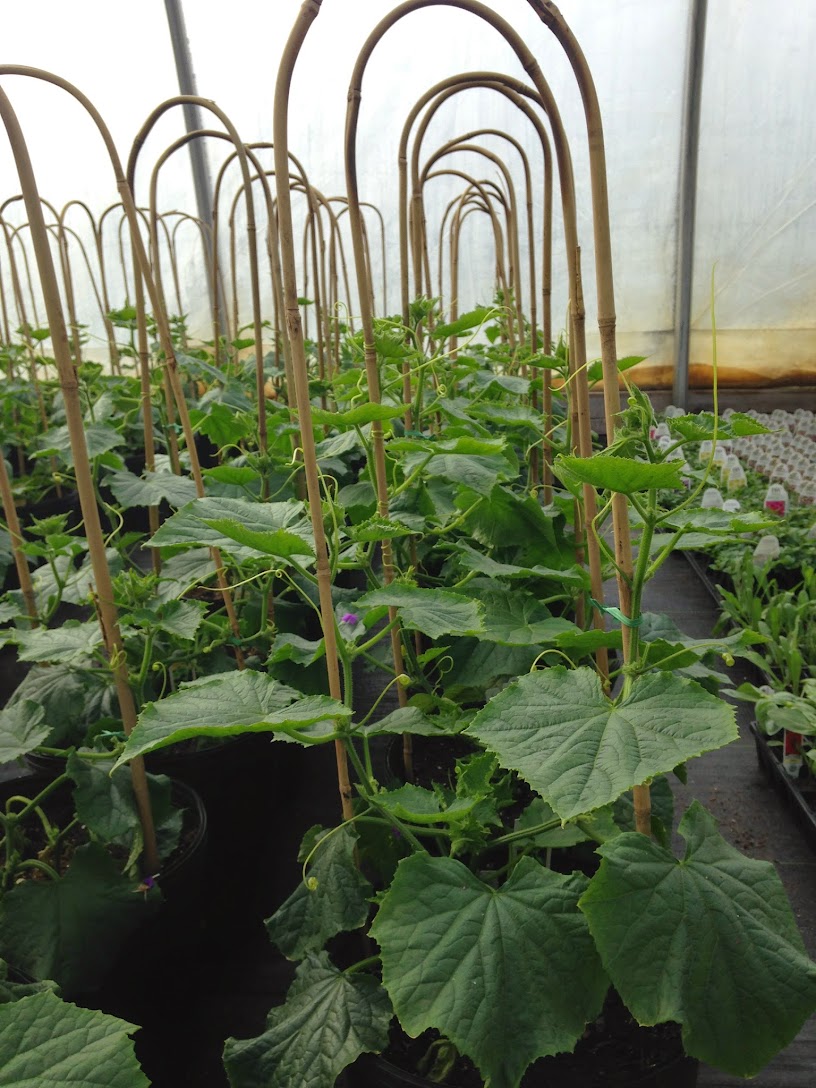
  • Cucumbers, cantaloupes, and zucchini and summer squash are best in quality when well tended. Just a single plant or two of any of those is usually enough for the home gardener, but by planting it two to three different times, spaced out, the quality will always be good. The dates are: June 1st (or last week in May if you are in a warm spot), July 1st and July 15th. This method will ensure a continuous harvest of prime looking vegetables. Just remember to pull out and discard the pest- and disease-prone older plants. If your compost gets very hot and is well managed, it is okay to compost these plants. Pest problems will diminish when the older, less healthy plants are removed. And you can use that opened up space for a quick growing crop like, lettuce, herbs, scallions, greens or fennel.

  • Arugula, mustards and other cutting greens for salads are best if sown or transplanted on a weekly or biweekly basis. Again, a small amount can be seeded next to the transplanted crops in order to give you 2 generations at once. This way you can have smaller quantities coming in at various times.

  • Broccoli gives the gardener a couple of options. It is best if transplanted and can be planted over 3 dates in the spring and 3 dates in late summer for a continuous harvest. I would choose late April, early May and mid May for the spring plantings and then Early August, mid August and early September for the fall plantings. Full heads can be harvested and the plants can stay in the ground to produce side shoots.

  • Green Beans are best when fresh and young. The seed is relatively cheap, so it is better to rip out old plants and have new ones coming along regularly. Having smaller, multiple plantings also means that no on is stuck picking beans for hours on end. Sow new seeds when the previous or first generation is about 6 inches high.

  • Boc Choi, Cabbage, and Cauliflower can also be planted multiple times. Cabbage holds well in the heat and can be planted every couple of weeks late April through early August. Boc Choi and Cauliflower are not as heat tolerant and should be planted around the same dates as broccoli (see above). It is best to use row cover like Reemay on these young transplants so that flea beetles do not destroy the plants.

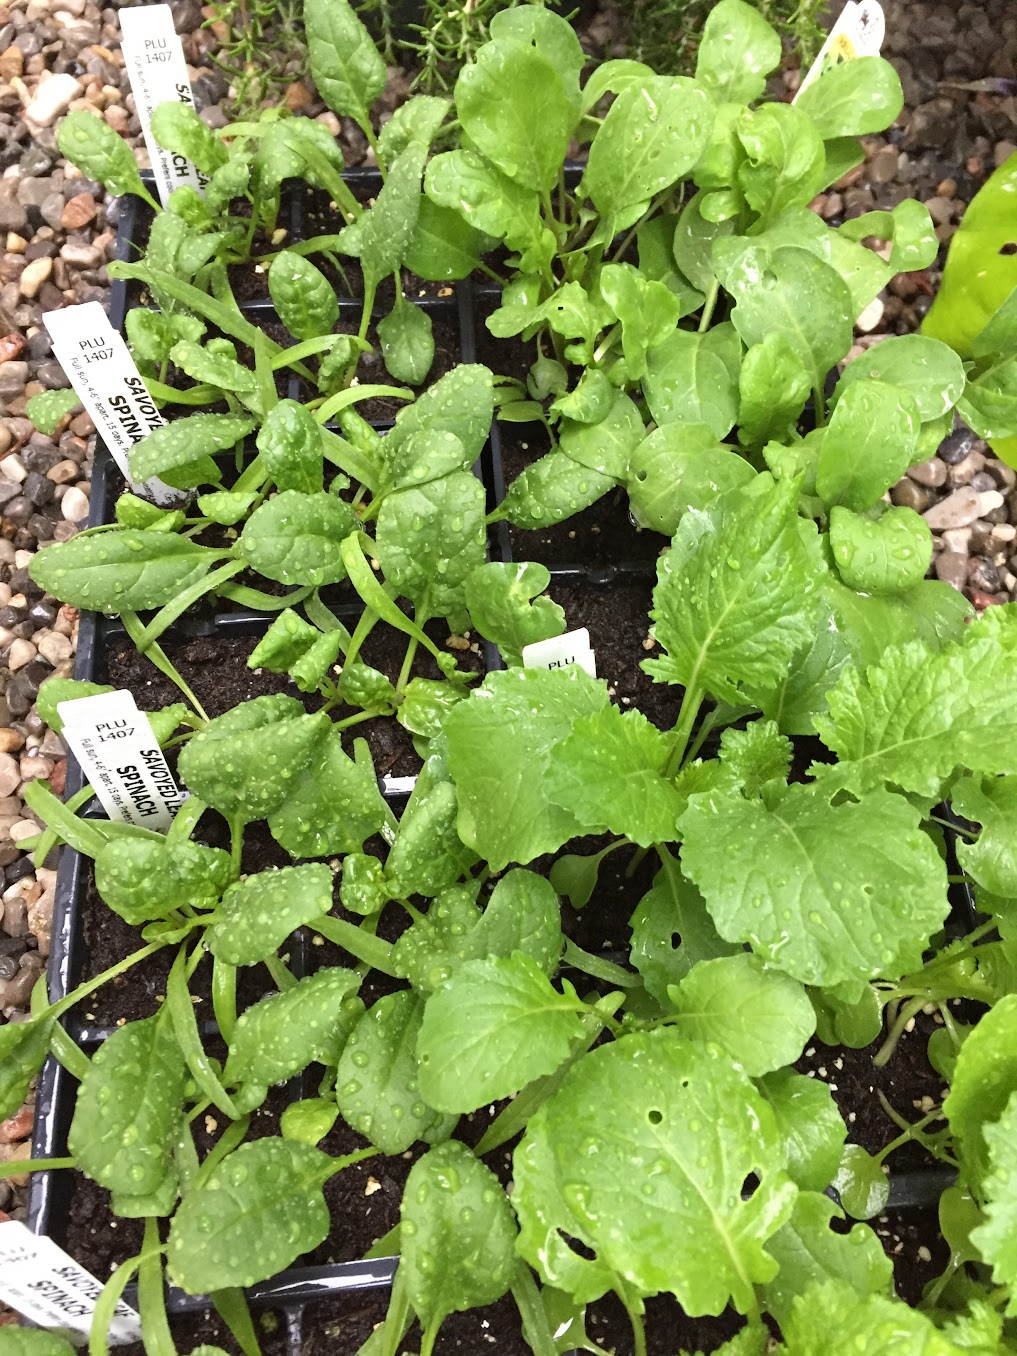
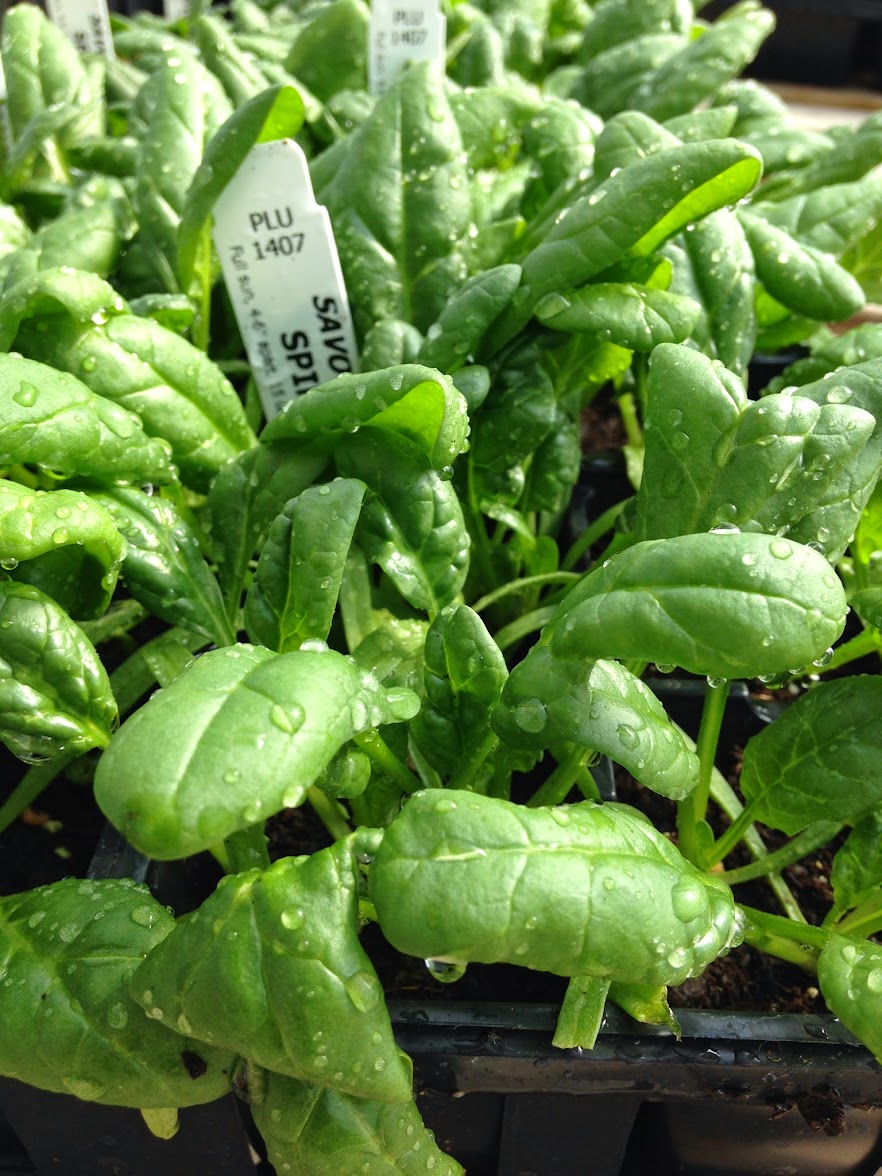
  • Spinach is another one that does not do well in the heat, but can be planted multiple times in spring and late summer. It can also overwinter with a little straw mulch for very early spring eating. Frequency of planting can happen every week mid April to early June and then early August to mid September. The last plantings in September are the ones which will be over-wintered and eaten the following spring. Apply straw mulch on overwintering spinach in December once the ground is frozen.

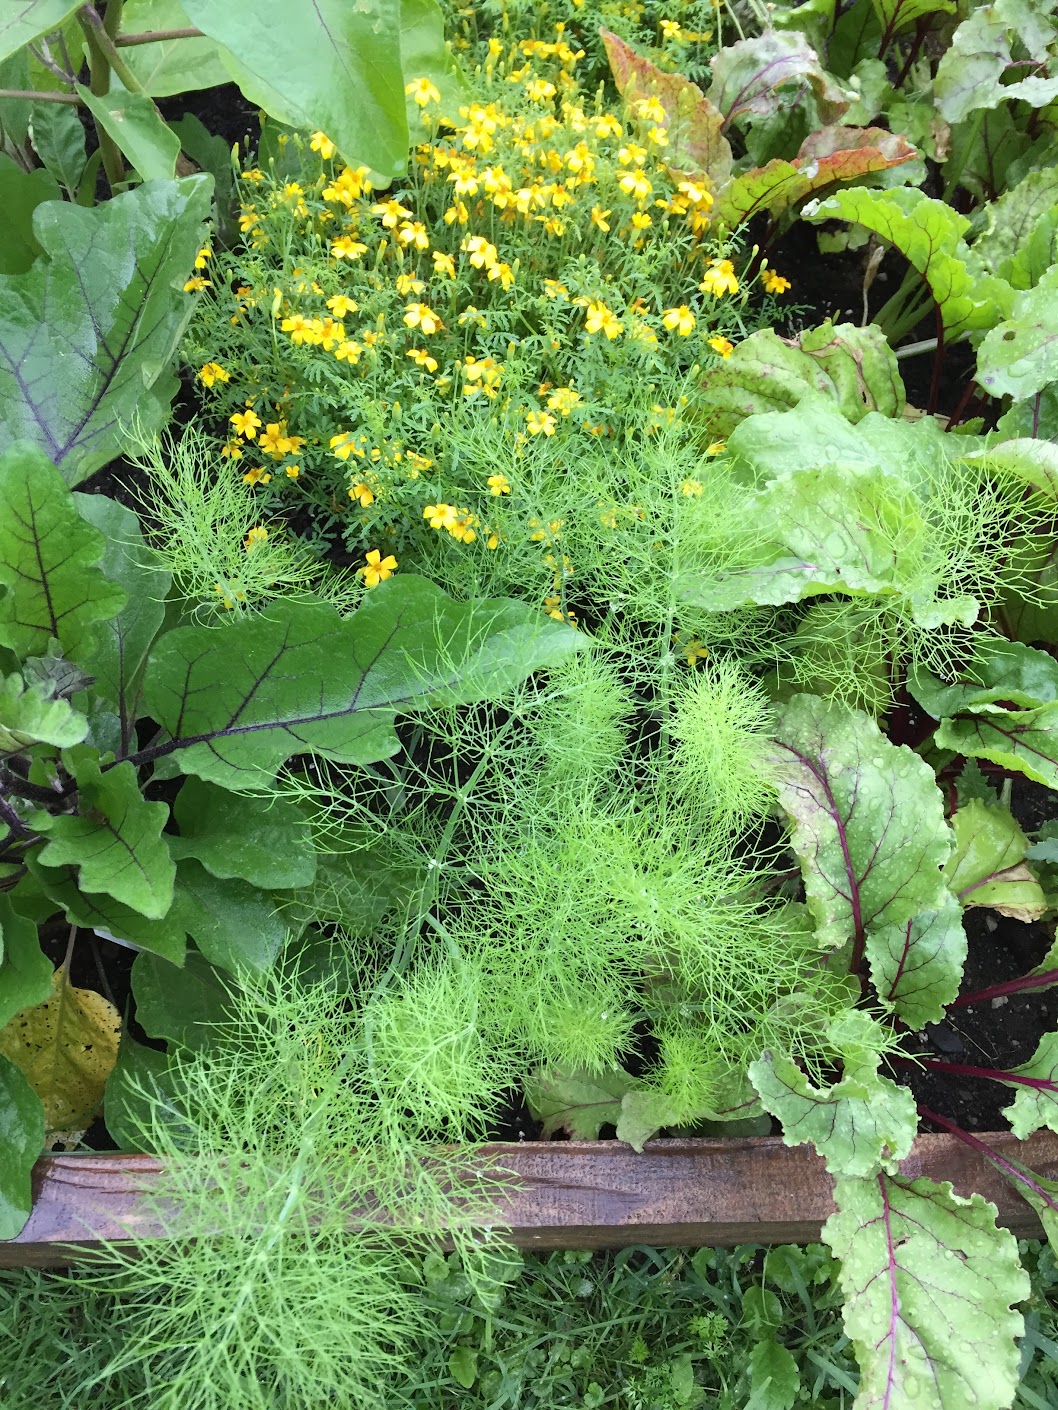
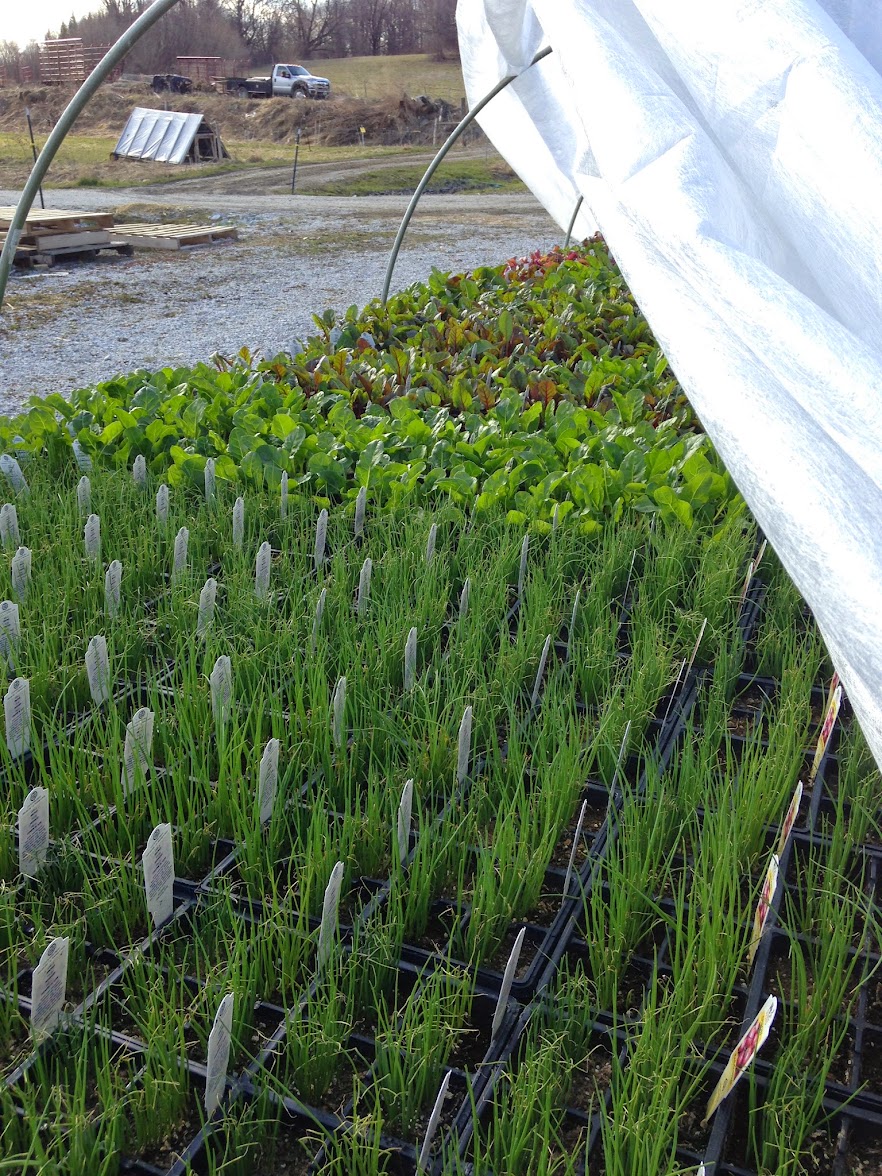
  • Beets, Carrots, Turnips can be planted from seed every two or three weeks from mid-April until about the third week in July. Summer carrots are not the same as fall carrots and certain varieties do better in summer than in fall. The flavor of fall carrots is much sweeter, so I usually plant a larger patch in the fall. Fall carrots can also be stored all winter without going bad due to their lower moisture content. I don't love summer carrots, so I often skip those. Remember, it is all about what you like to eat.

  • Celery and Celeriac are slower growing and can be transplanted 1 to 3 times during the season, from mid May until early July. These need lots of water and benefit from straw mulch to hold the moisture evenly around the roots.

  • Bulb Fennel and radishes are similar to lettuce - they can be planted each week if really loved, but they bolt in the heat and do best in the cooler temperatures of spring and fall. They are best if planted late April to early June and then again late August to mid September. They are cold tolerant and hold well in late fall. Radishes are grown from seeds and fennel is best transplanted. Fennel also benefits from a straw mulch - even moisture around the roots is what helps it make larger roots.

  • Corn - it is possible to do multiple plantings over different weeks, but an easier method is to plant all at once, but with various varieties that have different days to maturity. There can be a 40 day span between early and late varieties.

  • Peas can be planted every week, but this requires a lot of harvesting, irrigating, trellising, and variety research. It is possible though. More practically, the home gardener can sow 2 or 3 varieties in late April with various days to maturity. Fall plantings are sometimes successful but are weather-dependent. These should be done in mid August.

The following are generally planted just once a year, but the harvest can be staggered with a few tricks:

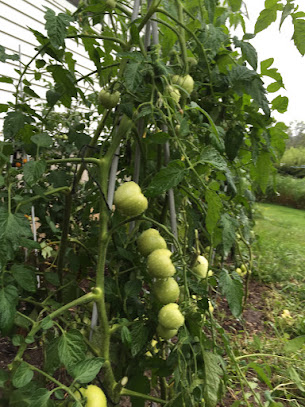
  • Tomatoes, Peppers, Eggplant - try a few varieties of each in order to not have everything at once. Determinate tomatoes will provide you with a big harvest all at once which is a good thing for people who make big batches of sauce for canning or freezing. Determinate tomatoes are the ones that grow until a certain height and then mature all at once. Indeterminate tomatoes are the ones that grow indefinitely until the frost and the fruit ripens gradually August until frost or disease kills the plant.

  • Peppers and eggplant are best if transplanted in early June once the soil warms up. One planting is usually plenty, but again an assortment of varieties will keep the harvest varied, staggered and interesting.

  • Onions and Potatoes are generally planted all at once, and again a few different varieties will provide you with a longer period of fresh eating. Both onions and potatoes can be stored for long periods of time in cool and dark conditions. Both can also be eaten fresh as young, green onions or new potatoes. Both can be harvested, cured, and stored for eating year round, though some onion varieties store much longer than others.

  • Winter Squash is another crop that is planted just once and can be stored. It is best cured for a week or two in a warm spot before eating.

  • Watermelons are usually planted just once in the home garden (early June is best). Cantaloupes can be planted as late as early July.

Open Spots

When you harvest a crop and create an open spot in the garden, take advantage of that spot with any of the quick growing crops that you like to eat. Some easy ones to try from transplants:

  • arugula

  • baby boc choi

  • fennel

  • lettuce

  • mustard greens

  • scallions

  • kale

  • chard

  • beets

  • herbs - pretty much any herb can be planted up until early August. Cilantro, dill, parsley, chervil are all cold tolerant and can be planted as late as mid-September from plants (mid August to late from seeds)

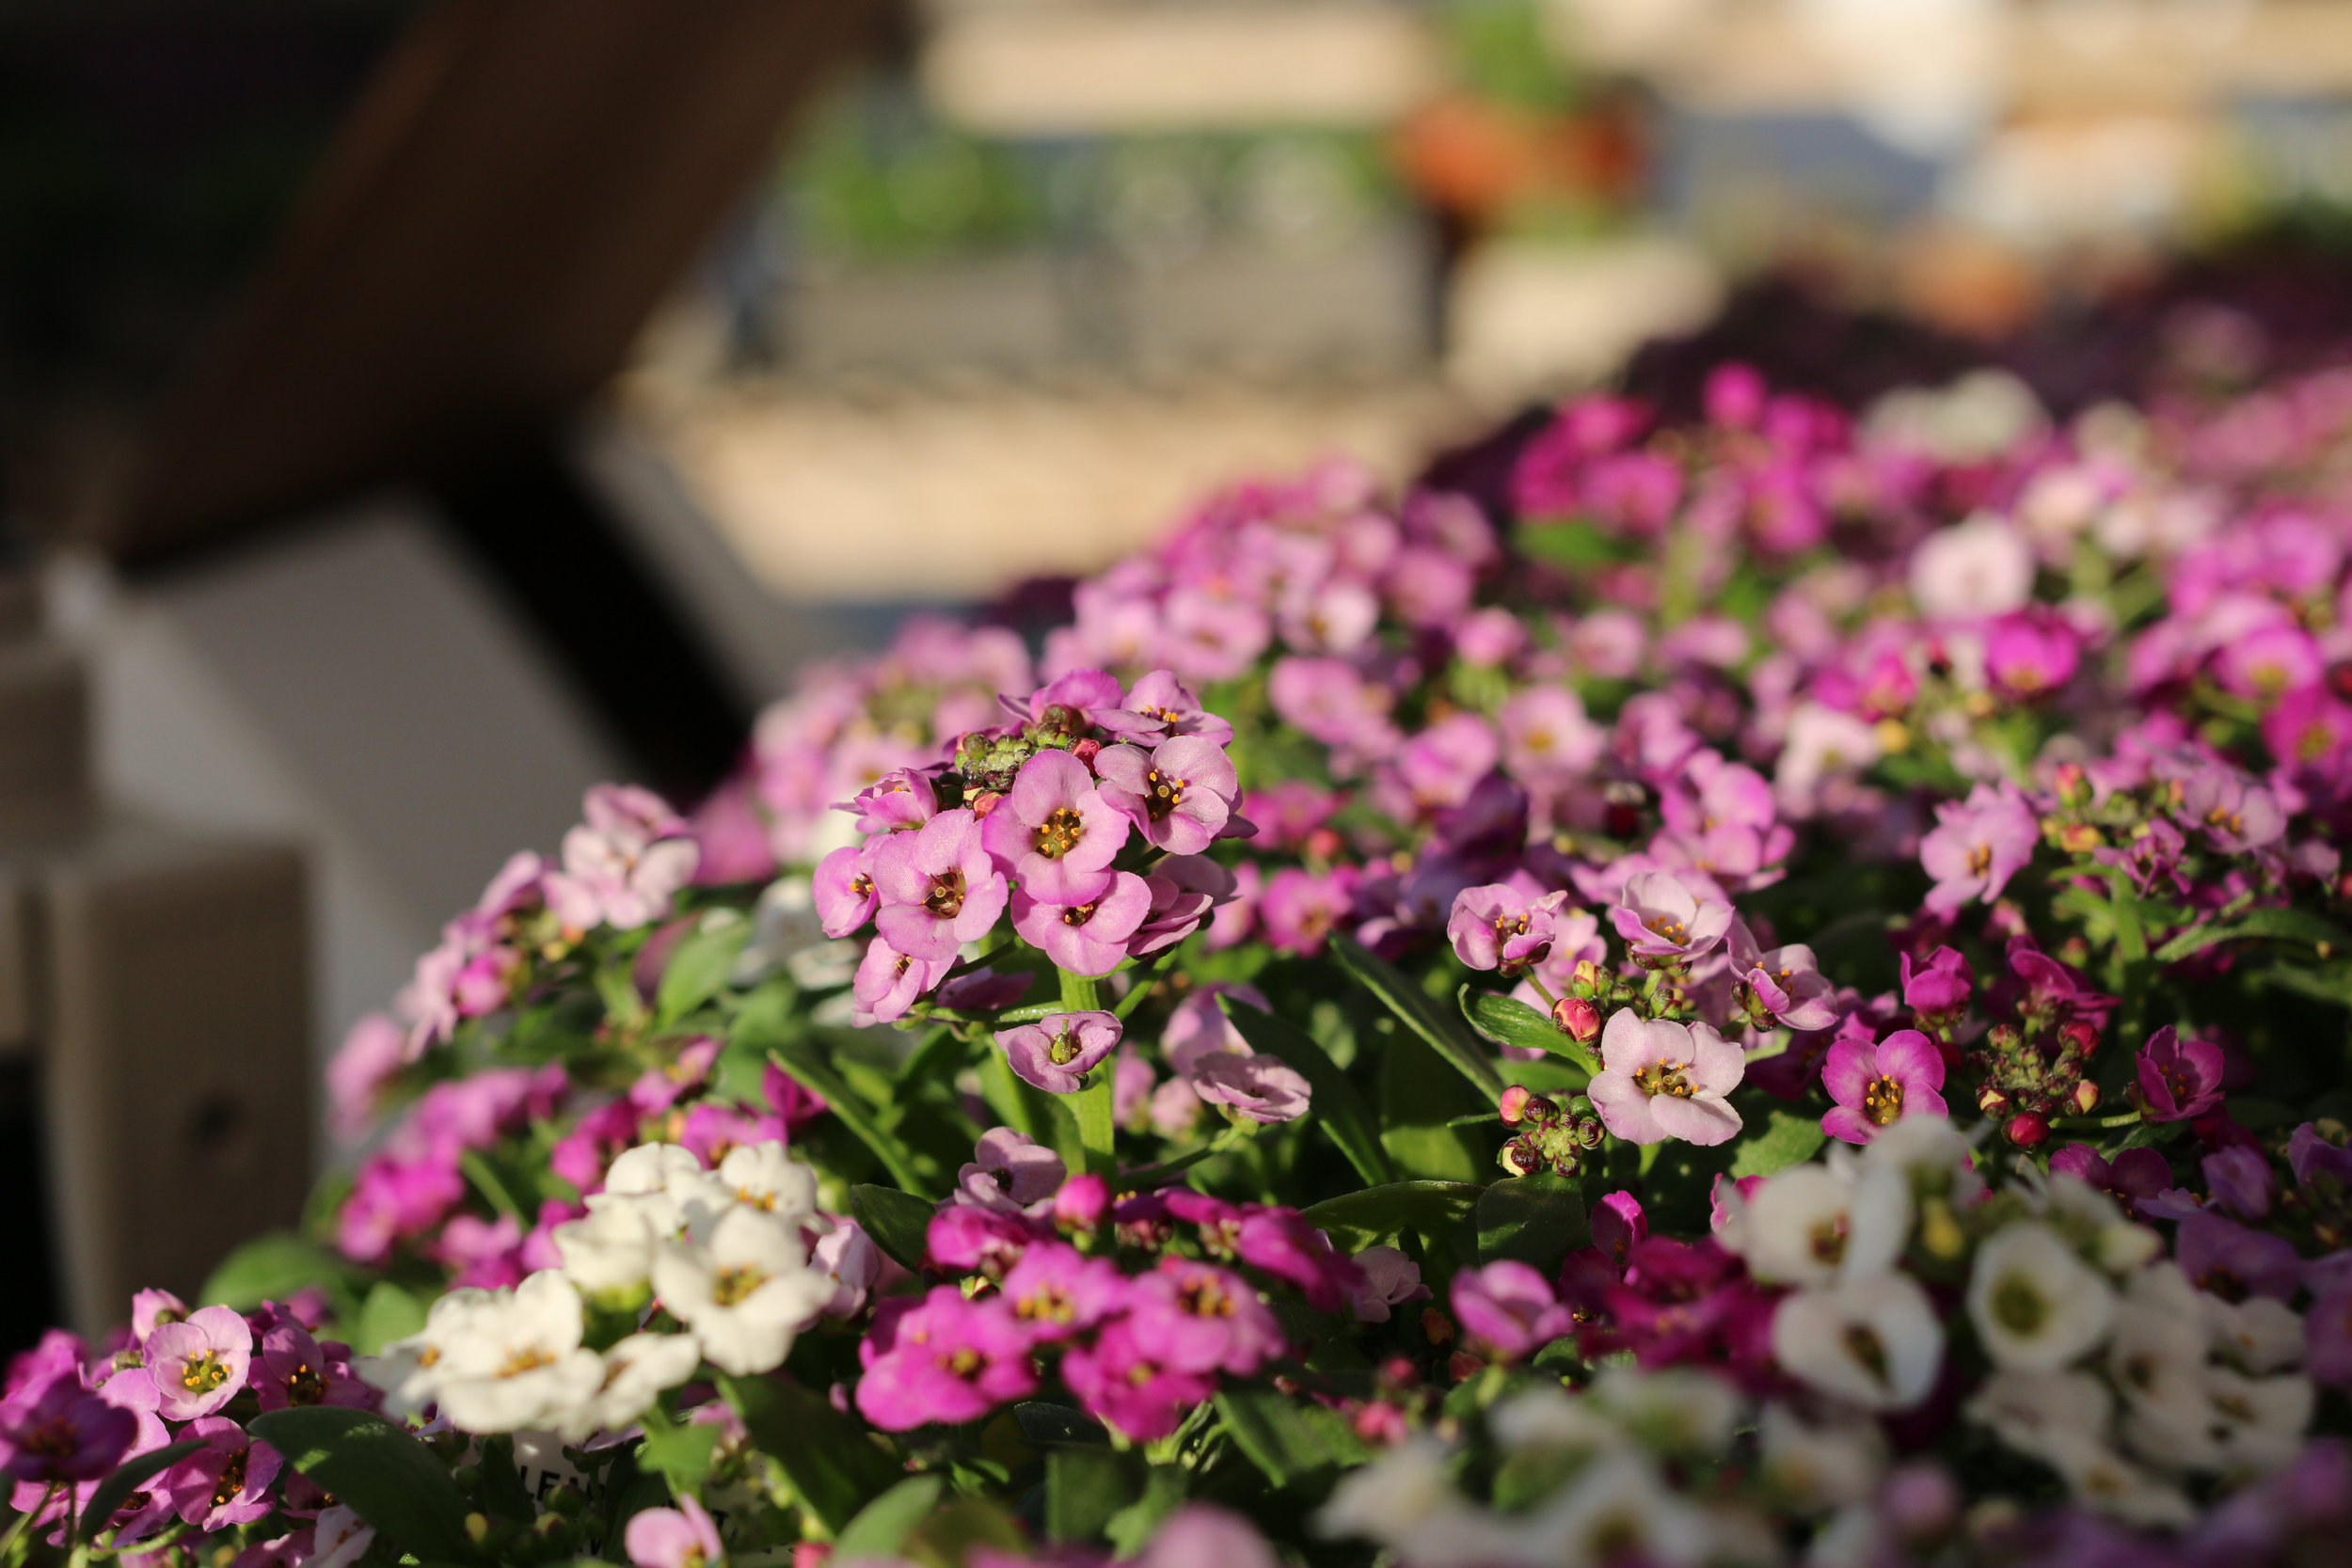
You can also tuck in flowers that grow vertically and don’t take up too much room:

  • cosmos

  • verbena bonariensis

  • lisianthus

  • calendula

  • poppies

From seed, you can try:

  • carrots

  • beets

  • radish

  • asian greens

  • mustard greens

  • lettuce

  • bush beans

Onions

Baby onions, about two to three weeks away from transplant time.

Baby onions, about two to three weeks away from transplant time.

A while back, I delivered a crate of onions and garlic to my dad. We had some coffee, talked over the Thanksgiving meal plans, and I took a little walk. That day is a distant memory, my father has since passed away, but the image of those onions and garlic has stayed in my head. The way they filled the wooden crate brings me to a memory of the smile on my dad’s face when he saw them, the food we talked about making together, the warm coffee in our hands.

Onions are a back ground vegetable, easily taken for granted, but aren’t they the basis of flavor in most dishes?

Some people are like onions too. Sharp and edgy at first, sweet and mellow with time and heat.

I am thankful for their plumpness, their abundant harvest, the flavor they will bring to our meals, and the way they generously keep so well under the right conditions.

I rarely buy onions or garlic, usually having enough from the garden to last the year, in some form or another. The storage onions that are great to eat fresh in July, when cured properly, last until March or April. By then chives are ready, then scallions, then green garlic and fresh onions again, one following the other, with a predictable rhythm.

My dad is gone now, but the memories are not, storing and keeping, sweetening with time.

The best time to plant onions is as soon as the ground can be worked, usually middle to end of April in Vermont. They don’t mind cold ground. They prefer it actually, and the earlier they go in, the rounder and larger they will be. Their trajectory is programmed by the sun; as the days get longer, the onion plants remember to follow the cue and they grow round and big. If you neglect this key part of onion growing and plant them late, the onions stay small, and more oval in shape, in a sort of protest.

Our onion plants come in 4 packs. There are about 80 plants in each pack. You just need to separate each individual plant (it is a quick job, especially if the plants are well watered). Then make a trench, 4 inches deep, as long as you want. And then lay each onion delicately in the trench, white roots down, green part up. Fill the soil in around each plant, pat firmly and water well. If 80 onions is too many, you can certainly plant some of the plants in little groups of 4 to 6, and harvest them young, to eat like scallions or baby onions. These are easily the best value in the gardening world, not be forgotten.

Rainy Weather Gardening

The weather lately is really putting a damper on my gardening aspirations. I am gong to make the best of it, and focus on what can actually be done in the cool and wet spring we are having, rather than on what cannot be done.

Paths are newly mulched with cardboard and bark mulch. The row cover tunnel just yielded our first harvest of mache and arugula and was just replanted with chard and broccoli raab. The row cover with hoops is one of the best ways to keep bunnies out…

Paths are newly mulched with cardboard and bark mulch. The row cover tunnel just yielded our first harvest of mache and arugula and was just replanted with chard and broccoli raab. The row cover with hoops is one of the best ways to keep bunnies out without a fence. This is the year of the bunny. We even have a bunny statue to beg off the bunnies and ask them to spare us, but it is not really working. Chamomile and stone edging is looking cute and a new patch of self seeding Marble Arch Mix Salvia will provide us with edible flowers, cut flowers, and dried flowers for a few years.

Here is what I am doing in the garden this week:

Clean up and mulch the path ways.

The weeds come out easily when the ground is wet. It is ok to walk on the pathways to clean them up and mulch them, but I avoid walking on the growing beds or doing much to the soil in the growing beds when the ground is really wet. Doing so would compact the soil and adversely affect the tilth. So, the paths are getting a little extra attention this year and I am mulching with a thick layer of cardboard and some rough bark mulch from Clifford’s lumber. This is not the regular bark mulch from a garden center - it is a byproduct of a local, family owned sawmill just down the road. I would not use it in all applications where mulch is needed, but it is perfect for paths and under trees and shrubs. It is a little too coarse for perennial beds (but that is a whole other topic, because really I don’t think bark mulch belongs in most perennial beds). Once the paths are clearly defined and mulched, the rest of the season will be so much less labor intensive in the garden. Some other mulch ideas for paths are burlap coffee bags (which you can find this Saturday at our New North End Plant Sale at Bibens Ace Hardware on North Ave in Burlington). straw (I recommend the organic straw from Aurora Farms in Charlotte), or a combination of newspapper and leaves. These are all pretty heavy duty recommendations for paths. I would not use a heavy mulch like this right under smaller growing plants because the decomposing organic matter uses up the nitrogen in the soil and starves the plants of the food they need for healthy growth. Mulching paths is satisfying and really pays off in the long run. Plus, you can do it in the rain.

Plant more salad greens and try out some new varieties of cool hardy vegetables, flowers and herbs

I just added two kinds of kohlrabi to the garden, green Swiss chard, some Italian bulb fennel, broccoli raab, dandelion greens and frisée. This weather is perfect for transplanting a few plants here and there into corners of the garden. Again, you want to avoid working your soil when it is wet, but it is entirely all right to loosen up small corners of beds and tuck in a few plants here and there. I just harvested my first planting or arugula and of mache and re-planted right into those spaces. I did not disturb the wet soil too much, and I think they will all be fine.

Make containers

Picking out colorful annuals and cool foliage plants is the perfect antidote to the grey and the wet days we seem to be stuck in lately. I am covering my mom’s balcony with pots of geraniums, agastache, salvia, herbs, petunias, argyranthemum, canna, millet, banana, and heuchera. Heurchera, or coral bells, is an under-used plant in containers, and adds broad texture, interesting contrasting color (so many to choose from), and looks good all season long. We have a dwarf red banana we are growing this year that has a beautiful glossy red tinged leaf and looks really striking with the wispy orange of the Kudos mandarin Agastache and the red veined caramel heuchera. Tuck in a red oak lettuce here and there, and you will have a gorgeous container with edibles, perennial and season long interest that holds up well in rain, cold, heat, and dry. I love helping people make containers and have two more Make and Take classes coming up in June for shade loving containers. There is still room to sign up in both.

Wistfully choose heat loving crops

This weekend, I plan to select the tomatoes, eggplants, peppers, melons, cucumbers I want to grow, but I am just hardening them off for now. I am not planting them in the ground. This means that they will come inside at night if it is below 45F and they will go back out in the day time to feel the sun (wishful thinking?), wind, and rain and get used to real life outside. What I am not doing is planting them in the cold ground. That would just stress them out. They need soil that is 50F or warmer in order to grow well, and stressing them at a young age will weaken them when they are older and diseases start to settle in. Planting heat loving crops in cool weather is just asking for trouble down the road.

Move perennials

They love this weather. If you have an area that once was sun but now is shade, it is a great time of year to move those sun loving plants to a brighter spot, away from the encroaching shadow of shrub and tree. I took advantage of the dry and warm day on Wednesday to clean up a perennial bed and replant with shade loving plants under the shrubs that now cast shade. I used tiarella, pulmonaria, variegated Solomon’s Seal, Jacob’s ladder, and hostas. I love that sun to shade switch that inevitably takes place in a garden, the moving art of it all.

Hopefully, this gives you a good amount to do and scratches the gardening itch just enough. Happy gardening!


Who likes what? Inspiration for this rainy and cool spring.

calendula.jpg

While it has been a little cool and wet, I have had some extra time to plot out some new combinations I want to try in the garden. I love to mix up edible and ornamental plants, and coming up with some new ideas is always a creative part of the garden process I enjoy

People often ask me about companion planting, with the goal of learning more about what plants keep pests off of what other plants. I usually reply by saying that a mixed garden, with flowers and herbs interspersed among the vegetables generally helps confuse insect pests and also helps attract beneficial insects who are in search of pollen. Here are some combinations that I regularly create just because they work so well. Maybe as an exercise in trying something new, you could try your hand at one or two of these combos and then come up with some of your own. It is a great way to study plants, contrast, colors, and texture in the garden.

  • Verbena bonariensis, California poppies and lacinato kale - We do this often in the demonstration garden at Red Wagon Plants because the Verbena bonariensis is self seeding, along with some California poppies, and it is just so simple to throw in a few kale plants and see the magic unfold all summer long. The poppies bloom first and are a cheery, airy note floating beneath and alongside the dark green, almost black foliage of the kale. Later on, in late summer, the kale is bigger, the poppies are finished blooming and the verbena kicks into high gear with wiry stems waving high above the kale; delicate purple blossoms nod above the mature, gnarly textured leaves of the kale.

Some other favorites include:

  • Rainbow chard, gem marigolds, and lunchbox peppers

  • Opopeo amaranth,nicotiana elata, northern sea oats and redbor kale

  • Green butter lettuce, curly parsley, and calendula

  • Tokyo Bekana mustard, chervil, green oak lettuce, pansies and alyssum

  • Bleu Solaize leeks, Hungarian bread seed poppy, and rebor kale

  • Datura, African blue basil, and dusty miller

Mid-April Garden Jobs

onions.JPG

It is finally time to get into the garden after a long and very cold winter. Here are some jobs that can happen right now.

Sow from Seeds

Peas, carrots, beets, radishes, turnips

Transplant

Onions - they need the cooler days and long nights of April in order to make large onions in summer. Here are a couple of videos that will give you an idea of how to do it quickly. First, make a trench and sprinkle in some Compost Plus:

Then separate the clump of onion plants into individual plants. Onions should be planted about 4” apart, so just lay them in the trench, all in a row, then gently pat the soil around them to fill in the trench and stand them upright.

Leeks are planted the same way, but require more space, so I do those 6” part with 2 feet between the rows. Onions can have 1 foot between the rows. One 4-pack of our onion or leek plants has about 80 plants in each pack, so it is great to buy a few varieties and share with a friend so you can try multiple kinds. We grow red and yellow storage onions, Italian cipolinni onions, mini purple onions, 2 kinds of sweet onions, and early New York onions. We also grow scallions, 3 kinds of leeks, and shallots. All are planted in the same way, except scallions can be planted in small clumps of 10 to 15 plants. And they don’t need to grow in rows, but can be tucked into individual spots between other plants.

You can also be planting kale, arugula, mache, mustard greens, cabbage, and collards.

Herbs that can take the cold of April: Sorrel, chervil, cilantro, dill, chives.

alyssum clear chrystal mix.jpg

In the flowering plants department, it is a good time to plant alyssum, violas, and pansies. They are a good food source for bees this time of year when very few other things are flowering.


I wrote more about onions a few years ago here.

Happy gardening! They are announcing rain later today, so I am getting out there now.


Sweet Potatoes Slip Sale 2016

sweet_potatoes_3.jpg

Sweet Potato Slip Sale

June 11th and 12th, 2016

8:00 to 6:00 pm

 Red Wagon Plants greenhouses

2408 Shelburne Falls Rd  * Hinesburg, VT

Proceeds from the sale benefit the educational programs of Vermont Community Garden Network.

For more information, call 482-4060

Sweet potatoes can be grown in Vermont. Under ideal conditions they thrive and can yield up to 5 pounds per slip. During this benefit sale, we will be selling sweet potato slips in 4" pots, with three slips per pot. These get transplanted 18" apart, in loose, well drained soil. You can also grow them in containers. They like warm, southern exposure, and can be trellised to save space.

Here are some resources for more information on Sweet Potatoes:

The Vermont Community Garden Network has information on their programs and the sweet potato sale here.

This  article on the Mother Earth News website highlights growing methods for northern gardeners and best ways to store the tubers.

 Here is a photo essay on how some ingenious customers are growing their sweet potatoes in Starksboro.

Recipe for Roasted Sweet Potato Fries with Herbs

2 large sweet potatoes, peeled and cut into 1/3 inch batons

3 TBS olive oil

salt and pepper

1/3 cup finely chopped parsley, chives, and or cilantro

2 cloves of garlic, finely chopped

1 small pinch of cayenne

1 tsp lemon juice

  • Preheat the oven to 450 F. Place 2 large cookie sheets in the oven so they are pre-heated as well
  • Toss the cut sweet potatoes with the olive oil and salt and pepper in a large bowl
  • Arrange them on the hot pans in a single layer.
  • Roast for 20 minutes, and flip them over with a spatula, and return to the oven for another 20 minutes, or until tender and browned.
  • Meanwhile, toss the herbs, garlic, cayenne and lemon juice together in the same bowl
  • When the hot fries come out of the oven, sprinkle the herb mixture on the fries and serve immediately

Growing Instructions for Sweet Potatoes

Sweet potato slips are cuttings that come from a parent vine. The slips grow best in a loose, sandy or silty soil that drains well. If sweet potatoes are grown in a rich dark soil they may discolor but are still good to eat. • Transplant the slips into garden beds during June, preferably in the late afternoon or on an overcast day. When transplanting, lay the slips on their sides with 2/3 of the slip buried a half inch under the soil. Water enough to keep the soil moist, but not saturated. • Plant the slips 10 to 18 inches apart in rows that are three to four feet apart. The rows or raised bed should be elevated 4 to 8 inches above the ground level to allow the sweet potatoes room to form. • Keep the cuttings watered while they are getting established. The leaves that were originally on the planted slips will dry up and fall off leaving just the vine stem. New leaves will emerge from the cuttings as the slips become established. • The sweet potato vines will cover the ground reaching 5 to 10 feet in length. Hoe around the vines to cultivate weeds and mulch with hay if desired. • Deer love sweet potato leaves, so be sure your planting area is fenced if deer are aproblem. A flying gold colored beetle may chew round holes in the leaves. The vines are tough and will keep growing despite insect damage. • Sweet potatoes are dug and harvested in late September through mid October, a day or two before the first predicted frost. Most of the sweet potatoes will be just below the parent plant. Each plant can produce up to six sweet potatoes. • After harvesting, dry the sweet potatoes on the ground for two or three hours. Allow them another 10 to 14 days to cure at room temperature or above, before storing the sweet potatoes at a temperature between 50 and 60 degrees F. • Unlike Irish potatoes, sweet potatoes should not be kept cold in a garage, refrigerator or outbuilding. If properly cured and stored, they will keep until April. Enjoy!

Hardening Off Those Plants

Curious about what "hardening off" means and why it's important? Here's a blog from our archives to help you prep your cold-season transplants for the great outdoors. 

Plants need to be hardened off before being transplanted. What does this mean? It is the process you take them through to get used to direct sunlight, wind, cold, heat, dryness, and any other weather conditions they will be asked to live through during their lives. When plants are started in the greenhouse, in trays or pots, their world is sheltered and comfortable; food is readily available in the compost-fortified soil, and the temperatures are carefully regulated. Once it is time to go out into the harsh world of the garden, the goods and services become a little more scarce for those baby plants and they go through a bit of withdrawal known as "transplant shock."  Hardening them off gives them a gradual adjustment to this new world.  It is best to start out by putting the plants outside for a few hours, and then bringing them back in; this gives them a small taste of direct sunlight. In any greenhouse, the plastic film filters out 10 to 25% of the sun's rays and the tender plants are literally sun-burned when they first encounter that unmediated light.  Here is how I do it at my house. When you buy plants that were grown by Red Wagon Plants, they have already been hardened off and you can put them right in the ground. The following method is important to follow if you are working with plants that you know are not hardened off yet.

Once they have gotten used to a few hours of sunlight at a time, they can stay outside overnight, but under a protective row cover.

The cover comes off in the daytime and the plants are acclimated to being where they will be planted for a few days.

If the temperatures drop down below freezing, cover them again. Cold hardy plants such as broccoli, cabbage, kale, hardy lettuces, hardy herbs, escarole, scallions, onions can take a frost without a problem, but they will do it with more grace and strength if they have been gradually introduced to those temperatures.

Once the plants have had a few cold nights, under cover, they can have a couple more nights without cover, and then are properly hardened off and ready to go in the ground.

It's also a good idea to give cold-weather transplants a little extra compost or a fish/seaweed emulsion watering at transplant time. It is hard for plant roots to uptake nutrients in cool weather and this will aid their transition as well.

Planting the Fussy Onion

Onions are some of the first things to go in the ground each spring. You may not know this, but onions are finely tuned creatures with a rigid hormonal profile. They are completely and utterly dependent on the sun's cycle to grow into the lovely round orbs we think of as onions. Those plump layers only grow in relationship to the lengthening days of spring. If onions are planted too late, they will never bulb out and become big and round. An onion that has been planted too late, let's say after the middle of May, will never quite size up, but will create a thick stem, and a barely bulbous orb. The engorged stem will not create rounded layers at all but rather look more like a slightly ovate leek. These are still fine to eat, but won't really be onions you can store through the winter.

We recommend that people plant onions in mid-April. When it is muddy, and cold, and you think there is no way a plant wants to go into the garden, well guess what? The onions really want to go into that cold earth. The way we grow onion plants for sale is that we seed about 80 plants into a 4 pack, and your job as the gardener is simple:

  • Prepare a bed in the garden - deep, well worked, rich soil is best. I prepare my onion beds in the fall, that way they are ready for onion plants first thing in the spring.
  • Gently pull the clumps of soil and roots and plants out of the 4 pack.
  • Separate each plant and shake off the excess soil. The individual plants are like tiny blades of grass, but each one will grow into a big onion plant.
  • Make a trench about 4 inches deep the length of your planting area. Onion rows can be about 8 inches apart, so depending on the size of your bed, you can plant up to 4 rows of onions in one bed and still reach across the bed to weed comfortably.
  • Plant the individual plants in the trench, about 4 to 6 inches deep. Only a few inches of the thin green stems will be above ground. You should have about 2-3 inches between plants.
  • Tamp the earth tightly around each plant.

The onions plants won't grow much at first, but they are just hanging out in the cold soil, programming themselves to grow once the soil warms up. It is these cold, long days that help make onions nice. I know, it is hard to believe that they prefer this, but they do. Southern growers, who have shorter summer days than northern growers, have entirely different onion varieties than we do. That illustrates just how much onions are day-length sensitive. A few degrees difference in latitude necessitates a whole different set of genetics.

The other things to keep in mind with onions:

  • Keep them well watered. Water and day length is what makes onions big. Some straw mulch applied in late June is a good idea for keeping the moisture even and consistent.
  • Keep them well weeded. Onions plants are slender and upright. They do not create any shade, therefore weeds like to grow near them, in the sunny under-story of the onion patch and because onions really don't want to compete for food, water and sunlight. They are not good at sharing.
  • Keep them well fed. An application of Compost Plus in May is a good idea. It will help them get big and strong.
  • Growing onions in black plastic mulch is a good option if you want to eliminate weed pressure and heat up the soil. Once onions are big, they like it hot.
  • Harvest onions once the tops start to flop over. You can eat them fresh, as "green onions" or you can cure them by laying them out in a dry, airy place, away from direct sunlight. This usually happens in late July or early August. It depends on the varieties you grow and on the kind of weather we are having.

Onions are best stored in a dark, cool, airy place. A damp basement is not a good storage spot. A cold, dry, dark attic is better. Or an unheated closet, or a garage that does not get too cold. Ideal onion storing temperature is about 35F. That is pretty cold - colder than most basements.

Some onion relatives can be planted later in the season. This includes scallions, mini-purplette onions, pearl onions, and shallots. Leeks are also tolerant of a later planting, and can be planted multiple times throughout the gardening season if you would like to harvest baby leeks. 

The onion varieties we grow each year:

Cipollini Gold Coin - a flat, disc like onion that stores very well in the winter. It is a strong flavored onion which mellows when cooked and is delicious caramelized, glazed, or roasted. One of our favorites for flavor.

Yellow Storage Cortland - a huge, good keeper which means that it stores well all winter. Dry the onion once harvested in a cool, airy spot, and you will be eating it until March or April of next year. 

Red Storage Onion Mars - also quite big, and also a good winter keeper. Slightly milder in flavor than Cortland and can be eaten raw when sliced thinly. Red Onions develop their red interior only once they have been cured. Once harvested, coll in an airy dark spot until the tops are completely dried and can be pulled off by hand. That is the curing process for all storage onions.

Sweet Onion Walla Walla and Ailsa Craig - both are gigantic sweet onions. They do very well with lots of water and mulch. Sweet onions do not keep over the winter. They do not need to be cured, but rather get refrigerated once harvested. They are delicious roasted, grilled, or eaten raw in sandwiches. 

Scallions - These can be planted in clumps of 10 or so plants. They can be planted every few weeks for a continuous harvest. If you do not want to buy scallion plants or seeds, you can eat young onion plants as scallions.

Shallots - These store very well after being cured like onions. They add a sweet and complex flavor to winter dishes, marinades, and dressings. 

Mini-purplette - these are lovely purple pearl onions that are delicious in a spring braise with salad turnips and peas. They can be planted in clumps of 4 to 6 plants and can be planted multiple times throughout the season for more than one harvest. They also make great pickles. About 1" to 2" across.

Focus on Eric!

Eric building our pergola 

Eric building our pergola 

During our 10th anniversary season, we'll feature profiles of members of our amazing Red Wagon team. This week we interviewed Eric Denice, who’s our jack of all trades, maintaining our facilities, keeping our greenhouses running smoothly, and fabricating beautiful raised beds and retail displays. 

Like Allison Lea, you’re one of the longest term Red Wagon employees. How did you end up here? What keeps you here? 

I went to college for environmental studies but left after six months. I wanted to have my own little farm. When I was 20, I had a greenhouse in my backyard. I didn’t know a whole lot back then. 

I had known Julie for a while before I started working here. One day I was biking past Red Wagon, I popped in to say hello, and Julie said she needed [to hire] someone. The timing was right for me, and nine years later … 

What keeps me here? It’s a beautiful place, and I work well with Julie and learn a lot from her. The seasonal work fits well with my other jobs. And I’ve always loved plants.

What do you do at Red Wagon?

I build greenhouses, fix everything, do the plumbing and a little bit of electric. I build our retail displays and benches. I set up systems, like our computerized irrigation system.

I started out doing wholesale deliveries and customer service. This is the first year I'm not doing deliveries.

I have my own business in greenhouse construction and residential carpentry.

Are there any special projects you’re particularly proud of?

Well, I built the two 150-foot greenhouses out back, and I set up their computer-controlled overhead irrigation system. Working for Red Wagon, I’ve built greenhouses all over Vermont.   

What are your favorite Red Wagon plants?

We grow so many plants now – it’s really incredible. I like everything, especially our kale and tomatoes.  

What’s your home garden like?

We have raised vegetable beds and a perennial garden. It’s a lot harder to maintain a perennial garden after having a child!

How have you been reflecting on Red Wagon’s 10th anniversary year?

I’ve learned a lot at Red Wagon. Julie runs the business really well. For example, I’ve gained a lot of customer service skills, and learned how to work with people on a professional level. I’ve learned the importance of being really thorough and detail-oriented. How to think through all my projects completely. How to make things so they last – always keeping the long-term in mind. 

How to Get Your Soil Tested

Here's one of our most popular posts from the archives. If you are a new gardener or gardening in a new spot, it's well worth it to get your soil tested to ensure happy plants and bountiful harvests. 

I've always thought that getting your soil tested was going to be somehow difficult and arcane.   But I've had some challenges growing things since moving here (namely like a non-blooming hydrangea).  So since Julie said it's a good idea, I've decided to give it a try. I visited the UVM Extension Service website.

And downloaded this form to fill out.

And scooped some dirt into a bag.

Julie adds:

It's best to take samples from multiple places, digging in the first 6" of soil, mix up the various handfuls of soilin a bucket, and select your soil test sample from this mixture. It gives the soil test people a better idea of the overall make-up of your soil. Make sure the bucket and spade are very, very clean.

skillet garden 024
skillet garden 024

Tomorrow I'll send the dirt and $18 to UVM.  And in 10 - 14 days I'll get back a recommendation of what I should add to my soil to grow what what we're planning.

In the meantime, I'm watching as the plants blossom, and unfurl, and grow.

skillet garden 013
skillet garden 013

Beautiful RWP pansy.

skillet garden 012
skillet garden 012

The last day of last year's inedible sorrel.  Tomorrow I'm ripping it out to make room for the currant bushes when they come, and will throw the leaves into a Greek-flavored braise I'm making.

Focus on Allison!

Allison scouting the greenhouses for pests

Allison scouting the greenhouses for pests

During our 10th anniversary season, we'll feature profiles of members of our amazing Red Wagon team. This week we interviewed Allison Lea, who manages our Integrated Pest Management (IPM) program. 

You’re one of the longest term Red Wagon employees. How did you end up here? What keeps you here?

I started working for Julie when she was farming in Starksboro, and when she started Red Wagon I came along. I love working for Julie. She’s basically family at this point. I watched her daughter get on the  bus to kindergarten, and now she’s in her second year of college!

What keeps me at Red Wagon is that I love plants and I love what I do. I taught myself about integrated pest management (IPM) and have continued to develop that role. It’s an interesting job; I’m very much behind the scenes. It’s looking for very small pests and/or the small signs that the creatures are there, and that they might be getting out of balance. I’m tuning into a different sort of sight. I spend a lot of time by myself, looking through the plants and walking around examining things.

It’s a bit surprising because I’m an English major, not a science person. Well, I say that I’m not a science person, but when I started learning about IPM, I got interested. It’s fun to geek out on pests and their life cycles and their predators and their life cycles. The learning process is never-ending. That surprised me because I’m the kind of person who’d rather lie on the couch and read a novel than study science.

Tell us more about IPM. What is it, and why is it important?

Greenhouses are ideal habitat for pests: you don’t change location from year to year, you’re providing the ideal climate and growing all these succulent little plants. All of Red Wagon’s greenhouses are certified organic, which means that we don’t spray chemicals to keep pests in check. There are OMRI-approved sprays [meaning they are acceptable for certified organic production], but not using sprays is better for plants and everybody, even the organic sprays. 

Instead, every week I scout the greenhouses for pests, mainly aphids and thrips. These pests suck the plants’ sap, so I’m looking out for plants with puckered or shriveled leaves, or that look yellowed and droopy – really, any plants that just don’t look happy. It’s kind of a second sight.

I want to make sure that things aren’t getting out of a control. My goal is to strike a balance, so I’ll order beneficial insects like parasites that lay eggs inside of an aphid or predators that will eat an aphid entirely.

Is IPM applicable to home gardens or more relevant to commercial growers?

I’m not out to eradicate pests; I think you need balance. When you garden outside, there is just more natural balance. A greenhouse is an environment that creates potential imbalances. Outdoors, aphids kind of take care of themselves. In my own garden, I know that there are certain plants every year that are going to get aphids – I just notice it, I don’t necessarily manage it. My yarrow, my heliopsis inevitably get covered with aphids. I wipe them off and move on. 

What are your favorite Red Wagon plants?

I love our herbs! I love how aromatic they are. And I love the vegetables – for example, brassicas are hearty, perky, and they always look good, especially this time of year when the more sensitive plants aren’t quite as happy. The brassicas are strong, almost utilitarian. I like them for their strength.

What's your home garden like?

I like growing herbs. Things like sage, thyme and oregano smell and look good. I really like lavender and rosemary, which I bring inside in the winter. I also like growing herbs that attract bees. I have motherwort in my yard, which a lot of people might not like because it spreads, but the bees like it. I also grow medicinal herbs: elecampane, calendula, angelica. I have a lot of fruit trees, thanks to my partner. I’m not that meticulous. I’m not a Martha Stewart gardener by any means!

 Interview has been edited and condensed.  

Giving Thanks with Braised Thyme and Turnips

A few years ago, I worked for the Intervale Center as a farming consultant for the New Farms for New Americans program run by the Association of Africans Living in Vermont. My job was to help new Americans, primarily refugees from Bhutan, Somalia, and Burundi, in finding markets for their beautiful produce and to help them understand and navigate the vagaries of our cold climate, on-line seed purchases, calendar planning, etc. Most of the time, probably all of the time, I was the one doing the learning. It is an experience I look back on fondly and feel thankful that I was able to get to know these smart gardeners and farmers. Every time I walk into Stone Soup in Burlington and see braised Hakueri turnips at the hot bar, I think of Michel and François who established a long term relationship with the restaurant by growing these perfect and tender roots. They still grow and sell them for Avery and Tim at Stone Soup, and it all started with a face to face meeting, in 3 languages, a seed catalog, and a warm feeling or two.

A fitting Thanksgiving side dish, don't you think?

Braised Hakurei Turnips with Thyme

Serves 6 as a side dish

1.5 pounds Hakurei turnips, the small white ones. About 2 bunches

6 healthy sprigs of thyme (about 1/2 a clamshell package or 1/3 of a bunch)

1/2 cup water

1/4 tsp salt

2 tablespoons butter

1 tablespoon honey

Salt and pepper to taste

Cut off the greens, but save them for another use. They are delicious!

Wash and scrub the turnips and cut into halves or quarters, depending on size. If very small (1 to 1.5 inch in diameter, leave whole). Each piece should be about 2 bites worth.

Add turnips to a medium saucepan with water and salt and thyme.

Bring to a boil, and immediately lower the heat to medium-low. A strong simmer, low boil. Leave the pot covered for 6 to 10 minutes. When the turnips are tender but not mushy, uncover the pot, add the butter and honey, and gently shake the pan to mix. Cook another 5 or so minutes until the water is mostly evaporated and the turnips are cooked through but not falling apart. Remove the thyme sprigs.

Taste for salt and pepper and season accordingly.

Want to grow your own? 

If you haven't grown your own white turnips, consider it for next year. They are easy to grow, last long into the fall, and are sweet and delicious. While rutabaga and traditional purple-topped turnips have their own charms, these white "salad" turnips are delicate, sweet, and can be eaten raw or cooked.

For a fall crop, sow seeds of Hakurei turnips directly into a shallow furrow in the garden in mid-August. They prefer loose, deep soil that drains well. A little compost is always a good idea, but not too much as it can stain them or create crooked  growth. When the plants are a couple of inches tall, thin to 1 plant every 2 to 3 inches. Keep well watered. That's it.  They are a perfect crop to follow an earlier planting of peas or beans or lettuces or greens.

Sage Brown Butter and Ricotta Gnocchi

Here is a quick dinner that sounds difficult to make. But it is really easy. Sage is still looking great in our garden with the long, warm fall we have had and it pairs beautifully with butter in about 5 minutes of gentle cooking. The ricotta gnocchi is a little more involved but not much, and if you have ever tried to make potato gnocchi and felt discouraged, redemption is at hand. These are super simple to make.  We first ate these when our friends Marjorie and Marian of Orb Weaver Farm made them for us, and we have been hooked ever since.

Ricotta Gnocchi with Sage Brown Butter

Ingredients:

  • 2 cups whole-milk ricotta (1 pound) Have you had the yummy one from Mountain Home Farm?
  • 2 large eggs, lightly beaten
  • 1 1/2 cups grated Parmigiano-Reggiano (3 ounces), divided
  • 1/4 teaspoon grated nutmeg
  • 1 1/4 cups all-purpose flour
  • 1/2 stick unsalted butter
  • 10 to 15 whole sage leaves, depending on size. About 1/4 cup.
  1. Stir together ricotta, eggs, 1 cup cheese, nutmeg, and 1/4 teaspoon each of salt and pepper. Add flour, stirring to form a soft, wet dough.
  2. Shape dough on a well-floured surface with lightly floured hands into 2 ropes that are about 1 inch thick. Cut crosswise into 1-inch pieces with a lightly floured knife. Place in 1 layer on a lightly floured parchment-lined baking sheet while you work.
  3. Cook gnocchi in 2 batches in a pasta pot of boiling salted water (3 tablespoons salt for 6 quarts water), adding a few at a time to pot and stirring occasionally, until cooked through (cut one in half to check), 3 to 4 minutes per batch. Lift out with a slotted spoon and drain in colander.
  4. Meanwhile, cook butter with sage in a 12-inch heavy skillet over medium-low heat until golden brown, about 5 minutes.
  5. Gently toss gnocchi with brown butter in skillet and sprinkle with remaining 1/2 cup cheese. Season with salt.

For a great photo explanation of this, click on any of these pictures for a link to the "Inspired Taste" website. They do a great job of explaining the simple process. 

Garlic Ritual

Planting garlic in Vermont is a great way to extend the gardening season and gives you a crop that is perfect in so many dishes, stores well all winter long and even generates its own seed. It is a perfect way to tune into the cycles of the gardening season and feel like you are growing an important part of your diet. Garlic is expensive to purchase so there are savings to be had with your own garlic crop. Please follow this guide for easy, step-by-step instructions that will give you a garlic patch for life. I have been growing out my own garlic for 18 years and usually do not need to ever buy seed stock or garlic in the grocery store. The pleasures of garlic growing are abundant and I encourage you to get familiar with this wonderful and simple crop.

When to start the cycle?

Planting dates in Vermont are anytime between mid October and late October. It is best to wait until then, because if you plant too early, the bulbs will break out of dormancy too soon and this weakens the plant going into our harsh winters. If you plant the cloves during those last two weeks of October, it gives them just the right amount of time to take root and hunker down until spring, but not send out any top growth.

To plant garlic, you need to follow a few easy steps.

1. Bed preparation.

This is the act of making your garden soil ready for garlic planting. You want a nice patch of garden, that is worked deeply so that the soil is loose about a foot down in depth. If your garden is very compacted and hard, the garlic will not be able to grow well and you will be sure to end up with small heads of garlic that are tedious to peel and not all that satisfying. You can prepare the bed with a 3 prong fork by digging in straight down, tilting the handle of the fork back and forth, and loosening the hard pan. This is a good work out! Don’t hesitate to get dirty here by kneeling in the earth and breaking up the clods of soil with your hands so they are not chunky at all. Add a bit of well rotted manure or compost at this time. Not too much. For a 5 by 10 bed, maybe a 5 gallon bucket’s worth. You don’t want to over feed the garlic roots in the fall, but a little compost will add organic matter and that will help the structure of the soil, keeping it loose, able to retain some moisture without staying too wet.

Take your time and your garden will reward you. I always look at garlic planting as a soulful moment in the gardening cycle. It is saying goodbye to summer and embracing the dormancy of winter, when seeds deep below the surface slowly get ready for their spring emergence. Living in a climate with such long winters, I need these small, but important, rituals to remind me that spring will come and the cold barren winter is a necessary part of it all. The seed garlic is planted in the fall because it needs to send roots far into the earth in order to feed itself the following year. I take this as a metaphor for my own winter activities that feed me all year long - catching up on sleep, feeding my mind with more reading time, eating great, nourishing foods, and spending more time with friends and family.  I digress here, but these are the thoughts I have as I plant garlic, and after many years of doing it, I find that it is a necessary part of my mental preparation for winter.

2. Mark the rows with a hoe, or hand tool. I usually keep the rows about 12 inches apart and since my beds are about 4 feet wide, I keep 3 rows per bed and can easily reach the center. Just drag your tool - the sharp tip of a hoe or the narrow edge of a hard rake works well - through the soil to delineate the rows. You can use string and stakes if it is important to be straight, but I don’t bother with that at all.

3. Break up the garlic heads into individual cloves. Do not peel! And notice that one end is the root end and one end is the stem end. This will be important for planting right side up with the root end pointing straight down and the stem end pointing straight up.

4. Space out the cloves. Lay the cloves on the top of the soil, following the line you have just drawn in the soil.  Allow about 6 inches between all the cloves.

5. Planting, spacing, and yields

Now you can start to plant. I always kneel down and take my time to feel the earth under me at this point. It just feels good and is a way to say goodbye to the garden before winter! Then, take a bulb planting tool, or a sturdy,  sharp pointed stick, or your hand if your soil is soft and pliable, and poke a hole about 4 to 6 inches down. Shove the clove of garlic deep down, root end down, and cover up with the soil. Continue down the row and repeat until all is planted. Three  heads of garlic will turn into about 24 heads next spring - assuming your garlic has about 8 cloves per head. . And with 6” by 12” spacing, a 5’ x 10’ patch of garlic will yield about 60 heads of garlic. That is enough to enjoy one head of garlic per week, all year long, and still have some left over for planting. To plant a patch this big, you will need to plant the equivalent of 7 to 10 heads of garlic.

6. Compost and mulch. I usually add another 4” of compost or well rotted horse manure to the bed. I then leave it like that for about 6 weeks. Then in mid to late December, I cover the bed with a thick layer of straw. You can also use leaves here, but straw is the best insulator with hollow stems that trap air and keep everybody warm down below. Another advantage of straw is that it usually does not have weed seeds in it; mulch hay, straw’s poor cousin,  should be avoided since it is laden with all sorts of perennial grass and weed seeds. The straw moderates the winter soil temperature and prevents buckling and heaving which could push those garlic cloves up and out of the ground.

Let winter pass you by now, and next......

7. Spring time chores with garlic. Once the snow melts and the soil warms up a bit, your garlic will break dormancy and magically pop up out of the earth. It is important to pull back the straw to let the garlic see sunlight. If you wait a bit too long, and pull back the straw only to see a bunch of yellowing stems, don’t worry! The garlic shoots will green up in no time and will look fabulously sturdy after a week or so of direct sunlight. I usually pull the straw into the garden path, let it pile up there and then replace it around the growing garlic to block out weeds once the garlic plants are about 8 inches high. I often will add a little granular fertilizer at this time, before putting the mulch back in place. For a 5 by 10 garlic patch about 3 cups of Pro-Gro from North Country organics or one bag of Compost Plus from Vermont Compost Company is just about right. This will insure you get large, easy to peel cloves that taste great.

8. Garlic scapes will appear on stiff neck garlic around late May. These look like green curly cues with a pointy end that gracefully swoops down and around, waving in the breeze. This is the budding and flowering portion of the garlic plant. It should be removed to help the plant spend its energy on sizing up the goods below ground. If it is allowed to flower, the plants’ strength will go towards the flower and the garlic forming below ground will be the weaker for it. The good news here is that the “scapes” as they are called, are good to eat. I usually cut off the pointy tip - it is rubbery and inedible, and then slice up the round stem and use it in stir fries, stews, pasta dishes, or pickles. When cooked, it has the texture of a nice green bean and the flavor of mild garlic. It is absolutely delicious and a once a year treat that marks the beginning of summer - a harbinger of good things to come.

9. When to harvest? Garlic is ready to harvest when about 70% of its leaves have turned yellow. This is somewhat subjective, and should be taken as not a hard and fast rule, but rather a guide. You can dig up one head of garlic and look for signs of well formed skin, plump cloves, and individuation (cloves that are individually formed, and not one big mass). This is usually some time in late July. In very wet and rainy years, sometimes it makes more sense to take the garlic our of the ground a little early so that the skin does not rot in the damp earth.

10. How to harvest? Take out your three prong fork again and use it to loosen the soil around the outside edges of each garlic row. This will break up the soil enough to allow you to pull out each plant with a firm yank. (If the stems break off, it is likely you waited too long and the skin and stems are starting to rot. At that point, just dig up the cloves with a spade and they will be okay in taste; they just won’t store well. ) Lay the plants on the surface of the soil so that they start to dry off. Once all the garlic is pulled up, wipe it with a towel or rag, and get ready to tie it into bundles. I usually take about 8 plants, hold them together in one hand, and with the other hand, wrap twine around the whole bundle. Tie off the twine and then hang the bundle in a dark airy space. The rafters of a garage, shed or barn work well. If you don’t have that type of space, just find a place out of the rain, out of direct sunlight and with good air circulation - a covered porch? a dry basement with a fan running? a spare bedroom that can get a little dirty? (no shag rugs please!).

11. Curing the garlic Curing is the process of letting the garlic dry which makes the papery skin that allows the garlic to keep all winter. The stems will turn brown and brittle and the exterior of the bulbs will become dry and paper-like, just like garlic in the store. At this point, it is okay to cut off those dry stems, wipe off any remaining dirt, cut off the roots, and place your garlic in a crate to store it. This can be done anytime from 3 to 6 weeks after you initially hang up the garlic to dry.

12. Storing the garlic Once the garlic is cured, cleaned and trimmed, you are ready to store it for eating all winter long. Garlic is best stored in the dark. In an airy, dry, cool place. I use milk crates, covered with a piece of burlap, and keep the crate in a very cool part of the basement. Ideal garlic storing temperatures are between 35 and 45 degrees, but a refrigerator is too humid, so please don’t be tempted to use that as a storage method. Other good places to store garlic (and onions for that matter) are unheated attics, attached garages that don’t freeze, but are not heated, or 3 season porches that do not freeze. Root cellars are great, but most of us don’t have one. If well stored, garlic will last until April or May - almost right in time for the garlic scape harvest!

13. Finding seed stock.

Until you build up your own supplies, you will have to purchase seed garlic. There are many great resources for garlic and for finding garlic seed, I recommend Johnny’s Selected Seeds, or locally, Last Resort Farm in Monkton, Hudak Farm in Saint Albans, or any farmer at your local farmers market who has nice looking seed stock. Seed stock is basically sorted out of the garlic harvest and selected for the following the following traits:

      • good size
      • evenly formed cloves
      • strong stem
      • well formed skin
      • great flavor
      • ability to store for a long time

If you have been growing out your garlic in your garden, you can pick out the best cloves at cleaning and storing time. Set these aside in a safe place where they will not be eaten and come October, experience the joy of planting your own seed garlic.

14. Plant garlic. Repeat Step 1. above and the cycle starts all over again!

Mid-August - the perfect time to start a garden.

It took four hands to trellis the tomatoes this weekend. Out of the 18 or so tomatoes planted at my house, I had only caged or trellised a lucky 12. The remaining 6 have laid on the ground without protest all summer, sending useless shoots and suckers straight to the sun, begging for light, and promising no fruit. I walked past them for weeks promising them a trellis, tomorrow, next Wednesday, tonight if I get home early. Poor things. Well, tomorrow finally came in the form of last Sunday. My first real and complete day off since June, and I gathered them up, shouted for help and strung them up. I am one of those people who loves to garden, but has so little time to do it. Maybe I should say I love to garden, but also love to swim, hike and read with the little free time in my possession. I have a feeling many of you are like this too. True confessions. But gardening is the hobby headquarters of second chances. You get a do-over every year, and within every season sits cycles of opportunity. Many crops take just a few weeks to mature, and redemption can be had that easily. Here is how I have been approaching the mid-August gardening rush....as a time to prepare the fall garden of my dreams. We have harvested garlic, cabbages, lettuces, escaroles, beans, and now there are wide swaths of blanks slate for fall crops. Or redemption, depending on how you look at it.

I am putting scallions in the nooks and crannys. Bulb Fennel too. These grow upright and vertical and do not take up too much space.

I experimented with planting arugula, cilantro, and dill in between my tomatoes this year, and the shade the caged tomatoes give has prolonged the life of these cool loving crops. I have been able to cut and cut again where normally, in the heat of summer, these quick lived herbs and greens would have gone to seed in a hurry. This is definitely something I will try again. I have added some lettuces to the understory as well, and they are doing well, although a little leggy from the lack of light.

I am planting another generation of beets this week. Right where the cabbages were - just adding a bit of compost, working the soil to loosen it, and transplanting. We grow them as clusters in 4-packs for easy planting - just water well and separate each plant gently and give it 2 to 3 inches of space. You can fill up a 2 foot x 2 foot square with one 4-pack - it is about 16 to 20 beets. And they will have plenty of time to size up before the ground freezes while taking advantage of cold temperatures that make them sweeter.

I am also adding another generation of spinach where some earlier lettuces and escarole had lived. It is important to keep summer planted spinach well watered since it hates the heat, but once well established it will grow quite nicely. This is another crop that is best to transplant in the heat of summer....it likes to germinate in cooler soil with constantly even moisture. Our 4-packs have about 16 plants per pack, and I gently separate them (like the beets) and plant each one about 4" to 5" apart. One 4 pack will give you a thickly planted 6' row that you can pick from repeatedly mid-September to mid-November.

Arugula and Broccoli Raab are going into a spot between the kale and chard in one of my raised beds. Here they will have a little shade from the taller plants, but they will also get plenty of sun since the taller plants are just on the outside edges.

There is still time to put in broccoli, cabbage, boc choi, Napa cabbage (kimchi!), cauliflower, romanesco cauliflower, broccoli raab, lettuces, arugula, cilantro, dill, parsley, and other herbs that can stay in pots to come inside for the winter when the temperatures start to drop. In a really long time, right?

Mothers' Day

We are loaded with great gift ideas for Mothers' Day this year. We have added so many new succulents, sempervivum and sedums that make great planters, houseplants or can be added to the landscape. Succulents are generally grown in containers in our climate, and come in many textures, colors and forms. They can make great houseplants in the winter and love spending the summer outside in a pot. Sempervivum are also known as hens and chicks....they are those cute rosette shaped plants that grow in rock gardens or along stone paths and in patios. We have about 7 kinds of those and it is fun to pick and choose for funky designs. And we have about 12 kinds of sedums this year. These come in a vast array of sizes and shapes from little 2 inch tall rock garden plants to huge 3 foot tall perennials that make a statement in the garden May through November. For the mom who wants to homestead or grow more of the family's food, we have berry patches and fruit orchards waiting to happen - peach, pear, plum trees; raspberry plants that produce in summer and fall; 8 kinds of blueberries; blackberries; hazelnuts; hops; grapes; currants; and gooseberries. And strawberries too, including a really nice French one called 'Mara des Bois' - it has been bred in France for the past 30 years or so to have extraordinarily sweet and fragrant strawberry flavor. It produces fruit all summer long, and can be grown in a big pot on the deck or in a strawberry patch. We also have strawberries growing in hanging baskets for a fun surprise snack all summer long.

For the mom who likes to be adventurous in the kitchen, we can help put together a delicious selection of herbs that will make cooking easier and full of flavor. We can even recommend a variety of mints (we grow 8 kinds) for making interesting cocktails, teas, or using in desserts.

For the traditional mom, we have lots and lots of lovely hanging baskets that will brighten the entryway and bring a splash of color to the home all summer long. We also have the right fertilizer and plant care tips to keep the plants looking good in the heat and straight through fall.

For the mom without much gardening space, we have really nice cucumbers, zucchini, and tomatoes that are in big 3 gallon pots with a bamboo trellis. With the right compost based fertilizer, they can keep growing and producing all summer long right in their pots on the deck or balcony.

For the choosy mom, we can always provide you with a gift card that will make her happy every time she comes in.

April 26th Photo Gallery

Lettuce 'Forellenschluss' 

Marigold, French Bonanza

Catnip 4" Pots

Dusty Miller 'Silver'

Snapdragon Rocket 4-Packs- Pink, Red, and Yellow

Cosmos 'Sensation Mix' 4 packs

Mara des Bois Strawberry - everbearing French variety that is prized for its outstanding flavor. 

Lobelia Regatta Midnight Blue

Bidens 'Namid'

Echeveria Holy Gate

Rose Cascade Ivy Geranium

Thai Basil

Patriot Bright Red Zonal Geranium - Blurry picture, but lots of our geraniums are breaking into color like this. 

Arugula

Cold Frame with lettuce, chard, onions, kale - everything is hardening off nicely.

Spinach and most of our leafy greens are seeded fresh every week, so they are never old and root bound.

Another cold frame with chard and onions.

Penny Yellow Viola

Lilac Ice Viola

Sweet Genovese Basil, Nufar.

Mara des Bois Strawberry. This is a French variety that has been bred for maximum flavor. It came out of breenders' greenhouses in the late 90's and came on the market in the USA only in the past few years. It has the most incredibly intense strawberry flavor and is day-neutral, which means it will bear fruit this year, and will continue to do so all summer long. Very hard to find and expensive root stock. We are lucky to be able to grow it out for our customers. 

Onions, leeks, shallots, scallions on the cold frame.

Provence Lavender. Hardy to Zone 5 reliably, but have gotten a few years out of it in Zone 4. Faster to grow then Munstead Lavdender with bigger plants and flowers. 

Penny Orange Viola