canning

Green Tomato Salsa Verde

photo: Kate Bentley

photo: Kate Bentley

Here is a perfect way to use up lots of tomatoes from the garden even if they have not ripened yet. Everyone who tastes this salsa loves it, and it is very easy to make. If you would like to freeze it, it does so very nicely in bags or jars or plastic containers; however, I usually can mine in 1/2 pint jars so that it is ready to go. If you do not have experience with hot water bath canning, please read about it on the ball website. The instructions below assume that you know how to sterilize jars and that you know what “process in a hot water bath” means. You also can just share with friends, and eat this fresh, right now. Or preserve some for later, and keep some to eat now, depending on how many green tomatoes you have to use up. This recipe is from a blog called Local Kitchen, where I have found many recipes that I love for winter preserving. I usually double this recipe for a bigger batch.

Salsa Verde

INGREDIENTS

  • 4 cups green tomatoes, finely chopped

  • 1/2 cup red onion, diced to 1/4-inch (about 1 tennis ball-sized)

  • 1/2 cup green bell peppers, diced to 1/4-inch

  • 1/2 cup minced hot peppers (a mixture is great), with or without seeds (about 3 – 4 large) (wear gloves)

  • 1/4 + 1/8 cup white wine or cider vinegar

  • 4 tbsp lime juice

  • 3 large cloves garlic, minced

  • 2 tbsp fresh cilantro, chopped

  • 1 and 1/2 tsp ground cumin

  • 1/2 tsp sea salt

  • 1/4 tsp chile pepper flakes

  • 1 tsp raw sugar (optional)

METHODS

  1. If canning, prepare canner, jars and lids.

  2. Chop vegetables. Add all ingredients except cilantro to a medium stockpot; bring to a boil over high heat. Reduce heat and boil gently for 10 – 15 minutes, or until vegetables have softened and the salsa has thickened slightly. Add cilantro, mix well and return to a boil.

  3. Ladle hot salsa into hot, sterilized jars; remove air bubbles and push all vegetables down below the level of the liquid, adding more salsa to yield a 1/2-inch headspace if necessary. Wipe rims, affix lids and process for 15 minutes in a boiling water bath.

Yields about 5 half-pints.

Stick Season Tasks

  • Plant bulbs. Watch this video with Charlie Nardozzi if you don't know how.  Gardener's Supply in Burlington, Williston and on line, has a great selection of flowering bulbs that will wow you in the spring.

  • Mulch your perennials with leaves. No need to think of leaves as waste...they are loaded with carbon and a perfect way to add organic matter to your gardens. They will offer some winter protection too.  Here are some other leafy ideas.
  • Cut back annuals if you have not done so yet. Or leave the sturdier ones such as sunflowers and amaranths since they make lovely perches for song birds. Not everything needs to be so tidy.


  •  Build a raised bed for next year
  • Weed and cut back perennial beds.
  • About all that food you diligently canned and froze all summer - start eating it!

  • Let us know what varieties worked well for you. You can contact us through this website.
  • If you want to make a new garden for 2013, now is a great time to mark it, remove the sod, and amend with compost.
  • Turn the compost pile.


  • Clean off tools, oil them, put them away neatly, and feel good about it all.


  •  Store garlic and onions in a cool, dark, dry place.
  • Make a pot of potato leek soup.
  • Mulch your leeks and root crops, if you have some in the ground still, with straw, so that you can harvest them after frost comes.

  • Sit by the fire if you have one, light some candles if you don't, and enter the time of contemplation and restoration.


Please try this at home.

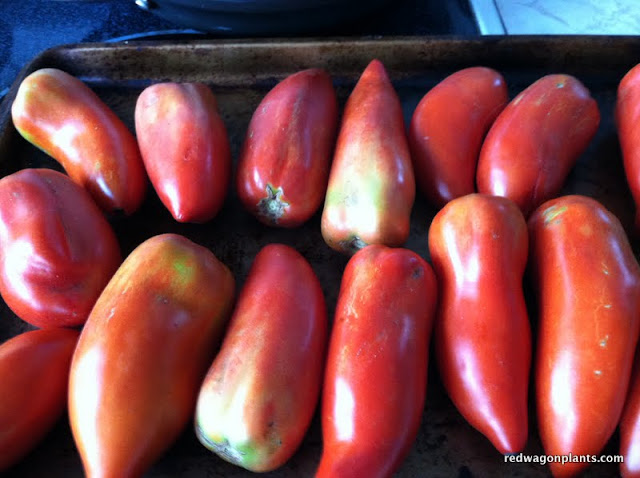
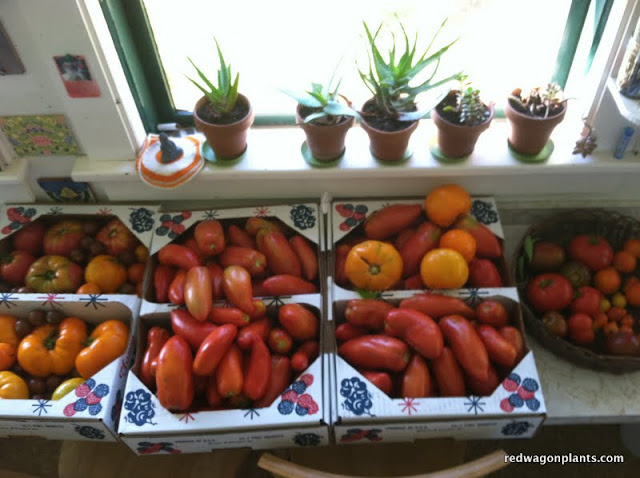
Does your counter look like this during tomato season? Do you feel pressed for time, don't want to be indoors too much with the canning pot, yet hate to see a single precious tomato go unused? Well, I can relate. I love to eat tomatoes in winter, the ones from our garden at least, but I don't love spending all that time indoors, canning and fussing. I have been trying something new this year, and I want to share it with you just because I think you will really like it.

I have been roasting the tomatoes in a hot oven, peeling them, and then throwing them in ziploc bags for the freezer. This gives maximum taste for minimal work. I know you can just throw raw tomatoes in bags and throw those in the freezer, but then you are left with watery, ice shattered, flavorless blobs. I prefer to let the oven do a little work to concentrate the flavors and then have an item to pull out of the freezer that tastes special, an item that has some flavor layers already built in. I used to make this with olive oil and garlic and herbs, but realized that I can do a simpler version with naked tomatoes that is quick, easy, and lends itself well to the preserving process.

Roasting tomatoes is super easy.

You just lay out some paste tomatoes (it works with other tomatoes too, but the cooking time will be longer since they are more watery) in a single layer on a cookie sheet. Pre heat the oven to 400F.  Don't add anything - no oil, salt or anything else. We are just going for tomato flavor here. This will allow you to really customize your dish the way you want it when it is time to use the tomatoes in winter. Slide them into the hot oven. Wait 30 minutes.

After 30 minutes, take them out of the oven and flip them over. Tongs are handy for this process. If they have released a lot of water, you can drain off some of it, carefully, in the sink at this point.

Then they go back in the oven for another 30 minutes. The beauty of this recipe is that you don't have to watch over them. There is alot of what is called "passive time" in cooking and this method is chock full of passive time- I love that I can be doing other things while this is going on.

When they are done roasting, I turn off the oven, walk away and ignore them for a while until they have cooled down or I am done whatever project I started or wait until even later that night, when it is dark and the late summer sunshine is no longer tempting me out of doors. Then it is time to peel them. Just cut the tops of with a small serrated knife, and the skins just slip off in one or two quick motions. It is super simple. The fleshy, juicy, thick tomatoes have been reduced to a lovely consistency and can just go into freezer bags at this point.  I usually get two quart bags out of one cookie sheet;s worth of tomatoes.

So then what do you do with all those frozen tomatoes? Sauces, soups, stews,vegetable sautees, pizza, lasagna, and more will all benefit from these. Anytime a recipe calls for whole canned tomatoes, you can substitute these. I will be posting recipes using these tomatoes throughout the winter, so if you find yourself with a good supply and a lack of ideas of how to use them, check bag for some tips. Enjoy!


High Priority - Roasted Ratatouille for the Freezer

I have to admit that I don't love frozen vegetables for the most part. So if you have a favorite way to freeze a vegetable from your garden, please share it with me. Here is one I like and eat willingly out of the freezer come the dark days of winter. I want to share this simple thing with you in hopes you might have a similar beloved thing to pass on to me. For some reason, this year has not been a year when I put up a lot of food for winter. A few jars of tomatoes and this amazing thing I will now show you are the only things I have done. No beans, no salsa, no jams, no chutneys. Well there is still time, so maybe I will play catch up and do a plum chutney with the amazing plums passed on to us by our friend, Yvan.

This recipe starts in the spring. I basically plan part of my garden just so I can have all the right veggies to make this. You need

  • onions
  • garlic
  • peppers
  • eggplant
  • tomatoes
  • zucchini or summer squash

The garlic gets planted the previous fall, the onions go in in late April, and everything else goes in June 1. I like to freeze about 10 to 20 quart bags of this ratatouille, so I usually plant about 6 pepper plants (3 Ace and 3 Italia) ,  6 San Marzano tomatoes, 6 eggplants (usually a combination of Listada di Gandia, Orient Express, and Hansel), and 1 zucchini plant ( I do two plantings, one June 1 and one July 1 that way the plants are always healthy). Most households do not need more than 1 zucchini plant. Really.

Harvest all the veggies, wash them well. And start chopping. This year, I was a bit lazy and bought a few disposable pans to do the roasting. It made for easy clean up, but the veggies did not caramelize as much as they would have on metal or pyrex. Lesson learned.

So basically you just chop up all the vegetables into 1" chunks or so. The proportions are different every year, but it is usually about 1 part onions, 1 part peppers, 3 parts eggplant, 2 parts tomatoes, and 2 parts zucchini. I chop everything separately and then add it to the pans. I then drizzle olive oil over every thing. Add lots of salt, good sea salt is best, and then handfuls of chopped herbs to each pan. I like a blend of thyme, oregano, and rosemary. But other combinations work well.

Preheat the oven to 375F and slide in the pans. Turn and toss every 20 minutes, until everything is cooked and starting to caramelize. The overall cooking time really depends on the amount you are doing, the type of pan you are using, the thickness of the vegetable layer in each pan, etc. Basically, cook it until the whole house smells really good and the veggies are very soft and starting to brown. If I were making this for a meal to be eaten that night, I would do a single layer, in pyrex, and let it get golden brown. This is much harder to do in big batches in a home oven, and since freezing compromises texture and flavor anyhow, I think of these roasted veggies as additions to other recipes all winter long, not the main showcase in a meal.

Once everything is cooked, let it cool down completely, and then carefully scoop it into plastic quart-sized freezer bags. I usually use a measuring cup and one of those funnels for jars, since it makes life a little easier. Once frozen, the veggies can be used in pasta sauces, on pizza, in lasagnas, in soups and stews, as fillings in calzones, or as a topping for polenta, etc. You get the picture. It's such a nice way to have a little taste of summer in the winter and uses up so much of that amazing garden produce. Even in a summer like this one, when I have had to take some time away from gardening and preserving, I made sure to do some of these roasted veggies for the freezer.

Simple Food Preservation for the Home Gardener

The most important element of putting up food is safety. While problems like botulism are rare, they can be serious. Please make sure to follow recipes exactly, as the amount of acid, cooking time, and temperature can determine whether foods will be safe to eat.

The type of food preservation you'll do depends on your storage space, what you like to have on hand to eat in the winter, and how much work you want to do. Freezing food is the easiest method, but it depends on whether you've got extra space in your freezer.

For excellent over-all advice and recipes for canning, freezing, and otherwise preserving food, visit any college's Extension Service website, or:

  • Canning Across America
  • preservefood.com
  • simplycanning.com
  • A brief rundown of what I do most years:

  • Fruit Spreads and Jams: I use a low sugar pectin such as Pomona's, which you can buy locally at City Market. It allows you to make a really simple fruit spread with honey, fruit juice concentrate or just a fraction of the sugar that would be in a regular jam.

    Canning is a great technique for preserving high acid foods like tomatoes, fruit, and pickles. For a thorough explanation of canning, go to vegetablegardener.com. This will give you a very clear introduction to water bath canning (non-pressure canning of acidic foods). The ones that I do each year are tomatoes, peaches, and applesauce.

    Simple Tomato Sauce: wash and cut up tomatoes into halves or quarters. Then pulse in food processor until they are chopped up well and the skins are pulverized. I usually do a few batches at a time until I have about a gallon of soupy tomato sauce which I then cook down for several hours over low heat until the desired thickness is reached. Salt to taste. This can then be canned or frozen. I doctor it up with herbs, garlic, etc when I use it in the winter time that gives me more flexibility.

    Tomatoes can also be frozen whole and raw by placing them in a zip-lock bag as they ripen. When you later need to use them, you just have to run them under warm water to slip the skins off.

    Roasted Ratatouille: I chop up onions, zucchini, eggplant, and tomatoes and toss them with herbs, olive oil, and sea salt. I then spread it on cookie sheets in a single layer and roast in a 400 degree oven until soft and starting to caramelize (turning once or twice helps). It takes about 50 minutes per batch. I then freeze this in containers or freezer bags. It is fantastic on pizza, pasta, in lasagnas or other casseroles, or on its own.

    Sweet Peppers: just chop up raw peppers and place in a freezer baggie. Very simple and a great addition to just about anything you are sauteeing.

    Herbs: any herb can be turned into a puree with a little olive oil and salt in the food processor. This is a good candidate for freezing in ice cube trays and then placing the frozen blocks into labeled baggies. When making dishes in the winter, simply toss an herb cube into the pot for extra flavor ; soups, sauces, stir fries, salad dressings are all good options for this method. Pesto can be frozen this way too, allowing you to thaw out just what you need.

    Other vegetables that freeze well are green beans and spinach: just steam, dry well, and place in bags. You can also chop spinach or other greens after blanching briefly, and press into ice cube trays to freeze into cubes to have on hand for soups, pasta and the like in the winter.

    Pickling beets, carrots and cucumbers is another simple and satisfying way to store these veggies, either in the refrigerator (for consumption within 3 months), or by canning them for a longer shelf-life. See recipes at:

  • Recipezaar AllRecipes Garden Web/Harvest Forum