Blog — Red Wagon Plants

herbs

Red Wagon Herbs

What's a greenhouse grower to do when the spring season winds down and there is still plenty of great weather for summer growing and the greenhouses are empty? Well, start a new business, that is what. We are so happy to introduce to you our new sister business, Red Wagon Herbs. We are growing Certified Organic herbs for year round harvest and selling to local stores, restaurants, and food hubs. Our focus is on the popular culinary herbs for now, but we are likely to branch out into the more unusual once we have had a chance to explore our markets and have gotten familiar with our new growing practices. This is a perfectly natural extension of our plant business since we already partner with fantastic stores and we love to grow herbs more than anything else. As a matter of fact, the plant business, in its earliest days, was just a potted herb business. In a way, we are going to back to those days and loving the continuity, evolution, and expansion.

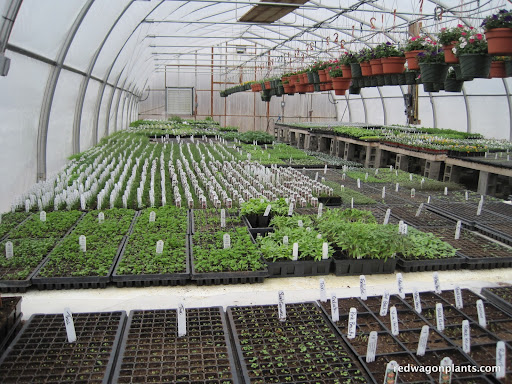
Our herbs are grown using three different methods: in the ground for summer and fall harvest, in a new, unheated greenhouse (paid for in part by a grant from NRCS EQIP) for fall, winter and spring harvest, and in our existing, heated houses for those coldest months. We are excited to be the only Vermont farm offering organic herbs year round and hope you enjoy cooking with them as much as we enjoy growing them.

Please be on the look out for an Open House this fall so we can show you what we have been up to and give you a chance to smell, touch, taste, and see it all.

Our current line up consists of :

  • Basil (March through November only)
  • Chives
  • Cilantro 
  • Dill
  • Curly and Flat Parsley
  • Sage
  • Thyme
  • Oregano
  • Tarragon
  • Rosemary
  • Savory
  • Marjoram
  • Spearmint
  • Bouquet Garni ( a mixture of aromatic herbs for roasting, stocks, and more)

Coming Home

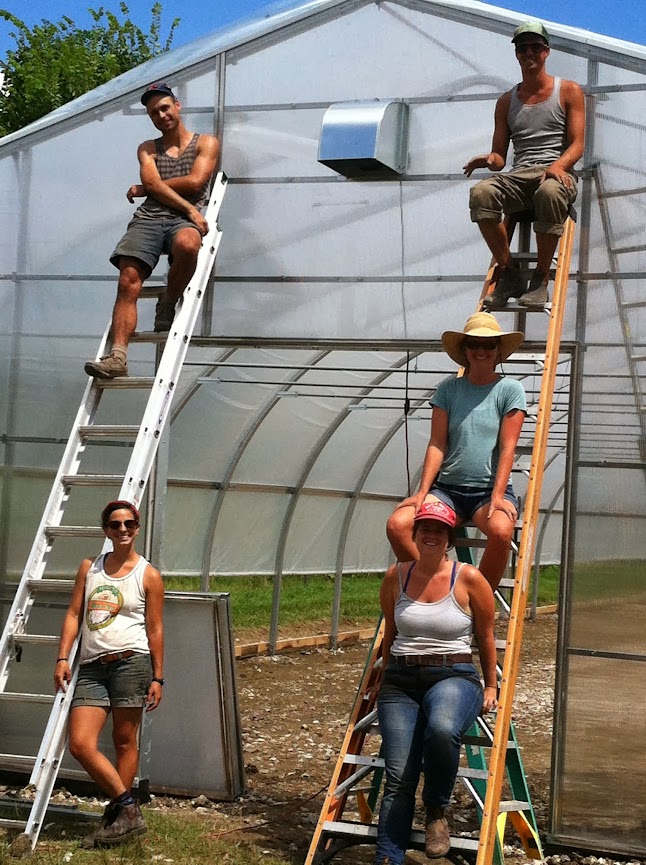
Earlier this week, I went away for a total of 48 hours. This is astounding for a couple of reasons. Not only because it is May, and who do I think I am going away for a whole two days while trying to manage a greenhouse business. No, it's astounding because of the way that I came home.  I landed. I arrived. No stress, no jumping into a chaos of activity, no guilt at being gone, no extra work piled up. I came home to a busy crew doing everything well and calmly. I came home to happy customers loading up on plants while wearing big smiles. I came home to a feeling that all is right in my little world.  Two days off in May is hard to pull off in this line of work, but what helped me so much was that everyone who works here knew what to do, they made smart decisions and I am sure they handled problems with grace.  So, thank you, crew.

I also came home to a garden. I love my garden. The moments in the garden are rare and precious for me in May, but the first thing I did when I got out of the car, was go up to the large garden above the barn and finished planting a bed of strawberries. I harvested an armful of asparagus, collected the 4 eggs the hens had laid, picked a handful of chervil and flat full of mache, and I got to work making  dinner. I looked at my haul, as the sun was setting and felt embraced by the bounty.

We ate late. We ate well.

Egg Salad in Spring

Makes enough for dinner for 3 and leftovers for everyone's lunches. 

  • Hard boil 8 to 10 eggs.  (My method is to put cold eggs and cold water in a sauce pan. Bring to a boil, covered with a lid. Let it boil one minute. Turn off the heat, but leave the pan on the burner. Set the timer for 8 minutes. Drain and run under cold water for 5 minutes.)
  • Finely chop a handful of herbs - I used chervil and chives.
  • Finely chop a rib or two of celery - I would have used lovage had it been big enough.
  • Finely chop half a shallot or 3 scallions
  • Peel the eggs and place in a shallow bowl. Cut them up with a couple of knives or a pastry cutter.
  • Add all the other ingredients.
  • Add enough home made mayo to moisten the whole thing.
  • Stir gently.
  • Season with salt and pepper to taste.

Homemade Mayonnaise

Add to the blender:

  • 1 egg yolk
  • 2 tablespoons lemon juice
  • a dash of cayenne
  • 1/4 tsp of salt
  • 1 tsp of Dijon mustard or 1/2 tsp dry English mustard
  • Blend for a few seconds and then very slowly drizzle in 1/2 cup of olive oil, grape seed oil, or a blend of the two.  Drizzle it in a very thin stream while the blender is whirring around though the top of the blender cover. Or you can use a food processor and drizzle it in through the feeder tube. Or you can do it by hand in a bowl, with a whisk. If you do that, try to anchor the bowl by wrapping a damp towel around the base. Or get someone to help you with another set of hands to hold the bowl, or beat the eggs, or do the drizzling. Beat or blend or process until it starts to thicken up.
  • Taste for salt and add a little pepper. If it is too thin, you can add more oil, still adding it in very slowly while blending.
  • You can add fresh herbs to the mayo, a little crushed raw garlic, a little chopped poached or roasted garlic (mellower flavor), anchovies, spices, roasted peppers etc. (for cleanest flavors add just one of these other ingredients, not a combination.)

We ate this lovely egg salad with toasted Pain de Mie (or Pullman Bread) from Scratch Baking Company in South Portland, ME and the asparagus was steamed and cooled, served on the side, splashed with some lemon juice.

Mache Salad

Mache is also know as corn lettuce. It is a cold hardy green that germinates only in cool temperatures. We grow it in flats in the greenhouse in the winter and gorge on it from late March to late May. It is a sturdy green with a nutty flavor, and it is eaten as a whole plant, washed well under running water, and dressed lightly with hazelnut or walnut oil and a good sea salt - fleur de sel, Maldon, or sel gris. The small plants have a really interesting texture and a rich flavor that is perfect this time of year when one craves green and fresh.

To the garden, the hens, and the amazing crew at Red Wagon Plants, thanks. You make life pretty, tasty, and lovely.

-Julie


Jo Ann Gardner comes for a visit

From Julie.... There are a few garden and farm writers out there that move me to no end. I have had a fascination with homesteading literature since I was a little girl and still to this day I love to pour over books, catalogs, websites and blogs that have to do with growing food, living off the land, making do with things that are around the house, etc. Within this genre, one of my absolute favorite writers is Jo Ann Gardner.

She has written eloquently about the plants she loves for decades and I have poured over some of these books countless times. She and her husband were once back to the landers in Nova Scotia, far off the beaten path, and were able to make a livelihood for themselves in a very short growing season and on very challenging soils. Her writing reads like a series of love letters to a set of handsome, rugged plants that got them through tough times. I am absolutely honored to have Jo Ann visit our greenhouses this Saturday and to share some of her plant knowledge with us. She now lives across the lake, in Essex, NY and is active in gardening efforts at home and at a local senior center. Her talk on Saturday will focus on how to use herbs in pots and containers around the home. I am sure she will bring along her wit, thrift, and cleverness and we will all be a little richer for it.

Brown Dog Books  in Hinesburg is carrying her books, and they will set up a table at our greenhouses on Saturday for those of you who may wish to purchase one or two. But be warned - Jo Ann's writing will fuel the fires of any gardening addiction. Also present on Saturday will be Jess Bongard, of Sweet Lime Cooking Studio. She will be bringing us some herb treats to sip and snack post-workshop. Coincidentally, Jess is teaching an herb class in her home kitchen on Sunday. You can read about it here. A group of us are going from Red Wagon, making it a party, I am sure.

I like June. The bulk of the spring planting is done. The porch is swept off, and it is just the right time to sip a lemon verbena iced tea, make a lovage and butter sandwich, and gaze lovingly at all the herb pots surrounding the patio. I hope to see some of you this Saturday. Psst...there are only a few slots left, so please call or email to register.

FAQ #22: Which herbs are perennial and which are annual?

Perennials: Angelica, Catnip, Chives and Garlic Chives, French Sorrel, Germander, Anise Hyssop, ‘Munstead’, 'Grosso', 'Provence'  Lavender, Lemon Balm,  Lovage, Mint, Oregano, Rue, Sage, Winter Savory, Sweet Woodruff, French Tarragon, Thyme, Valerian Annuals: Artemisia (self seeds), Basil, Chamomile (self seeds), Chervil (self seeds),  Cilantro, Dill, Fennel, Feverfew (self seeds), Lemongrass, Marjoram, Papalo, Parsley, Red Shiso, Rosemary, Summer Savory

Some herbs can be kept as houseplants over the winter. Some that do well are rosemary, thyme, sage, basil, and parsley. It is always nice to have a few pots of these in the kitchen to snip into bowls of soup, salads, scrambled eggs and roasted vegetables and meats. You can dig them up out of the garden in the fall or just grow them in pots all summer that you then bring into the house once the temperature drops.

FAQ #21: How can I keep arugula, cilantro, lettuce, and dill from bolting?

The first step to preventing bolting is to understand what causes it. Bolting, or going to seed, is a natural part of the plant's life cycle. Some plants have longer life cycles than others. Arugula, lettuce, cilantro and dill all have relatively short life cycles, so they will try to produce seed within 8 to 10 weeks of being planted. It is an inevitable part of the plant life cycle but can be postponed with good management. It can also be caused by shock during transplanting, by too much or too little water, and around the solstice when the days start getting shorter. Transplant shock can be minimized by careful hardening off and transplanting in late afternoon when the plants will not be exposed to intense midday heat. Water carefully and time your plantings so that a fresh generation is coming along before the previous generation goes to seed. Here is a helpful schedule to help you maximize the harvest:

Cilantro - plant every 3 weeks from late April to mid August. These are very cold tolerant and can be grown early and late to extend the season. If you are very eager to have cilantro for salsa, then make sure to plant some in early July so that it is ready to eat at the same time as your tomatoes are ripe. The flowers of cilantro are edible and are a lovely addition to salads and salsas.

Dill - like cilantro, is very cold tolerant and can be grown early and late in the season. This self seeds willingly, so you can always allow a patch to flower and drop its seeds giving you a perpetual patch. The flowers of dill are tasty in pickles and marinades.

Lettuce - lettuce can be grown at the baby leaf stage or the full head stage.  Please refer to our lettuce post to learn more about the timing of lettuce. It should be planted every week or two if you eat lots of salads and want fresh, non-bitter leaves on your plate. It can be planted from seeds or from plants. If you prefer the texture and flavor of full heads of lettuce, then transplant individual plants every 10" - about 4 to 8 transplants a week is plenty. If you prefer cut lettuce leaves, then use seeds, and sprinkle them in a row, about 2 or 3 seeds per inch. Cut lettuce leaves can grow back and provide you with a second harvest, but the quality goes down each time and the bitterness increases. It is best to replant a fresh row of seeds every couple of weeks.

Arugula - like lettuce, it can be grown from transplants or from seeds. It is best to plant it regularly as it does not grow back very well. Its flowers are edible, and can be a nice peppery additions to salads, sauces, and grilled fish.

Herb Spiral Workshop


Our retail greenhouse is co-owned with a wonderful business also located at the same site. It is Queen City Soil and Stone, owned by Charley Macmartin of Burlington. Not only is Charley one of the nicest people you could ever meet, he is also the talent behind all of the stone work you see in our parking area and our lovely display garden. Charley uses the retail greenhouse as the home of his winter workshop series for homeowners and landscape professionals who want to learn or perfect dry wall masonry. The first workshop in this series is a perfect one for the Red Wagon Plants community since it is focusing on herb spirals. These simple and elegant structures are a great way to plant lots of herbs close to your kitchen door and in such a way that you give each herb the type of micro-climate it craves. Herb spirals provide various conditions in one small space - dry and sunny, shady and moist and everything in between.

Here is Charley's description of the upcoming workshop :

Queen City Soil & Stone’s series on garden stone features continues in November with a workshop on herb spirals. An herb spiral is a stone wall twisted in on itself creating a garden bed of varying soil depth and planting possibilities from kitchen herbs to strawberries to cut flowers. The workshop will be held at Red Wagon plants in a heated greenhouse on Saturday, November 12, from 9am to 2pm.

The cost of the workshop is $50 and space is limited. To sign up, call Charley MacMartin at (802) 318-2411.


The workshop will be hands-on:  building an herb spiral, discussing herb spiral design and learning about the plantings that a spiraling garden bed allows.


High Priority - Roasted Ratatouille for the Freezer

I have to admit that I don't love frozen vegetables for the most part. So if you have a favorite way to freeze a vegetable from your garden, please share it with me. Here is one I like and eat willingly out of the freezer come the dark days of winter. I want to share this simple thing with you in hopes you might have a similar beloved thing to pass on to me. For some reason, this year has not been a year when I put up a lot of food for winter. A few jars of tomatoes and this amazing thing I will now show you are the only things I have done. No beans, no salsa, no jams, no chutneys. Well there is still time, so maybe I will play catch up and do a plum chutney with the amazing plums passed on to us by our friend, Yvan.

This recipe starts in the spring. I basically plan part of my garden just so I can have all the right veggies to make this. You need

  • onions

  • garlic

  • peppers

  • eggplant

  • tomatoes

  • zucchini or summer squash

The garlic gets planted the previous fall, the onions go in in late April, and everything else goes in June 1. I like to freeze about 10 to 20 quart bags of this ratatouille, so I usually plant about 6 pepper plants (3 Ace and 3 Italia) ,  6 San Marzano tomatoes, 6 eggplants (usually a combination of Listada di Gandia, Orient Express, and Hansel), and 1 zucchini plant ( I do two plantings, one June 1 and one July 1 that way the plants are always healthy). Most households do not need more than 1 zucchini plant. Really.

Harvest all the veggies, wash them well. And start chopping. This year, I was a bit lazy and bought a few disposable pans to do the roasting. It made for easy clean up, but the veggies did not caramelize as much as they would have on metal or pyrex. Lesson learned.

So basically you just chop up all the vegetables into 1" chunks or so. The proportions are different every year, but it is usually about 1 part onions, 1 part peppers, 3 parts eggplant, 2 parts tomatoes, and 2 parts zucchini. I chop everything separately and then add it to the pans. I then drizzle olive oil over every thing. Add lots of salt, good sea salt is best, and then handfuls of chopped herbs to each pan. I like a blend of thyme, oregano, and rosemary. But other combinations work well.

Preheat the oven to 375F and slide in the pans. Turn and toss every 20 minutes, until everything is cooked and starting to caramelize. The overall cooking time really depends on the amount you are doing, the type of pan you are using, the thickness of the vegetable layer in each pan, etc. Basically, cook it until the whole house smells really good and the veggies are very soft and starting to brown. If I were making this for a meal to be eaten that night, I would do a single layer, in pyrex, and let it get golden brown. This is much harder to do in big batches in a home oven, and since freezing compromises texture and flavor anyhow, I think of these roasted veggies as additions to other recipes all winter long, not the main showcase in a meal.

Once everything is cooked, let it cool down completely, and then carefully scoop it into plastic quart-sized freezer bags. I usually use a measuring cup and one of those funnels for jars, since it makes life a little easier. Once frozen, the veggies can be used in pasta sauces, on pizza, in lasagnas, in soups and stews, as fillings in calzones, or as a topping for polenta, etc. You get the picture. It's such a nice way to have a little taste of summer in the winter and uses up so much of that amazing garden produce. Even in a summer like this one, when I have had to take some time away from gardening and preserving, I made sure to do some of these roasted veggies for the freezer.

This blog post was written by Julie Rubaud.

Best-dressed pasta goes for the layers

Turn on the oven - 400F. Go to the garden and look for cherry tomatoes.

Take lots of said cherry tomatoes and cut them in half and dump them into a glass or pyrex baking dish, a big one, so that they are in a single layer.

Add some finely chopped cipollini onion. Or red onion, or sweet onion, or any kind of onion really.

Add a few or more tablespoons of olive oil. A good one. Don't skimp here, you want everything well coated, slippy-slide like.

Grab some herbs like savory, rosemary, oregano, sage, (and/or) thyme and chop them up finely or coarsely, depending on the look you want and your tolerance for stems in food.

Add plenty of good sea salt.

Toss together and slide pan into a pre-heated 400F oven. Forget about it for a good 45 minutes. Check and stir / flip once, about half way through. It will start to get caramelized and yummy. You can do this ahead of time and just let it sit in the turned-off oven for a while. Gets better with time, promise.

Meanwhile, do the second flavor layer......

Heat up a generous amount of olive oil in a heavy saute pan (1/2 cup or so).  I used cast iron and it was lovely.

Chop up some sweet onion, red pepper, hot pepper.  (If you need quantities, try 1 medium onion, 1 large red pepper or 2 small, 1 jalapeno or cherry bomb or 2 thai hot peppers, or more to taste. No rules here.)

Add onion and peppers to hot olive oil, and let it fry for a while. Stir every now and then. These will sizzle gently for about 10  minutes. They will soften, get fragrant, etc.

Chop up about 6 cloves of garlic.

Chop up about 4 tablespoons of herbs - a combo of oregano, sage, rosemary, thyme is nice. But really, any woody, fragrant herb will do here.

Find some paprika. My favorite is Pimenton (the smokey kind) but if you don't have that, you can use sweet or hot (if you can take the heat.) If you don't have any paprika at all, just skip it; the dish will be good without it.

Add garlic, paprika, herbs, and about 1/2 tsp salt to olive oil and peppers in the pan.  Stir, and turn down the heat. This will simmer together another five minutes or so over low heat. More time is fine. But 5 minutes is the minimum. Again, expect fragrance here.

You can get the pasta water going at this point.  You know...big pot, lots of water, salt.

Once pasta water is boiling, add the pasta. However much you need and while it cooks finish off the sauce.

Here is how:

Squeeze a lemon. Turn sauce # 2 off ( the one on the stove, not the one in the oven) and take it away from the heat. Add the lemon juice. It may sizzle a bit, so stand back. Stir together. Add some chopped parsley or basil (one or the other, not both, please).

Take roasted cherry tomatoes out of oven. Add the sauteed peppers and herbs to the tomatoes, scraping up every savory bit. gently and lovingly merge the two sauces. Serve in a bowl with a nice small ladle.

This is a rich, olive oil intense sauce. Use sparingly over the pasta with lots of freshly ground black pepper. The flavors add up to more than the sum of the parts. Really.

Some possible additions, if you must:

  • anchovies ( with the peppers and onions on the stove)
  • olives (pitted and chopped, added at the end with the lemon juice)
  • capers (can be added at the beginning or at the end. Gives you two different flavors either way, experiment with which you like best).
  • scallions (toward the end of the cooking time in either of the two sauces)
  • freshly grated parmesan (to pass around at the table)

But really, the beauty of this sauce duo is the simplicity. Don't overdo the flavors right off the bat. Try it as is. Just swoony and simple.


Fall Planting Guide

Mid-August is rolling around, and with it comes some vegetable planting possibilities that will feed you late into autumn and early winter. This is a great time to clean out some of the garden beds that have finished producing and replant them with some fresh crops for late season harvest. Here are a few options that you might want to consider incorporating into your later summer gardening routine.

A note on flea beetles and row cover. Flea beetles are little, black and jump around on your plants while making tiny little holes. They love anything in the brassica family - cabbage,broccoli, arugual, mustards, collards, etc. Row cover is a white fabric used to keep out insects and/or to warm up the soil and air around the plants. It does not hurt to use row cover to speed things along and to keep out the flea beetles. Broccoli - seed a small amount directly into garden beds, or buy transplants up to mid-August. If you are direct seeding into a garden bed, remember to thin or prick out and replant the broccoli babies so that they have proper spacing (15” or so). Cabbage - same as broccoli. Choose shorter day varieties. Seed packets usually list the days to maturity for all crops. In early August, you can usually get away with planting a 60 day cabbage that will be ready in early October. Kale - this is a great time to put in a few more kale plants or seeds, they will size up before snow flies, and will withstand lots of wintery weather. The good thing about kale, is that once it is full grown, it will just stand around in the garden waiting to be picked. It does not get “too old” or bolt (jump into seed production mode). This makes it a great early winter crop and a joy to harvest under snow fall. Collards can be treated this way as well. Arugula - a nice addition to salads, this tender green with a mustard-like flavor is also a great survivor of cold temperatures. It can withstand many hard frosts and will continue to add a little spike to your salads well into November and December. You can put row cover on it to keep away the flea beetles and to give it a little extra protection from cold winds that can dry it out. If it starts to turn a little purple in the colder temps, don’t worry about it, it is still fine to eat. This is just a symptom of not being able to absorb phosphorous in cold conditions. Turnips - a short season salad turnip can still be sown in August. I like the Hakurei variety from Johnny’s. It is delicious raw in salads, sliced thinly or finely diced, or sauteed in a little butter with fresh herbs (winter savory makes a special appearance at my house, often in this dish in particular). People who think they hate turnips will just be shocked when they taste these buttery slices that just melt in your mouth. Spinach - in the first half of August, it is a good idea to plant a large patch of spinach. It will germinate in the cooler night time temperatures (spinach does not like to germinate in the heat) and will last a long time in the field in the cool temperatures of October and early November. Carrots - fall carrots are best seeded right around July 4th. This gives you a chance to do an early batch of carrots for late spring, early summer eating, and then a second (or third) batch for fall eating. Fall carrots are considerable sweeter than spring seeded carrots and are definitely worth the trouble. Boc Choi - this is another crop that does really well in the cooler temperatures of fall. It is not a heat lover, and therefore should only be planted in April and May and then again in mid to late August for fall harvest. This benefits from row cover if you have a lot of flea beetle pressure. There are quite a few different versions of boc choi, and if you like the crunchy texture and delicate flavor of this crucifer, then please consider trying baby boc choi, red boc choi, or full sized boc choi. While it is easier to start with plants, it is certainly possible to direct seed this crop. Beets - fall time beets are sweet, tender, and do not have that “dirt” taste of beets grown in full summer heat. Last planting date for fall beets is around August 10th. They should be direct seeded in the garden and then thinned to one plant per 2 to 3 inches. You can space the rows 10 to 12 inches apart and fit about 3 rows in an average bed with a 4 ft width. The greens are tasty too, and the little delicate plants you pull out when thinning are a great addition to sauteed greens, soups, or even salads if very young.

Cilantro and Dill - these herbs can be planted directly in the garden from seed as late as mid-August. They grow well in the cold, and actually prefer it. The cold slows them down and prevents them from going to seed. Plant a good sized patch since you can harvest the plants well into December. They can take a frost, a snow fall and still will bounce right back.

Mustard Greens - these can be planted just like arugula. See instructions above.

Radishes - are a great addition to the late season garden. They can be planted right up to early September, and will maintain a high level of quality right up until it snows.

Lettuce - you can direct seed certain varieties of lettuce for fall harvest. Some do better than others in the cold. I like to plant Merveilles des Quatres Saisons and Tango for their beauty, taste, and cold hardiness.

Parsley - this herb can take very cold temperatures, so make sure, in mid-July or so that you have a nice patch of this going into fall and later summer. If this is an herb that you use frequently, it does not hurt to plant two or three different patches over the course of later April to mid - July. It is a slow grower, so after mid-July you can only plant it from transplants, not seed.


Things to Plant Now. You Will be Glad You Did.

August is rolling around, thundering ahead,  and with it comes some vegetable planting possibilities that will feed you late into autumn and early winter. This is a great time to clean out some of the garden beds that have finished producing and replant them with some fresh crops for late season harvest. Here are a few options that you might want to consider incorporating into your later summer gardening routine.

Broccoli

- seed a small amount directly into garden beds, or buy transplants up to mid-August. If you are direct seeding into a garden bed, remember to thin or prick out and replant the broccoli babies so that they have proper spacing (15” or so).

Cabbage

- same as broccoli. Choose shorter day varieties. Seed packets usually list the days to maturity for all crops. In early August, you can usually get away with planting a 60 day cabbage that will be ready in early October.

Kale -

this is a great time to put in a few more kale plants or seeds, they will size up before snow flies, and will withstand lots of wintery weather. The good thing about kale, is that once it is full grown, it will just stand around in the garden waiting to be picked. It does not get “too old” or bolt (jump into seed production mode). This makes it a great early winter crop and a joy to harvest under snow fall. Collards can be treated this way as well. A note on flea beetles: It does not hurt to use row cover to speed things along and to keep out the flea beetles. They are little biting insects that make little holes in the leaves and generally slow down a plant’s growth by stressing it a bit. All vegetables in the brassica family are susceptible to flea beetles - broccoli, kale, cabbage, mustards, arugula, collard greens, and boc choi are all in this family.

Arugula -

a nice addition to salads, this tender green with a mustard-like flavor is also a great survivor of cold temperatures. It can withstand many hard frosts and will continue to add a little spike to your salads well into November and December. You can put row cover on it to keep away the flea beetles and to give it a little extra protection from cold winds that can dry it out. If it starts to turn a little purple in the colder temps, don’t worry about it, it is still fine to eat. This is just a symptom of not being able to absorb phosphorous in cold conditions.

Turnips

- a short season salad turnip can still be sown in August. I like the Hakurei variety from Johnny’s. It is delicious raw in salads, sliced thinly or finely diced, or sauteed in a little butter with fresh herbs (winter savory makes a special appearance at my house, often in this dish in particular). People who think they hate turnips will just be shocked when they taste these buttery slices that just melt in your mouth.

Spinach

- in the first half of August, it is a good idea to plant a large patch of spinach. It will germinate in the cooler night time temperatures (spinach does not like to germinate in the heat) and will last a long time in the field in the cool temperatures of October and early November.

Overwintered Spinach - overwintering means keeping a vegetable alive through the winter for spring harvesting and eating. Not all vegetables can survive our VT winters, but the few that can include spinach, parsnips, leeks, garlic, and parsley. Spinach for early spring eating (mid to late April) should be sown in the first two weeks of September. Once it germinates, allow it to grow without harvesting or touching it. You can eat a little if you want, but ideally you will leave as much of the plant in the ground as possible. Once very cold weather hits, in early to mid-December, you can protect the spinach under a layer of straw, or leaves, or a few layers of row cover. In the spring, as soon as the ground has thawed out, remove the layers of protection and you will see the spinach come to life, long before any other plants begin to stir. This is such a delicious treat for early spring and really worth the trouble. A future post will be just about overwintered vegetables, so if this is something you have been wanting to try in your garden, check back here in a few days!

Cilantro and Dill

are good herbs for fall planting since their cold-hardiness is unmatched, and it will give you something to add to autumn salsas, salads, and pickles. Just sprinkle some seed into a shallow trench, press them in, and lightly cover with soil. The planting depth is very shallow here, just 1/4 inch or so. One of the most common problems with crops seeded directly into garden soil, is that they get planted too deeply. Remember this basic rule of thumb: the seed needs to be planted only 2 times deeper than its own size. Cilantro and dill will live until the first snow! They thrive in the cold. They are true soldiers of season extension.

Let us know if you feel inspired to try your hand with some of this season extension - we love to hear about it!

What Can I Plant for a Little Early Color Around the House?

It's been a pretty cold spring in Vermont this year. I cannot remember a spring like this in recent memory, with night temperatures dipping into the twenties in mid-April and day time temperatures hovering in the low 40's. Many of our customers are ready for some color around the house, and it's still not safe to put out hanging baskets, or most annuals for that matter.

What I suggest for early spring containers is a selection of cold hardy plants, especially the ones that seem unusual in containers, but will feed the need for signs of life around the yard!

The following plants are just great for a year like this and look really cute mixed together.

  • Violas and pansies
  • Allysum
  • Cold hardy herbs such as parsley, chervil, mint (ginger mint cascades down the side of the container), cilantro, dill. The textures and different greens at dimension to the arrangements. Plus you can snip at them and bring them into the kitchen for some spring time flavor boosts.
  • Colorful kales such as Redbor and Red Russian.
  • Fennel - the bulb kind or the bronze herb kind
  • Lettuces - especially the green oak, red oak, and cherokee red batavian
  • Frisee endive - it has a lovely frilled edge, and an unusual lime green color.

The beauty of this kind of planter is that it is multi-purpose. The violas and pansies and their "companion" foliage are all edible. What a nice gift for someone special, or a treat for yourself to celebrate the slow unfurling of spring.

First Days in the Greenhouse

Beautiful bacopa cuttings ready for potting up

It is finally that glorious time of year when work in the greenhouses begins. Our first cuttings have arrived and we have started potting them up, giving each plant new room to grow in wonderful Vermont Compost Company potting mix. (See note below) We can imagine that they feel the same way we do upon first entering the greenhouse, as they shed their cardboard boxes and we our many winter layers. At first the sunshine pouring down dazzles us, and we squint in the brightness. But soon we are all reveling in the lovely feeling of the rich soil, the moist, 85 degree air on our skin, and the intoxicating scent of rosemary. Within a few days this greenhouse will be filled to bursting with vigorously growing young plants.

DSCN0403_020DSCN0403.jpg
'Gorizia' Rosemary cuttings before repotting
Bronze-leaf begonia cuttings, awaiting potting
Golden sage and rosemary
Buddy dibbling the pots for planting
Allison, our seed master, seeding the first trays
Allison seeding trays
Kate potting up rosemary

By Sophia

Note: "Cuttings" are plants that can only be started from rooted stems. Instead of the plant producing seed and being propagated from a seed, plants that are 'vegetatively propagated'  (as it is called) are only true to type from the stem cuttings. In some cases, this means that they are cloned hybrids - a cross between two plants and they would revert back to looking like one of their parents if you planted the seed.  Another reason plants are propagated this way is because they are too slow to germinate and in our climate, they would be hard to establish. We buy in our rooted cuttings because making them ourselves would require heating a greenhouse all winter long and for now it is more efficient to buy in these beautiful cuttings from growers in Quebec and Massachusetts who specialize in this kind of greenhouse production. And just to be clear, this is old-fashioned plant breeding and propagating - these are not test tube babies or genetically modified organisms.

Gratitude

I woke up today feeling grateful and recharged with a blue sky blasting through the window and a full night of sleep behind me (the first in a while.) Here are a few pictures I took with the early morning sun casting a bittersweet glow on everything. What to make of that late fall look? Winter is coming, summer has produced all it can, and it is time to settle back and enjoy the dark days ahead. The dormant days ahead work for the seeds that need it in order to crack into life come spring - it can work for us too. It is a just fine time of year for sinking into the couch, making soups, catching up on reading, and over all feeling gratitude for the cycles of the seasons, the sweetness in the people around us. While the basement is full of jars of applesauce, tomatoes, jams, chutneys and pickles, I also try to keep a few things going in the garden as long as possible.

Like these .....

The straw keeps the soil from freezing around the leeks so that I can harvest them even in deep snow. The lettuce, arugula, cilantro and dill behind them will keep going a little while longer. I can cover them up with row cover, but most likely they will be eaten before I even need to do that. I will plant 2 or 3 times more next year so that I can have enough to take us through December.

I love this close up of dill with all of its fine texture.

Dill is one of the hardiest herbs to grow in cold weather and gives such brightness to late fall salads, potatoes, eggs, and fish. I use it quite a bit this time of year after pretty much ignoring it all summer long except for using it in a pickle jar or two or three.

I always bring in a few baskets of herbs. I don't do anything to them except cut them, pile them into a basket and leave them around the house. They smell great and love to go to work by the handful when I am making soups, broths and stocks. I don't think they object to being stuffed into a poultry cavity every now and then either. There is nothing like using herbs in big bunches of branches to feel like I am living a rich and luxurious life.

I want to say thanks to compost too.

Parts of the garden are ready for spring, and parts still have a ways to go, but there is so much satisfaction in seeing the raised beds awaiting next year. Soil building organisms busy making teeming, hot life. The ones who really get some of the credit for this are these lovelies......

Enjoy your next few days of rest if that is your luck and your lot. And thank you, deeply, for being a part of all this beauty and grace, coldness, sunshine, poop, and all.

The Garden in July, a Few Tips on Creating Micro-climates, and a Beach Picnic.

This summer, the weather has been garden perfect for many crops. All the heat lovers are thriving and the crops that like it cool and moist are doing well where they have been watered and are getting a little shade. I have a nice stone wall thanks to Charley of Queen City Soil and Stone, and the shady side of the wall is a perfect place for crops like celery, mid summer lettuce, artichokes, and boc choi. They benefit from the afternoon shade the wall creates. Additionally,  the moisture that builds up at the base of the wall from the terraced soil above it creates a perfect micro-climate within the garden. You can easily achieve this in any garden with strategic rock placement - not a full-fledged wall necessarily, but a few stones stacked up to retain moisture on a slope or to allow for  north-side shade in a fully exposed garden. Look around your garden for other mico-climates like tall plants that can be used to create shade for summer plantings of lettuce. Right now, I have lettuce planted in odd spots throughout the garden - under a  sunflower, at the base of the stone wall, and under some tomato plants.

The eggplant has been tremendous this year and last night, we had a great meal of marinated eggplant while sitting at the lake, scooping up piles of the salad with pieces of pita and a little feta. Here is the recipe. I used a combination of the Gretel and Machiaw eggplants (pictured above).

Marinated Eggplant adapted from smitten kitchen.com

  • 1 lb long, Asian eggplant, sliced 1/3 inch thick
  • 3 tbs olive oil, divided
  • salt and pepper to taste
  • 2 TBS red wine vinegar
  • 2 TBS capers, rinsed
  • 1/4 cup mint, finely chopped
  • 1/4 cup of feta, crumbled

Pre-heat oven to 400 degrees. Coat a cookie sheet with a layer of oil and layer the eggplant slices in a single layer.

Bake them until soft (about 20 minutes), turning once and drizzling with a little more olive oil about half way through.

Blend the vinegar, remaining olive oil, salt and pepper, capers, and mint together. Place eggplant into a bowl, drizzle with the dressing, and stir to combine. Let rest for at least a half hour or place in fridge (up to one day). When ready to eat, sprinkle with feta. Eat with flatbread, while sitting near a cool body of water.

Bay Laurel in Vermont

If you ask me what my favorite plant is in my garden I would tell you about my bay laurel tree.  Many folks are excited by the plants that add beauty to their surroundings.  Personally I love the plants that I can use in the kitchen and my bay tree adds value year round.  (The fact my favorite plant is a culinary herb would be no surprise if you follow my blog, Hippo Flambe). The difference between a leaf picked off my tree seconds before using it is far removed from the dry, dusty leaves in the spice section of your supermarket.  Plus my bay laurel has the added benefit of being easy to care for. It was a rather  inauspicious start to my bay laurel tree farming. I was given the tree by a friend who had decided to "euthanize" her tree. Her tree had developed a sticky residue on the leaves and she did not want to spend the time cleaning the leaves. In addition it had clearly outgrown its 23 inch pot and she had visions of it taking over her house. I immediately jumped at the chance to own my own bay laurel tree and told her not to kill it, I would adopt it instead.  When I arrived at her house one day in the pouring rain I stared at the giant tree and I began to wonder how well this was going to work out.  The first problem was how to get it in the back of my station wagon, even with the rear seats folded down it was far to big. So we went after the tree with clippers, ruthlessly cutting back every limb. In the end the tree had lost considerably more then 50% of its branches and I remembered the advice to never prune a tree back that far. I shrugged and figured what was the worst that could happen, even if it died the tree was free to me, I had nothing to lose.

That winter we kept the tree in an upstairs South facing window and miraculously it began growing new leaves almost right away. I did not give it any artificial light or fertilizer, we just opened the blind from 7 AM until it was dark.  The room it was in only gets passive heat from the other rooms, so the room temperature is often as low as 59 degrees.  The tree was severely pot bound as even in a 23 inch pot 1 qt of water would come rushing out the bottom almost immediately.  Every week it put out tiny new shoots and leaves and I began to take more leaves to cook with.  After using the leaves a few times I began to care more about my bay tree.

That spring we began to search for a larger pot. I was told at many locations that I could get a larger ceramic pot but not plastic. It had taken 2 of us to slowly inch the tree upstairs in a plastic pot, ceramic and its extra weight was clearly out. Finally one nursery suggested I try bonsai-ing the roots. She explained bonsai tress are removed from their pots and then pie shaped wedges are removed all the way around the root ball so more soil can be packed in and the tree can stay in a smaller pot.  So I bought some high quality soil and we hacked out 4 pie shaped wedges all the way around the root ball.  When I returned the tree to its pot I was amazed at how much water it could now hold.  After a few weeks of new growth it was clear the plant was much happier.

Taking care of my Bay Laurel tree is remarkably simple, especially as I am often a house plant slayer.  In the Fall, sometime in October, we bring the tree indoors. Once indoors we water sparingly about once a week, although I know there are stretches where we just forget.  In the spring we take the tree back outside, where it does not need watering unless there is a really extended dry spell. If you prune it a little in the spring it will produce new growth.  Use well drained, fertile soil.  I just recently applied some of my favorite tomato fertilizer to the soil. The next time it becomes pot bound I will again bonsai the roots. The sticky residue that my friend found on the leaves is caused by scale insects.  If this occurs just wash the leaves with an insecticidal soap and use your nail to scrape away any insect bodies on the leaves and stems. You can also spray with alcohol.  The sticky residue is not usually deadly to your tree but it will inhibit new growth.  Try to keep it in a humid area but do not over water.  Humid in Vermont in the winter is hard, just keep it out of drafts and away from the heating vents, misting them occasionally with water if you want.

The great thing about growing a bay laurel is you only want the leaves, which are the easiest part of a plant to maintain.  If I was starting over with a smaller tree I would not allow it to become as big as mine is, this would make it easier to bring it in and out of the house every year.  When cooking with it remember the fresh leaves are much stronger and more flavorful then dried. When a recipe calls for 2 leaves I only ever use 1. If I just want a slight bay flavor I use a smaller leaf.  One of my favorite uses for the leaves is to flavor a pot of red lentils. I just add one leaf to a pot of simmering red lentils with kosher salt and cook until the lentils are tender.  To serve I simply drain the lentils, drizzle with flavorful extra virgin olive oil and sprinkle with freshly ground pepper.

Butter Lettuce, I love you

Green butter lettuce has to be my all time favorite lettuce....perfect texture, a color that can only be described as translucent and pearly, and a delicate flavor that truly is butter-like. I eat it in all sorts of situations and for all sorts of meals. Breakfast is toast with a thin spread of butter, snipped chives, some shavings of cheddar and a pile of butter lettuce leaves. Lunch is butter lettuce with a white wine vinaigrette, a piece of bread, and maybe a little tuna with herbs. Dinner will always include a butter lettuce salad with lots of snipped chervil. Or perhaps some grilled flank steak with butter lettuce, cilantro, thai basil, shallots, and a little hot pepper drizzled with a light sesame dressing.

Late May and June are the butter lettuce weeks. I plant a four pack of the lettuce every week from mid- April through August and I am rewarded with huge, green and white pillow-like heads of tenderness.  Here is a blog recipe from David Leit, who also appreciates this delicacy.

He is recommending a blue cheese dressing, which will be great later in the summer, but for now I cannot get enough of the delicate flavor and taste, so I will stick to my lighter dressings.

A Few Weeks Later

Here are some more recent photos. The work is flowing smoothly, the plants are doing well, and the extra heat and sunshine of early March is really paying off with lots of lush green growth. If you are in the area, please feel free to come visit and get a dose of spring. We will be opening our retail greenhouse April 23rd (10 am to 6 pm everyday).

Green butter lettuce next to red oak lettuce.

We now have 2 greenhouses full and 2 that are partially full.

You can take a look at more photos by going here. Have a great week. More sunshine and warm temperatures are on their way!

We will begin deliveries to local stores this week, so keep a look out for some herbs and violas to bring a touch of spring to your life.

Bringing in Herbs for the Winter

Herbs are one of the key ingredients in summer cooking that make the food really stand out, but we don't have to stop once winter comes.  The key, in my mind, to things tasting good is to layer in flavors using various simple techniques.  Herbs are the fastest and simplest of those methods, other than say, adding salt.

We have had such a warm November that I am still clipping herbs right out of the garden and the herbs in pots are still doing well on the back porch.  I have also started to bring in herbs from the garden to dry them.  The simplest method is to cut whole branches of  the woody herbs such as thyme, sage, winter savory, and rosemary and tie them into bundles and hang them in a dark, well ventilated place.  I usually leave them hanging for a month or so, and then place all the bundles into a large basket lined with a clean dishcloth.  I use a large amount of herbs all winter, by the handful, in simmering stews, soups, under and over roasted meats, inside the cavity of roasted poultry, etc.  I just can't think of a simpler and more effective way to add depth to whatever is cooking.

The leafier herbs, such as basil, cilantro, parsley and chives can be frozen for year round use.  This is best done with the aid of a food processor.  I take handfuls of washed herbs (stems removed) and pulse them in the bowl of the processor until they are finely chopped. I then drizzle in a little olive oil while the machine runs. Once it all looks like a nice green mush, I scoop it all into freezer bags and shape it into a thin, flat layer before placing the bags (lying down) into the freezer.  This allows the herb puree to freeze in a thin sheet that can be broken into smaller pieces when you are ready to use it. This frozen herb puree is a great addition to soups, stews, sauces, roasted or steamed veggies, and salad dressings.  I simply toss in a chunk of the herb popsicle at the end of the cooking time of whatever I am making so that the fresh flavor really comes through.

You can also bring herbs inside in pots for the winter and place them near a sunny window.  I keep a few herbs in pots all summer just for this purpose, but you can dig up whole plants out of the garden and repot them with some good potting soil. These are nice herbs to use as garnish, or chopped into a fresh salad.  These are not the herbs I use by the handful, but when I want just a teaspoon of fresh, chopped herbs to add a final punch to a dish.  Some of the herbs that work well for bringing indoors are thyme, parsley, rosemary, sage, oregano and basil.  The sunnier the window, the better luck you will have. You can also use some grow lights on a timer for even better results.  It's best to water these indoor herbs about once a week, but since they are in a semi dormant stage, they don't need to stay as moist as they would in the summer. The herbs won't always look great, but they will always smell good and have enough flavor boosting powers to earn their keep.