autumn gardening

Privacy from the Traffic to the Secret City

I like to plant perennials and woody ornamentals in the fall for two reasons: one, I finally have the time to do it, and two, they benefit from the cooler temperatures and the rainy days.  Today, I am planting a privacy screen between our house and the noisy road we live on.  While it's still a country road, the traffic is such that we cannot simply tune it out. There are cars every few minutes, and they are going way too fast.   We've determined there is a secret city over the ridge and all these cars are in a terrible hurry to get there.

My privacy planting is mirroring one that I already planted on the other side of the walk way.... Nine bark - those are the tall burgundy shrubs (Physocarpus), sedums (Autumn Joy and Madrona), some ornanmental grasses, some fall pink asters, and some heuchera or coral bells (Purple Petticoats).  Underneath, I will stash a bunch of pale Pink Emperor tulips and a few white daffodils.  I love keeping color combinations harmonious season to season and this creates a nice range of pinks, deep reds and maroons.  The grasses fill in to give it a naturalistic look and it only takes about two years for everything to grow up enough to become an 8 foot screen. I will stick in a few kale and chard plants come spring for the mandatory (in my mind) edible component.  In an effort to practice Gardening Without Guilt, I grow very practical plantings that will always accomplish a few of my gardening goals -- easy maintenace (it's okay if there a few weeds in there since it all looks like it belongs), habitat for wildlife (the birds and pollinators love these groupings of plants), beauty (to my eye at least) and harmony with some lovely edible plants (in this case it will be chard, kale and a few herbs).  The closer to the house we plant edibles, the more we will eat them and tend to them.  And by using plants for a privacy screen, we are not seeing the cost of and avoiding the aesthetic impact of a tall fence.

Pokey and Rosy

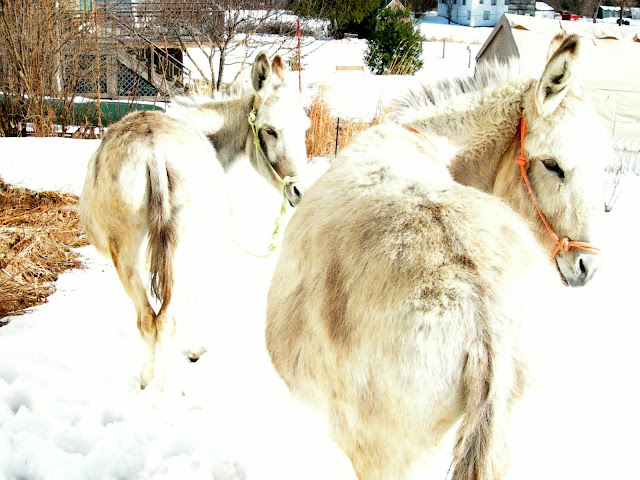
My plan is to add a few wheelbarrow loads of our compost, made from donkey manure (thanks to Pokey and Rosy, above), kitchen scraps, and garden debris.  Then I will work it all into the soil which was tilled up several weeks ago (and,no, I have not kept up with the weeding in the meantime).  The planting holes should be a couple of times bigger than the root ball of the plant, that way the soil can be loosened and worked up to create a welcoming home for newly spreading roots.  I don't add any fertilizer when planting in the fall because it encourages tender new growth that will not fare well in our frigid winters.

I like these types of plantings for the simple pleasure they provide as they grow up and the effect they have of anchoring the house into its place, making it more of a home and sheltering it from all those cars speeding off to their secret city.  I'll post a picture when I am finished.

Extra! Extra! 85 pounds of food from one plant.

Help!  Today has brought in a rainy September morning and a houseful of the ubiquitous butternut squash.   I just can't believe that one plant could produce 17 (!!!) giant squashes (85 pounds).   Some will go to the food shelf and some will go to friends (watch out). The truth is, I thought that I had planted delicata squash, which is my favorite, not butternut.  Whoops.  Soups, gratins, and stuffed squash will be on our table this fall and, thankfully, the squashes keep well into winter, but I am sure my people will be tired of eating butternut long before it runs out. Here is a recipe I love, and it will use up about 1/17th of my harvest....

Butternut, Cheddar and Sage Gratin

This needs only a green salad.  It's a hearty dish.

  • one peeled and cubed (1/2" or so) butternut squash
  • 1 TBS butter
  • 1 medium onion, roughly chopped
  • 1 clove of garlic minced or pressed
  • 1/4 cup of finely sliced, fresh sage leaves
  • a drizzle of olive oil
  • salt and pepper to taste
  • 1/4 c heavy cream
  • 6 oz grated cheddar cheese (I like sharp)

Preheat oven to 350.

Melt butter in a cast iron or other heavy skillet.  Over medium heat, add onion to melted butter and stir until it begins to soften (about 4 minutes). Add sage leaves and garlic.  Drizzle in some olive oil (about 1 or 2 TBS) and stir until fragrant and onions start to caramelize. (About 12 minutes)

Add squash to a butter or oiled 9 x 13" baking dish.  Toss in the onion and sage mixture, the cream, and salt and pepper to taste. Use your hands or utensils to get a good blend of all the ingredients.  Cover with foil and bake in preheated oven for about 40 minutes.  Take out the dish, remove the foil, turn up the oven to 450, cover squash with the cheddar cheese and return to oven until brown and bubbly, about another 20 to 30 minutes.  You can even turn on the broiler for a minute or two at the end to really make the top brown.

This freezes well.  It's great for potlucks and any other time you want to feed a crowd.

Planting the Perfect Pumpkin

We all want that giant, magical pumpkin come harvest time.  Here are a few tips to get you there.  Pumpkins are related to cucumbers, melons, summer squash, zucchini, and winter squashes and all of the vegetables in this family will benefit from this treatment. Warm soil. In Vermont wait until early June to put out the plants--a good rule of thumb is to wait until we have had a few nights above 50 F degrees. Transplants do better than seeds since you will have a head start on the season and don't risk having seeds rot in cold soil or be eaten by the local rodent.  It's best to keep two plants together when transplanting since the larger volume of foliage will help shade out weeds later in the season.

A raised bed or mound. This will help warm the soil and improve drainage.  It also gives the plants' shallow roots a place full or looser soil to spread without strain.

Lots of fertility. Compost is a  must for successful pumpkins, squashes, cucumbers and melons.  At home, we use rotted donkey manure (thanks to Pokey and Rosy) mixed with well composted yard debris (leaves, grass clippings) and food scraps.  More can be learned about compost at the Vermont Compost Company website.  A little granular fertilizer can be used as well if you do not have access to good compost and/or very poor soils.  A soil test is always a good idea, and can be done easily at your local extension office.

Adequate water. One inch a week.  That means that if it does not rain, you should gently pour about 3 gallons of water at the base of your plants.  A slow drip irrigation system or soaker hose is a great option as well.

Full sun. There is no compromise on this one.  The plants must have at least 8 to 10 hours of full sunlight.

Lots of room.  Plants (actually, groups of 2 plants) should be at least 3 feet apart. They need that much space for proper ventilation and so that the flowers and foliage are exposed to pollinators and sunlight.

Pollination. Plant a few bee friendly plants such as calendula, borage, mint and salvias around your garden to attract bees and other beneficial insects.  Cucurbit plants have male and female flowers on each plant and have to be pollinated by insects.  Welcoming bees to your garden will help yields since more female flowers will become pollinated--the only way for them to produce fruit.

Harvest at the right time. Winter squashes and pumpkins should be harvested when the skins are hard and cannot be pierced by your thumbnail.  Summer squashes and cucumbers and zucchini should be harvested at whatever stage you like to eat them, from baby to baseball bats.  Watermelons are harvested when the tendrils on either side of the attaching stem are dead and the yellow spot on the bottom of the fruit (where it rests on the ground) is a deep yellow, and when thunking the fruit with your knuckle produces a hollow sound.  Cantaloupes are ready when they slip off the vine with a gentle tug (called the "half slip stage").  Melons take a little trial and error to learn to harvest at the right time, but a good rule of thumb is "if in doubt, wait."

The Autumn Garden: Time to Gather and Restore

With these colder days also come a chance to produce a few more late season greens in the vegetable garden. These include lettuce, kale, parsley cilantro, arugula, mustard greens and spinach. Here is a simple system that can be followed by anyone wishing to extend the fall and winter harvest.

Don't Fear Frost! Extending Your Growing Season

Here in Vermont, we can count on just a few frost-free months. But with a little bit of planning, strategic planting, and getting the right tools, you can harvest through a bit of frost and snow. But by planning out crop planting so that crops are mature before the short days and cold weather hits, you can then protect them and harvest them well into winter.

Row covers such as reemay are usually used with hoops made of #9 gauge wire so that the fabric does not rest right on the plants. These covers breath and come in various weights. They allow light and water in, but raise the temperature of the soil and air inside the cover.

Cold frames are simple boxes that are filled with good quality soil and are covered with windows (called "lights") or clear plexiglass or sometimes plastic. They are used for season extension, plant protection, as mini-greenhouses, and as a place to overwinter tender perennials. The covers are closed at night and opened on sunny days. Lettuce, spinach, hardy greens, and herbs can be grown most of the winter in a hot bed with a south facing light. "Hot beds" are deep cold frames that hold a thick layer of manure below the soil. As the manure decomposes, it lets out a tremendous amount of heat which keeps the frame very warm at night even in the winter. Cold frames can be made out of wood, straw, stone, concrete with old storm windows on hinges. The windows must be small enough that they can be opened and closed easily by raising them up and propping them with a stick.

Straw mulch is a great way to extend the season for vegetables such as kale, spinach, carrots, beets and other root crops. Once the crops are matured, a very thick layer of straw around the base of the plants will keep the ground from freezing so that the roots may still be harvested. The straw also keeps the top of the crops from freezing in extreme temperatures. Spinach can be overwintered under straw so that an early spring crop can be eaten. Kale lasts well into winter and is also helped by a deep straw layer so that the cold wind does not completely dessicate the leaves.

Every home garden has microclimates. It is a good idea to take advantage of these when planning the fall garden. A south-facing foundation wall is a great place to prep a small area for greens and herbs that will be well sheltered from cold, northern winds. It's a good place to situate a cold frame as well and to plant it with radishes, greens, and other crops that will benefit from the micro climate.

Containers are another great way to extend the season. Herbs, greens and lettuces can be planted in pots, apple crates, milk crates, or window boxes and moved inside when the weather gets too cold. While they might not last all winter long, they will certainly give you some fresh eating for a few months longer...all you need is a sunny spot or some simple grow lights. Thyme, parsley, rosemary, and sage all do well in containers in the home and will last all winter. Kale and lettuce will last up to 5 or 6 weeks longer than they would outdoors.

Photograph by One Green Generation . Creative Commons license.