Photo Gallery

Enter at Your Own Risk: DIY Wedding Flowers. Part 1

Last summer, I must have helped at least half a dozen customers who were looking for some help in planting a garden specifically for home-grown wedding flowers. I often warn people that growing for a specific date is fairly technical and requires weekly plantings, regular harvesting all summer long to keep the plants blooming until the event, and most of all, a very flexible attitude. People who have a specific color scheme or variety in mind are not always good candidates for home grown wedding flowers since those types of flowers may be very hard to grow and getting the right color on the right day means planting about 10 times more than you think you will need in hopes that one of the plantings will be just perfect on the correct day. For those who are planning an event and are willing to look at the flowers as a fun and flexible component, then growing your own is a great option. I have listed below some varieties that are particularly well suite to a DIY flower program.  Full disclosure: I have talked about as many people out of growing their own wedding flowers as I have talked into doing it. It really is not a good fit for everyone, but for those who are willing and able, here is a little help to get you started....

ANNUALS

Verbena bonariensis - reliable and a lovely purple bloom with long wiry stems that hold up well to handling and mixing into all kinds of arrangements. Zinnias - come in all shapes and colors, are best suited for August or later. Require deadheading all summer long, but will branch out and be very productive once well established. Sunflowers - there are lots of sunflower varieties that are designed specifically for cut flowers. Some of our favorites are Giant Sungold Teddy Bear, Sunbright Supreme and Soraya. The only tricky thing is getting the timing just right. They only are perfect to harvest for about 10 days, after that their single blossoms start to drop their petals. Ageratum - blue,  can be tall if planted correctly - a little closer together. Needs deadheading all summer long if you are planning for a late summer or fall event. Very productive if well established and well taken care of. Agrostemma has a lovely, floating quality that gives a lot of life to mixed bouquets. It's airy and delicate, comes in purple or white and produces lots of good, long stems all summer long. Again, needs constant picking and deadheading to produce all summer long.

Ammi - this is a beautiful filler in mixed bouquets or in all-white arrangements. Easy to grow from transplants and produces, nice, tall stems.

Cosmos - come in a variety of textures and lengths, best suited for mid-August or later. While they are beautiful, they do take up a lot of room for not always a lot of stems.

Snapdragons - another multi-colored option or can also be grown as strains of single colors. We offer many options of snapdragons. The stems can sometimes be a little short, but with good fertility and 6" spacing, they will grow straight and tall.

Celosias - come in many shapes, sizes or colors. These are a hardy, easy to grow and more forgiving than others. And they can be dried for long-term keep sakes.

All of these annuals will give you a good place from which to start. Do-it-yourself flowers can always be supplemented with florist purchases the week of the event  if the budget allows it. We will cover more on home grown flowers in subsequent posts, so if this peaks your interest, please stay tuned. Part two will be about which perennials are easy to grow and use for cut flowers. Part Three will be about different tactics to make your cutting garden as prolific as possible.

Gratitude

I woke up today feeling grateful and recharged with a blue sky blasting through the window and a full night of sleep behind me (the first in a while.) Here are a few pictures I took with the early morning sun casting a bittersweet glow on everything. What to make of that late fall look? Winter is coming, summer has produced all it can, and it is time to settle back and enjoy the dark days ahead. The dormant days ahead work for the seeds that need it in order to crack into life come spring - it can work for us too. It is a just fine time of year for sinking into the couch, making soups, catching up on reading, and over all feeling gratitude for the cycles of the seasons, the sweetness in the people around us. While the basement is full of jars of applesauce, tomatoes, jams, chutneys and pickles, I also try to keep a few things going in the garden as long as possible.
Like these .....

The straw keeps the soil from freezing around the leeks so that I can harvest them even in deep snow. The lettuce, arugula, cilantro and dill behind them will keep going a little while longer. I can cover them up with row cover, but most likely they will be eaten before I even need to do that. I will plant 2 or 3 times more next year so that I can have enough to take us through December.

I love this close up of dill with all of its fine texture.

Dill is one of the hardiest herbs to grow in cold weather and gives such brightness to late fall salads, potatoes, eggs, and fish. I use it quite a bit this time of year after pretty much ignoring it all summer long except for using it in a pickle jar or two or three.

I always bring in a few baskets of herbs. I don't do anything to them except cut them, pile them into a basket and leave them around the house. They smell great and love to go to work by the handful when I am making soups, broths and stocks. I don't think they object to being stuffed into a poultry cavity every now and then either. There is nothing like using herbs in big bunches of branches to feel like I am living a rich and luxurious life.

I want to say thanks to compost too.

Parts of the garden are ready for spring, and parts still have a ways to go, but there is so much satisfaction in seeing the raised beds awaiting next year. Soil building organisms busy making teeming, hot life. The ones who really get some of the credit for this are these lovelies......

Enjoy your next few days of rest if that is your luck and your lot. And thank you, deeply, for being a part of all this beauty and grace, coldness, sunshine, poop, and all.

Fresh Start

We are busy preparing for the 2011 season and this includes counting everything in sight such as seeds, pots, trays, tags, and signs as well as ordering seeds, cutttings, pots, trays, tags, soil, and anything else we may need to make everything tick. But the most exciting preparation is the new grading and gravel in the greenhouses. When we first built the greenhouses 6 years ago, we had to cut some corners (that money thing, you know) and it meant that we did not spread and compact gravel before building the greenhouses. Well, over time, the native clay sunk and became a wet, weedy mess which unfortunately can harbor pathogens and pests. This fall, Linda Gionti of Gionti Stone Works, and Parker Excavation have been working together to bring us brand new, beautiful gravel floors which we are covering with brand new landscape fabric. This will keep weeds down and create a clean surface that can be swept and kept clean. It feels just great to have such team work (thanks to Eric, Jonathan, Allison and Buddy) hauling everything out of the houses and then setting it all back up again. Here are a few photos to give you a taste of the job.

It's kind of like getting a spa treatment for the buildings.

The Very Fragrance

Hope Johnson, whom many of you know from our retail greenhouse, brought me this plant this summer, while muttering something about "bringing coals to Newcastle" and said it was a red morning glory she had started from seed.....well here it, a few months later, and just a beautiful morning riser. It only opens for a short while, maybe if it had been planted with mroe of a south eastern exposure it would stay open longer, but I just love it. It is a dark pink, not a true red (this often happens with flower color description), and the flowers are about the size of a silver dollar. Should we grow and sell this next year?

These Kennebecs have provided me with the most satisfying harvest of my potato growing life. They were planted in the best soil in my garden, the site of an compost pile, and I did not even hill them. They were virtually maintenance free save for some periodic weeding.

This corn was transplanted in late July from seeds that had been started in mid-July. I somehow did not make time for corn any earlier this year. As Elise and I transplanted, I kept wishing for some October corn and a warm fall. Well wishes do come true: while the ears are not terribly big, the flavor is sweet and the texture is just right. This has been going into a fabulous corn salsa recipe I have been canning.

This makes it all worth the toil. I heard this line from a Rilke poem yesterday:

Is not impermanence the very fragrance of this world?

A good thought for autumnal transitions.

On Vacations and Onions

Last week, I came back from our ocean vacation, the one during which I  tried not to think about the garden for a week. This was preceded by some fast and furious hours hoeing, weeding, mulching, watering and generally preparing all plants for a week of neglect. Everyone survived, tomatoes are in high production mode, spitting out ripe orbs faster than I can use them; and the peppers and eggplant are jumping into harvest baskets, big and ripe. Potatoes are ready to be dug, garlic is cured after a couple of weeks hanging from the barn rafters. Onions are next on the harvest and cure list. I never seem to have enough onions to last through the winter even though I plant so many of them each spring. I think the culprit this year was poor bed preparation prior to planting. I try to get onions in as soon as possible in April, the same time that coincides with peak greenhouse production and growing wholesale orders. So yes, once again, the onions are on the small side because we planted them into some soil that was a little compacted and not rich enough in composted donkey manure.  What do I love most about gardening? Being able to say, "there is always next year."

Onions: harvest the onions by pulling up the whole plant once the tops die back and start to lie on the ground. It's best to pull them up on a sunny, breezy day so that they can spend a few hours drying in the sunshine and wind. Before night falls, on that same day, bring them inside, out of direct sunlight so that they may cure for a few weeks. The curing process is what turns the outside layer of the onion into the paper-like skin. This outer layer, when dried properly, is what gives onions their real staying power as a storage crop. It is best to place onions in an airy, dark place - a garage with airflow but no direct light, an attic with air circulation, a shed, or even an extra bedroom with the curtains drawn and the windows open. You can braid the onion tops, bundle them into bunches and hang them up from the ceiling or rafters. You can also leave them in a single layer on the floor, but they must be turned over at least once a week. Once the tops are completely dried and the outer layer is paper-like, you can pull off the tops and store the onions in baskets, brown paper bags (with slits cut for ventilation), milk crates, apple crates, or cardboard boxes. Again, the important thing is to make sure the onions are in a dark place and it is well ventilated. Basements are often too humid for onion storage. In the winter, onions can go down to the low thirties and be fine. Colder temperatures better for onion storage than warmth with the ideal storage temperature being 35 to 45 degrees F.

The Garden in July, a Few Tips on Creating Micro-climates, and a Beach Picnic.

This summer, the weather has been garden perfect for many crops. All the heat lovers are thriving and the crops that like it cool and moist are doing well where they have been watered and are getting a little shade. I have a nice stone wall thanks to Charley of Queen City Soil and Stone, and the shady side of the wall is a perfect place for crops like celery, mid summer lettuce, artichokes, and boc choi. They benefit from the afternoon shade the wall creates. Additionally,  the moisture that builds up at the base of the wall from the terraced soil above it creates a perfect micro-climate within the garden. You can easily achieve this in any garden with strategic rock placement - not a full-fledged wall necessarily, but a few stones stacked up to retain moisture on a slope or to allow for  north-side shade in a fully exposed garden. Look around your garden for other mico-climates like tall plants that can be used to create shade for summer plantings of lettuce. Right now, I have lettuce planted in odd spots throughout the garden - under a  sunflower, at the base of the stone wall, and under some tomato plants.

The eggplant has been tremendous this year and last night, we had a great meal of marinated eggplant while sitting at the lake, scooping up piles of the salad with pieces of pita and a little feta. Here is the recipe. I used a combination of the Gretel and Machiaw eggplants (pictured above).

Marinated Eggplant adapted from smitten kitchen.com

  • 1 lb long, Asian eggplant, sliced 1/3 inch thick
  • 3 tbs olive oil, divided
  • salt and pepper to taste
  • 2 TBS red wine vinegar
  • 2 TBS capers, rinsed
  • 1/4 cup mint, finely chopped
  • 1/4 cup of feta, crumbled

Pre-heat oven to 400 degrees. Coat a cookie sheet with a layer of oil and layer the eggplant slices in a single layer.

Bake them until soft (about 20 minutes), turning once and drizzling with a little more olive oil about half way through.

Blend the vinegar, remaining olive oil, salt and pepper, capers, and mint together. Place eggplant into a bowl, drizzle with the dressing, and stir to combine. Let rest for at least a half hour or place in fridge (up to one day). When ready to eat, sprinkle with feta. Eat with flatbread, while sitting near a cool body of water.

Meet RWP's Allison

Allison Lea is one of the terrific staffers at RWP.  And not only is she a master of plant production here, but she's also a gardener and home herbalist in her own right. This weekend she'll be offering a workshop at which she'll share techniques for making lip balms, infused oils for health and beauty, and nourishing skin salves.   By way of introducing her, we asked her to send along some photos from her own Addison County garden.

yarrow
yarrow
IMG_2826
IMG_2826
IMG_2815
IMG_2815
IMG_1465
IMG_1465

Hollyhock close-up

IMG_2836
IMG_2836

Lemon Thyme

There are still a couple of spaces in her Saturday, June 26 "Gifts from the Garden: Herbal Body Care"  workshop.  The cost is $25 per person, and you'll leave with a selection of the the goods you'll learn to create ... and some hands-on practice making gifts from your own garden.  Give us a call at 802-482-4060 to register.

Butter Lettuce, I love you

Green butter lettuce has to be my all time favorite lettuce....perfect texture, a color that can only be described as translucent and pearly, and a delicate flavor that truly is butter-like. I eat it in all sorts of situations and for all sorts of meals. Breakfast is toast with a thin spread of butter, snipped chives, some shavings of cheddar and a pile of butter lettuce leaves. Lunch is butter lettuce with a white wine vinaigrette, a piece of bread, and maybe a little tuna with herbs. Dinner will always include a butter lettuce salad with lots of snipped chervil. Or perhaps some grilled flank steak with butter lettuce, cilantro, thai basil, shallots, and a little hot pepper drizzled with a light sesame dressing.

Late May and June are the butter lettuce weeks. I plant a four pack of the lettuce every week from mid- April through August and I am rewarded with huge, green and white pillow-like heads of tenderness.  Here is a blog recipe from David Leit, who also appreciates this delicacy.

He is recommending a blue cheese dressing, which will be great later in the summer, but for now I cannot get enough of the delicate flavor and taste, so I will stick to my lighter dressings.

Sweet Potatoes in a Customer's Garden

We had some very innovative customers today who showed us photos of their garden, including some homemade containers for sweet potato vines. Here are the photos. Take a look and please know that we love to see what you are up to!  There is so much to learn from each other....

You can follow their whole process by seeing the pbotos and reading the caption in this photo album. Inspiring and informative!

What's Happening This Week in the Greenhouses

I have been spending more time in the retail greenhouse this week and I am just awed by the beauty of some of the flowers. Here are a few photos to get you in the mood too. Delicate folds and perfect gradations of pigment make for some intricate and dazzling begonias: Here is a dahlia that I am in love with:

These orange miniature roses are incredibly sweet near a stone wall or in patio conatiners:

And we have a full array of hot peppers now including:

And....

These Vanilla Marigolds are pretty special as well - very tall, upright and a creamy delicious....

Sweet Potatoes are Coming!

Cheryl says: I spent the Memorial Day weekend gathering containers, amending soil, watering, and otherwise getting my garden planted.

And now, with a few days of rain my plants are looking fabulous and happy, while I'm on a second mad search for containers so I can take advantage of the Sweet Potato Slip Sale this weekend.

A few of the things looking especially terrific right now:

garden skinny pancake 004

Apparently a deer thought so too:

garden skinny pancake 014

The Cherry Bomb pepper was full of flowers and now is setting fruit:

garden skinny pancake 008

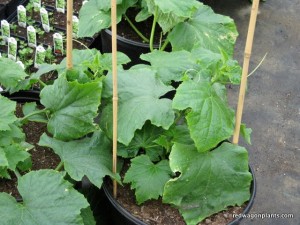
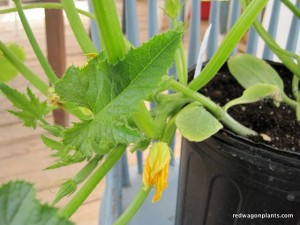
And the okra and pickling cucumbers are settling beautifully into their hanging bags.  I'm excited for when they start to vine.  The cucumbers are about to flower:

garden skinny pancake 011

My next project is to get myself 4 containers and a bunch of Fort Vee for sweet potato culture, consulting thesetwo Julie-approved links.   More to come.

Garden Tips: Tomato Planting

Now that tomato planting weather is upon us, I want to write a little about some questions we often receive from customers. One of them is "When can I plant tomatoes?"

Tomatoes are best planted when the soil is warm (night time temperatures are 50F or above) and all danger of frost has gone by. In Burlington that is generally the end of May or the first week in June.  The best planting method for tomatoes involves digging a shallow trench and laying them in it. You can break off the leaves on the bottom 2/3 of the plant and bury the whole stem horizontally in the warm top layer of soil. The buried stem will turn into a huge and healthy root system. The top of the plant is gently bent upwards and soil is patted around the base.  Tomatoes must be trellised for best results; it keeps the plant healthy, off the ground, and the fruit stays clean.

Here are some photos of a tomato planting that happened recently in our display garden:

The language that describes tomato plants can be a little confusing. Here are a few tomato terms explained: Hybrid - a tomato that is a cross between two different types of tomatoes. Seeds from these tomatoes will not grow out true to type, but will revert back to one of the parent tomato varieties. Hybrids are not genetically modified, they are just a simple cross between two types. For example, one tomato with good disease resistance is crossed with another variety that is known for good flavor in hopes of producing a healthy yet tasty tomato. Some of our favorite hybrids are Big Beef and Early Girl. Open Pollinated - a tomato that is the product of two parents that are the same variety. The seeds from these tomatoes will be true to type. All of our "heirloom" tomatoes are open pollinated and the seeds could be saved from those fruit. Heirloom - a variety with a story. These are plants which have been handed down, brought to the new world in various ways, found in distant parts, or in your neighbors back yard. These are all open pollinated. Heirloom is not a botanical terms, it just means that it is an older variety with a lot of flavor or other appealing characteristic like color of shape. Sometimes heirlooms are less disease resistant than hybrids, but they make up for it with flavor. Heirlooms are sought after by home gardeners since those types of tomatoes are not found in conventional grocery stores. Around here they are easily purchased at farmers markets, but it is always nice to eat something harvested just seconds ago from your own garden. Determinate - a tomato that only grows to a certain height and then all of the fruit ripen at once and then the plant dies. This is a good option for people who can or freeze tomatoes so that they will have a big batch ready to use all at once. Some of our favorite determinate tomatoes are Glacier (which is also an heirloom and very early to boot) and Celebrity. Indeterminate - a tomato that grows and grows, with the fruit ripening in various stages. The plant grows until it is killed by frost or disease. In a warm climate these plants would grow into woody vines.  Most of the tomatoes we grow are indeterminate. They require staking or cages, and there are many different methods for doing so. I've seen hockey sticks used in community gardens in Montreal!  Concrete reinforcement wire can be cut into 6 foot sections and bent into a tube shape - this makes once of the strongest and largest cages possible. There are lots of great trellising and caging systems available at Gardeners' Supply Company and your local hardware store will have simple wooden stakes and twine. Professional vegetable growers oftenuse a method called "bakset weaving" which is simple, efficient and affordable.  Here is a description from the University of New Hampshire Extension Service:

•Remove suckers (new shoots that develop in the leaf axils) before they reach an inch in length. • Leave the first sucker that grows below the first flower cluster, removing all others below the first flower cluster; allow suckers above first flower cluster to grow. • Pinch off tops once plants reach a few inches above stake. • Use 4 ft. sturdy wooden stakes, with double stakes at end of each row for strength. • Set stakes six inches deep, one stake for every two plants, as soon as seedlings are transplanted. • Begin supporting tomato seedlings after they have set the first flower clusters. • Tie sturdy, untreated twine at one end of row, about 18” up from soil level. Weave twine between tomato plants, wrapping twice around each stake down the row. After reaching the end- stakes, weave twine back up the row in the opposite direction, alternating with the weave-pattern of the first strand so each plant stem is encircled by twine. • As plants grow, weave another layer of twine every 6-8 inches to keep plants well supported. Four layers of twine will support most varieties.

Hope this information helps, and as always feel free to stop by our greenhouses where our staff can always talk to your about your tomato growing concerns. Happy gardening!

This Might Be One of the Most Dramatic Skies I have Seen

Here is what it looked like at the greenhouses a couple of days ago. We really have had some kind of weather lately!

Plants are growing well in spite of the crazy weather. Out in the garden, we are planting broccoli, lettuce, kales, cabbages, onions, fennel, escarole, spinach, peas, beets, and carrots. Come by and see what the crew has been up to - the plants look really gorgeous and are ready to make your yard smile!

Plants for Mom

We just have the most amazing and beautiful plants for Mother's Day, which you know is coming right up on May 9.  (That's next weekend if you can believe it.) Though pictures hardly do them justice, here are a few to tempt you.

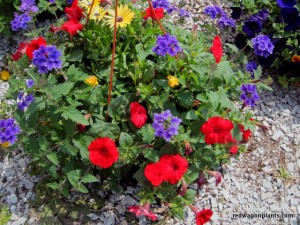
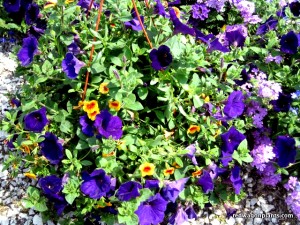
How about hanging baskets filled with outrageous color?

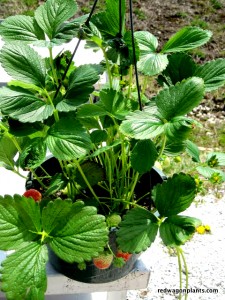
Or maybe something edible like an ever-bearing strawberry ...

... or trellised cucumber

... or gorgeous zucchini?

A hanging pot, some Vermont Compost Company Compost Plus, and your mom will have beautiful and productive plants all season long.  (Quantities are extremely limited, so make sure to get out here early before we sell out!)

Plants in the Ground

There are a few things I (Cheryl) must reiterate about my garden life. 1.  Curiosity yes.  Skills no.

2.  Everything in the garden takes me twice as long as normal people because I'm so easily distracted.

3.  I can never, ever seem to come home with enough mulch.

4.  I should not be trusted with plants who have needs that are in any way complicated.

Which is why the blueberries I planted two years ago are still these pathetic runts:

garden 002
garden 002

And why I should have resisted when Julie gave me a cardoon and an artichoke plant, which are sort of greedy plants that like lots of room and nutrients and water and stuff.

garden 003
garden 003

But I went out to the greenhouse this week and came back laden with lettuce, frisee, fennel, cilantro, broccoli raab, mustard greens,chervil, and gorgeous pansies for my more-shady eastern bed.  Julie had helped me pick these because they fit with my edible garden theme, are somewhat shade tolerant, and many are from the botanical family that's especially attractive to beneficial insects (as well as being the preferred food of the caterpillar that turns into the swallowtail butterfly - very pretty).

So I got the bed ready in the laziest possible way.  I did a fairly uninspired job of weeding, then spread mulch over as far as I could.  (Having, as usual, bought much less mulch than I needed, I could only go so far.)  With the lettuces and herbs, I put some compost in the small holes I dug in the soil.  But there was a foggy memory in a dusty corner of my brain telling me that overly fertile soil can discourage flower formation so I didn't add the compost boost to the pansies' spots.

garden 004
garden 004

Julie adds:

A gentle word on mulch.  In general, instead of bark mulch, which doesn't add anything to the soil, I'd recommend a good compost that is free of weed seeds or a product like VT Compost Company’s Perennial Blend. It is a mixture of compost and potting soil and peat moss and will create a weed barrier while adding nutrients at the same time. If a weed seed is under the compost blend, it won’t see the light of day, and in theory will not germinate.

Alternately,  I am a big believer in hoeing or using a tool to scratch up the soil surface every now and then, before the weeds germinate. I know it can be hard to fit in, but it can be kind of meditative, quick and not at all like weeding. Really.  Around food crops, it’s always best to assume you will have to do some handwork since there are no perfect and total mulch options. Close spacing, planting in rows and mulching paths works well in a more traditional plot; but in a situation like yours, where you are doing edible landscaping and not going for straight rows, weeding is inevitable.

Scratching up the soil surface before you even see the weeds is the simplest, input and money-free solution.  But if you want to invest in your gardening future, I think your beds could really benefit from the Perennial blend. For about $30 you could cover that whole eastern bed with a thin layer. That method is called “top dressing.”

Oh yeah, now that you have the mulch down, say three Hail Mary’s and come back to talk to me in a few weeks.

While I still had a ton of greens left to fit in, I went back to the greenhouse for today's grand opening and came home with some stunning annuals and very pretty perennials, as well as the most adorable basil I've ever seen.  Tomorrow morning, more mulch goes down, the rest of the plants go in.  And I now have to consider what to do with the additional bags of mulch that I bought.

red wagon grand opening 006

Raised Beds

by Julie

My home garden is often neglected. There are a few reasons for that - 1.) I am way too busy in the spring and don't have the time, and 2.) I would rather go swimming in the summer than weed. Yes, it's true. Our Vermont summers are so short, that I often make choices that don't benefit the garden come August. So in the early spring, before I get too too busy at Red Wagon, I try to make gardening choices that will entail less work come summer and get the plants off to a really good start so that they are strong enough to handle my abuse and neglect later in the season.

This year, the Red Wagon crew came over and installed some great raised beds in the back yard. My regular garden is quite shady because of some neighboring trees (not mine or I would cut them down!) so I decided to put in some raised beds in the overgrown meadow behind the house and hopefully this will help me tame the wild. It's a sloping, wet mess with a huge forest of Japanese Knotweed trying to take over everything in its path. I have dug a trench around the knotweed and Elise covered a 20 x 20' patch of it with black plastic that my neighbor, Paul,  gave me (I think he is worried it will spread to his yard, I would be too if I were him). Hopefully the combination of black-out and containment will slow it down.

About half way through the installation, the raised beds look like this:

We filled the raised beds with leaves, composted donkey manure and a thick layer of compost from Red Wagon Plants, which is mainly potting soil from years past that was given to us by the plants that did not sell. It's a great fill for raised beds, and not readily available to home gardeners, but I would recommend a mixture of top soil and compost. In the first year of a raised bed, the bottom layer can be some rough organic matter such as leaves, lawn clippings, etc. Just make sure that there is a good amount of the actual planting medium (at least 8").

I used a thick layer of cardboard and burlap coffee bags under everything to smother out the grass.

Here are the finished beds:

Our workshop on April 17th will be all about raised bed gardening with special guests Markey Read and Tim King. Please call us or email us to register. ..... 802 482 4060 or julieATredwagonplants.com.

A Few Weeks Later

Here are some more recent photos. The work is flowing smoothly, the plants are doing well, and the extra heat and sunshine of early March is really paying off with lots of lush green growth. If you are in the area, please feel free to come visit and get a dose of spring. We will be opening our retail greenhouse April 23rd (10 am to 6 pm everyday).

Green butter lettuce next to red oak lettuce.

We now have 2 greenhouses full and 2 that are partially full.

You can take a look at more photos by going here. Have a great week. More sunshine and warm temperatures are on their way!

We will begin deliveries to local stores this week, so keep a look out for some herbs and violas to bring a touch of spring to your life.

Spring's Slow Awakening

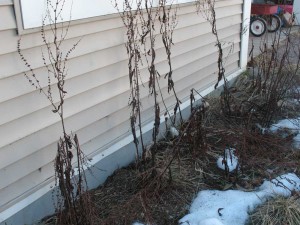
Inspired by Julie's visit and emboldened by the sunshine, I went out to clear away some of the mess from last year.  I was rewarded with a peek at what's coming up ... just in time for a cold snap this weekend.

3-20-10 Dakin Bfast 001

There was the wintergreen, staying as bright as it's supposed to.

3-20-10 Dakin Bfast 002

The first shoots of the soon-to-be inedible sorrel I mentioned last week.  I'm planning to harvest its first leaves for salad before I pull it out to replace with currant bushes.

3-20-10 Dakin Bfast 006

Oh, and look - some perky German thyme from RWP last year.  This is making a roast chicken more and more likely this weekend.

And as I was looking at the bare dirt, I had the sudden thought that I have no idea what is going on with it.  Julie, should I get it tested?  What should I do next to prep it?

Getting a Garden Started with Red Wagon Plants

Oh, my garden is perfect in March - all imagined blue blossoms and bursting red tomatoes and lush with shiny leaves.  I can picture it so well in these days before reality has arrived.  But still, I'm excited for the real thing, the dramas and surprises and smells and harvest.  And I'm looking forward to sharing my amateur garden adventures here on the Red Wagon Plants blog this season. I'm a Burlington mom, an enthusiastic though not terribly skilled gardener, food-lover, fund-raiser and marketer.  I blog about my parenting and food adventures over at crankycakes.com, and Julie's asked me to write about real life with Red Wagon plants through the growing season.  Last week she came over to talk about our plans, and we took a stroll around my Burlington condo, looking at the remnants of last year's garden that haven't yet been cleaned and gotten ready for the season.  It isn't pretty, but there's all that March imagination - and there was Julie with her excitement and amazing knowledge.

opt-legs-shadow

We talked about my goals, and looked at the space.  Within a general theme of edible landscaping, I want to grow:

  • Beautiful plants that we can enjoy through the season.
  • More of the things I never get enough of through our CSA share (especially tomatoes).
  • Plants that will help with my gift-giving for the holidays.  Last year I made some crazy nasturtium liqueur and I want to do more with cordials from the garden.  Plus I'm aspiring to make hot sauce to share.

I showed Julie my challenging spots - the north-facing edge that faces our neighbors' units where I grew red-veined sorrel last year (pretty leaves, but unwieldy and inedible).  Julie suggested currants, which will tolerate lots of shade, plus give us flowers and fruit.

opt-north

We looked at the north-east corner where I don't have anything except one gooseberry bush planted.  Julie wondered about making this shady spot a garden for pollinators - bees, birds and butterflies.  She pulled out her laptop and pulled up a long list of plants that could be in the shade.  We agreed on:

The longest side of my house faces east, which means a short day of direct light.  Last year, I had grown leeks (never got bigger than scallions), chard, kale, and other greens there, along with a big patch of nasturtiums.  After talking about what I wanted, we settled on:

  • Rhubarb (I've been interested in rhubarb for a while but because I have young children, I've been scared of the leaves that I had always heard were terribly toxic.  Last year I learned that it would take 10 lbs. of leaves to reach actual lethal levels, so I now can relax and allow it in the garden.)
  • Cilantro
  • Parsley
  • Dill
  • Bronze fennel
  • Bulb fennel
  • Chives
  • Chervil
  • Meadow rue

We walked around to the south, where we talked about taking advantage of the heat and light and growing pots of tomatoes and vines along a south-west wall, and putting in a container with:

opt-south-wall

So our plans are big, and the plants are growing.  Can't wait to get started.

Cuba

I recently took a trip to the city of Havana, Cuba with the hope of seeing some of the urban agriculture I had heard so much about. First a little background: the Cuban economy was sent into a complete crisis when the Soviet system collapsed and they lost access to a major trading partner. All exports and imports ground to a screeching halt and Cubans entered what they call the "Special Period." It was during this time that Cuban agriculture shifted from an industrial, chemical intensive model to a more diversified, small scale and organic model. The learning curve was steep out of sheer necessity and now Cuba can show examples of organic agriculture at its best, in spite of the ongoing US embargo. Under the Castro system, Cuban farmers may produce some of their own crops to sell at farmers' markets; this makes farmers one of the few groups that are able to have their own small enterprise since most businesses in Cuba are owned by the government. I was extremely lucky to be able to visit the famous Alamar Organiponico in Havana. This is one of the most innovative, organic vegetable farms I have ever seen and seems to have incredible high yields off of a relatively small parcel of land (roughly 20 acres). The Alamar Organiponico is a Basic Unit of Production, which in Cuban terms means that the land is owned by the government but the produce and its proceeds are owned by the workers who work cooperatively and share the profit. With the help of translator and friend, Majel Reyes, I met with the director of the Organiponico, Miguel Salcines Lopez. He explained to us that when agriculture in Cuba was industrial and monocrop systems only, with high levels of mechanization, many rural people left the countryside because their labor had been replaced by machines and subsistence agriculture was no longer possible. This great influx into the cities made for a new cultural outlook that disdained agrarian life. Part of the importance of the Alamar project is to create a type of agriculture that is human scaled and rewarding on all levels: financial, physical and spiritual. He believes strongly that if the people do not find meaning and beauty in their work, then the plants and crops will suffer.

Miguel Salcines, director of the Alamar Organiponico

Mr. Salcines was trained as an agronomist and worked for the government in a bureaucratic job for most of his career but said his soul woke up once he was able to work on the organiponico. His joy and enthusiasm seemed contagious. The farm consists of greenhouses, screenhouses, tropical ornamental plant nurseries, small scale forage crops, composting facility, vermiculture facility, a cafe, a farmstand, and a value added facility. Every crop we saw was a healthy bursting splash of green. Most crops are grown in raised beds with four rotations per year. Since the land is farmed so intensively, soil rejuvenation is constantly in motion with the addition of worm castings, compost, and soil innoculated with  mychorrizal fungi (a beneficial fungus which is produced on site).

Vermiculture at Alamar
California Red Wrigglers
Mychorrizal Fungi production. Plants are grown in cement bunkers, soil is innoculated with benefical spores, root systmes of plants host the fungi, plants are cut down, and fungi multiplies on root systems in soil.

All of their field transplants are grown on site and their potting soil is mixed on site. It is made up of rice hulls, worm castings, and compost.

Potting soil in dump wagon
Dumped out
Potting soil for seed starting
A really healthy root system
Seedlings growing out before being transplanted
Tomatoes, young and trellised
Carrots
Lettuce and herbs
Lettuce, herbs, a pole barn under construction, and housing complex

As you can see, plant spacing is very tight, but because of careful crop rotation, use of beneficial insects, and attention to soil health, disease and insect pressure is at a minimum. I was surprised to see that crops showed no sign of disease or stress in spite of the tight spacing and lack of air circulation between plants.

There are more photos available here. I encourage everyone to consider the possibility of going to Cuba. Americans can go legally under a general license if they are conducting research pertaining to their profession. Seeing a country where the people are at once poor yet highly educated with access to all kinds of arts and culture is a truly illuminating experience. The warmth and intelligence of all the Cubans we met was a life changing experience and one that I hope to repeat.  Cuba libre!