0
items
$0
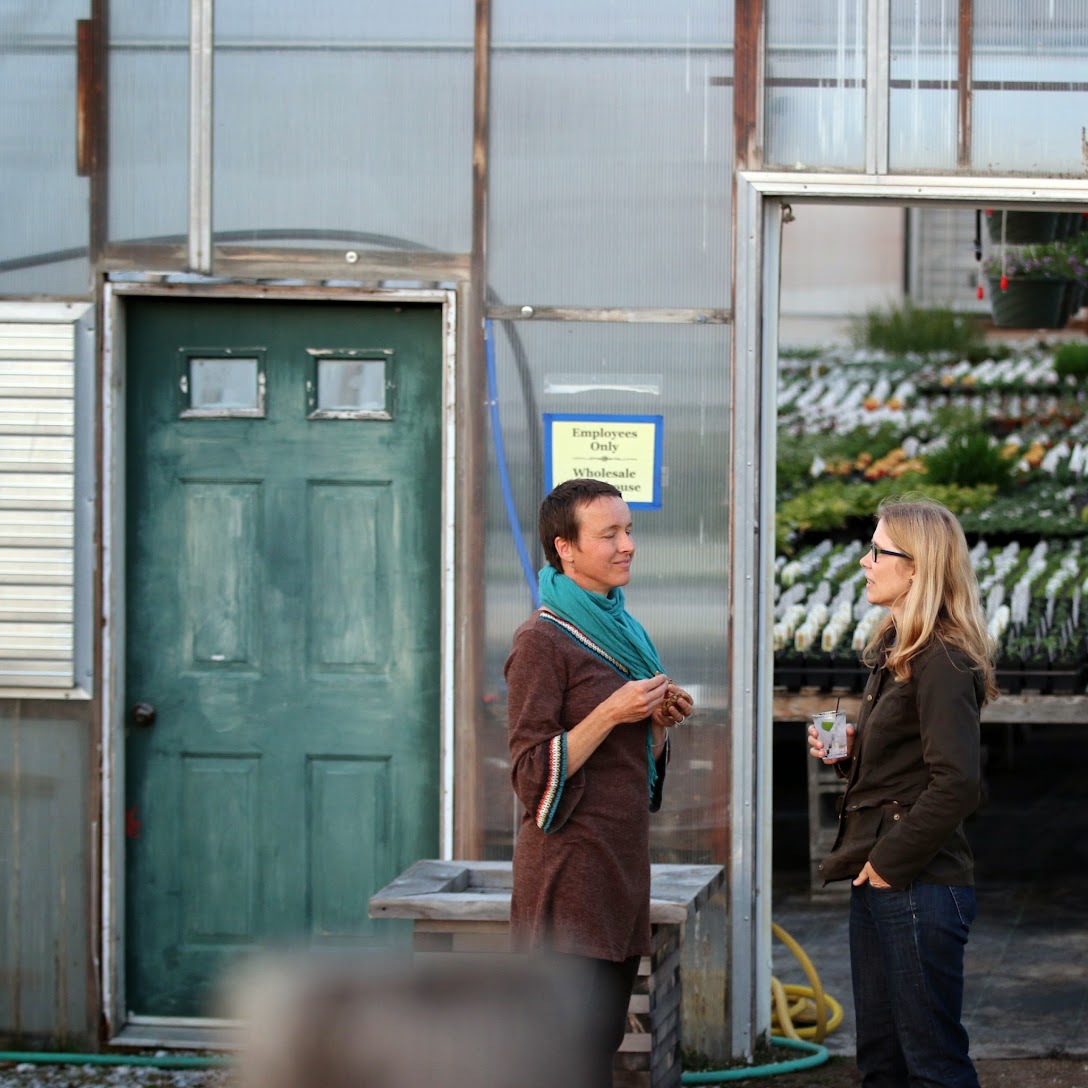
Opening Day Cocktail Party and Team Red Wagon Photo 2015


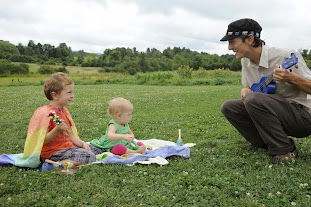
With vacation week just around the corner, we're excited to invite children to the greenhouses on Earth Day, April 22, for a free children's concert and fun activities from 9 AM to 1 PM.
At 11 AM, beloved local musician Mister Chris will perform, debuting songs from his newly-released album Family Archive, and featuring old favorites, too.
Check out his music at www.musicforsprouts.com and https://soundcloud.com/musicforsprouts.
Other activities include: make-your-own herb butter at 9:30, a greenhouse tour at 10:00 and a tour of Family Cow Farmstand at noon to meet the newly born calves. And children can paint-and-plant a pot throughout the event. We have lots of adorable pansies for them to pick out.
For more information, visit
or email heather@redwagonplants.com.
We're looking forward to this fun-filled event! The sandbox is filled and the greenhouses are full of color.....come explore.

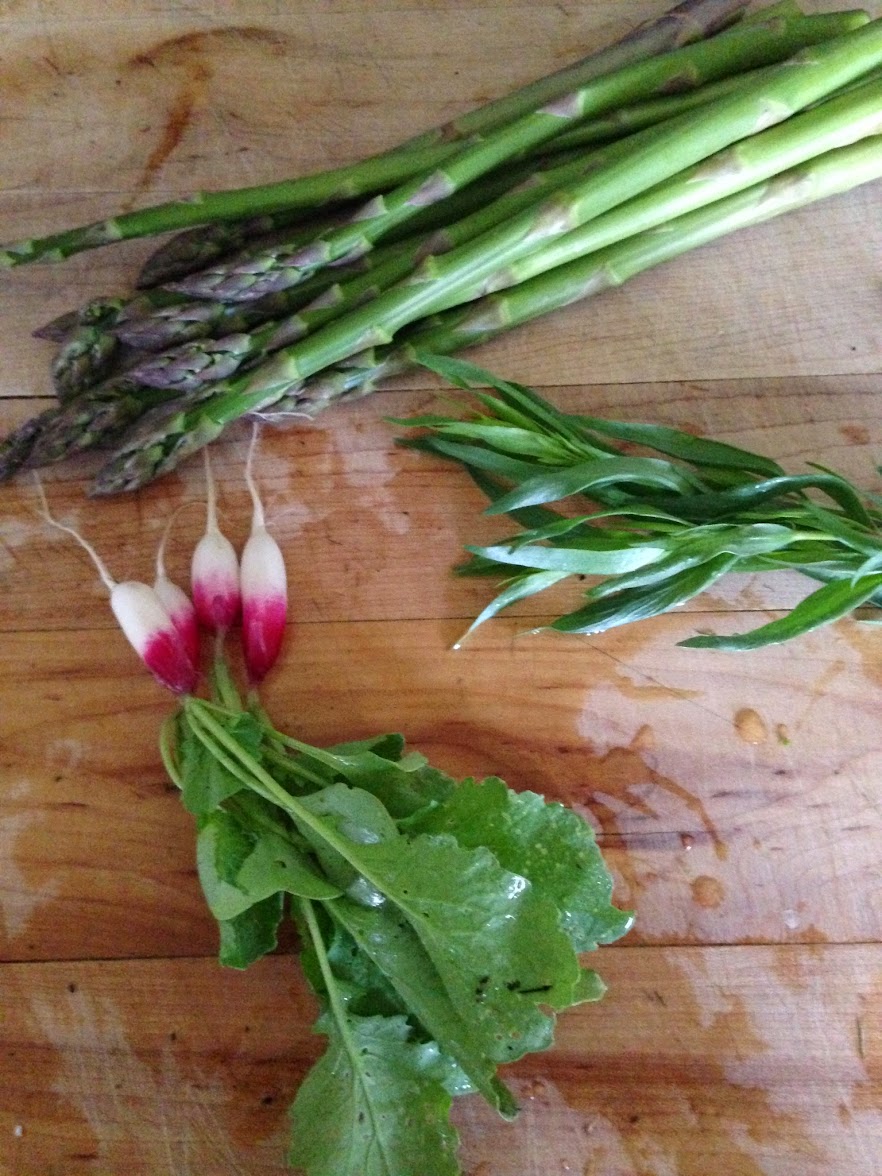
As soon as the ground thaws, and dries out, I will be ready to plant. After chomping at the bit through this long, never ending winter, I long to get my hands in cool dirt and ceremoniously plant the first seedlings. A cold frame helps to rush the job along, and I can't wait to open ours up, fluff up the tired soil, add some compost and amendments, and dig in. My cold season garden is pretty predictable each year. I crave certain things, stick to those, eat only that the entire period of time it is ready, and then usually it is out of mind the rest of the year. Asparagus for example. It is pretty much a part of every meal during asparagus season, and then I never think about it the other 47 weeks of the year. And it is ready before many other things, so why not give it the star treatment it deserves? It takes up a good chunk of my garden for a reason....homegrown asparagus absolutely cannot compare to what you buy in the store. There are so many delicate flavors in asparagus that are lost after any period of refrigeration, and I greedily await that first harvest each year.
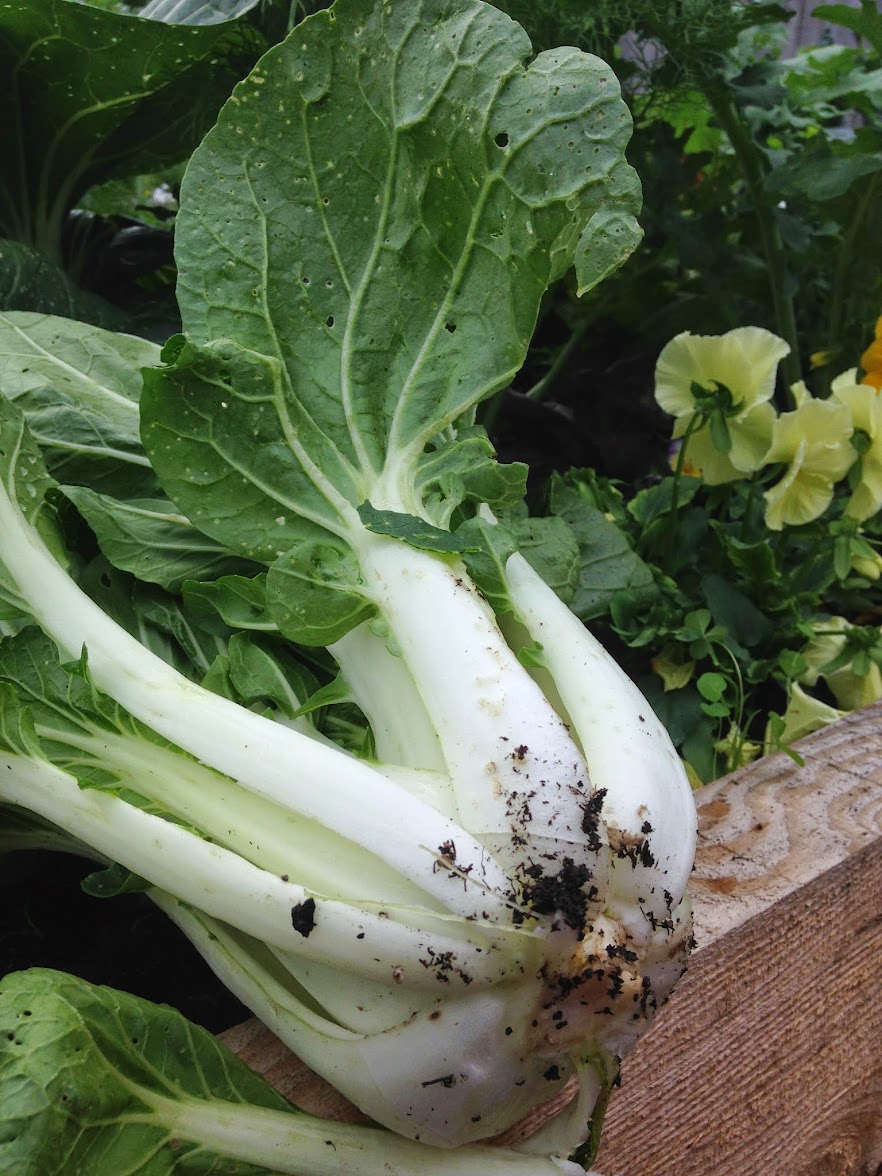
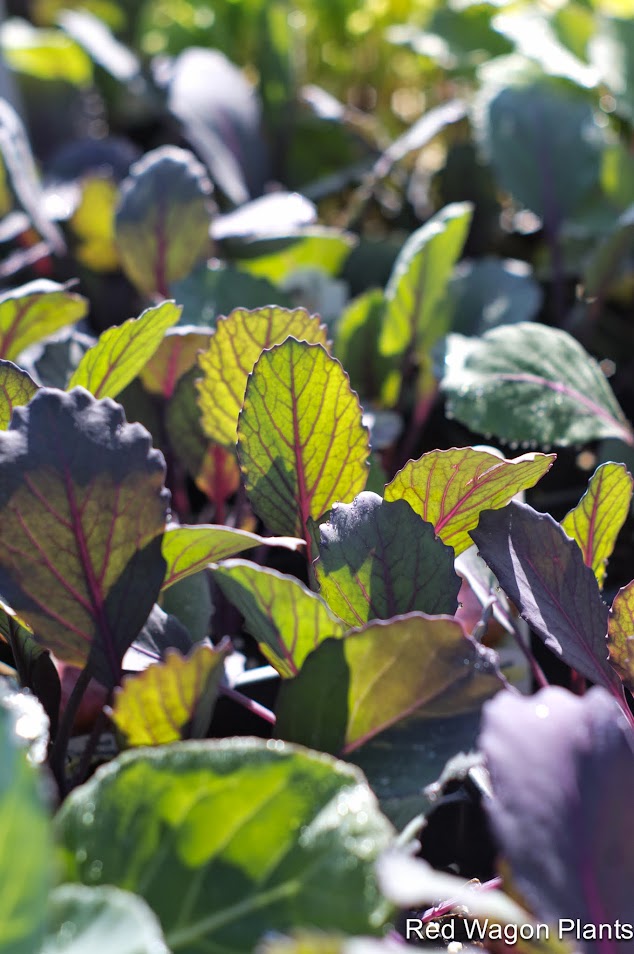
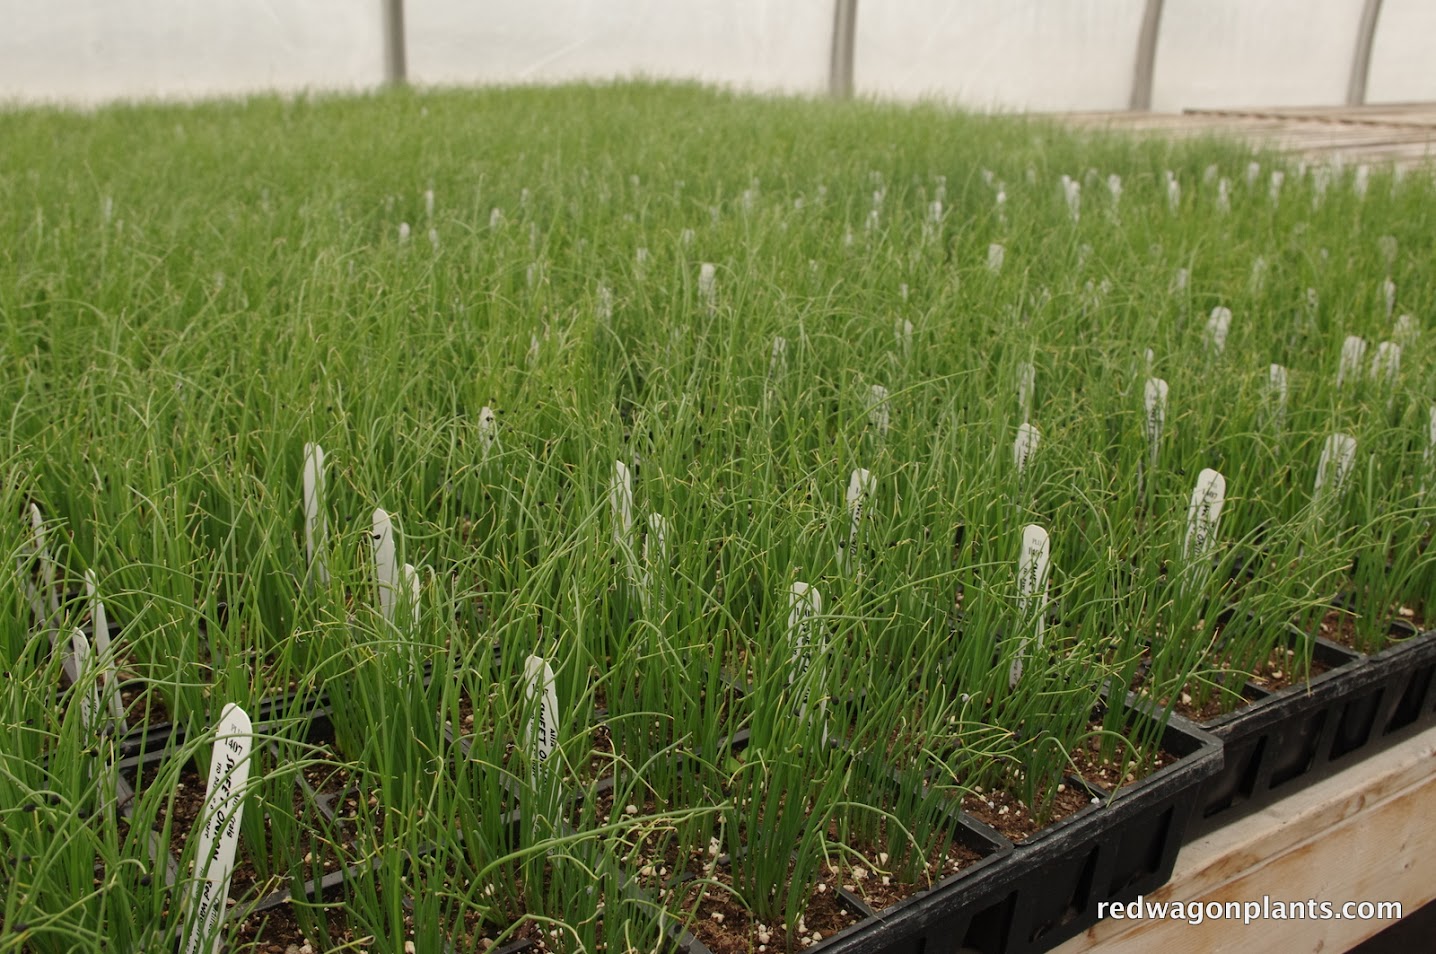
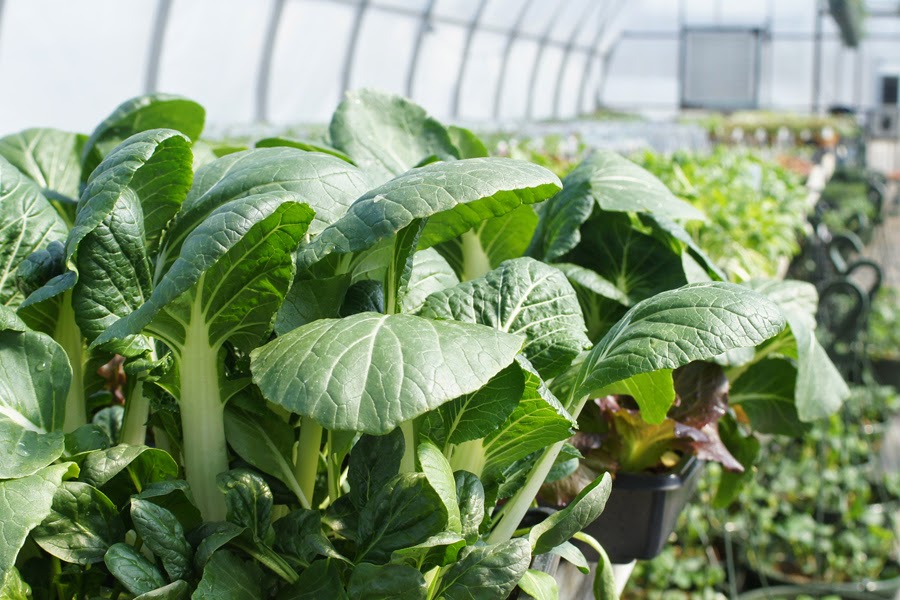
And then there is bok choi. For some reason, I don't think about this vegetable too much 11 months out of the year, but it is so cold hardy and so quick to grow, that earliest spring is the only logical time to insert it into the garden and into our kitchen. We grow 4 kinds of boc choi to give our gardens a real array of size, color, and harvest time. Violetta is quick to grow to baby size, and has shiny, dark purple leaves with pale purple and white stems. It is gorgeous and delicate and ready in just 3 weeks from the time I stick it in the ground. Shanghai Baby Bok Choi is another quick and tiny one, but the palest green, with the most tender flesh. Red Choi is a medium sized boc choi with a more mustard like flavor, and the regular boc choi we grow, Joi Choi, grows up to be huge, heavy, and gorgeous (see below). These are all delicious chopped up and stir fried with ginger, hot pepper flakes, and garlic; or thinly slivered and eaten raw as a salad or slaw or dropped into a warm bowl of broth.
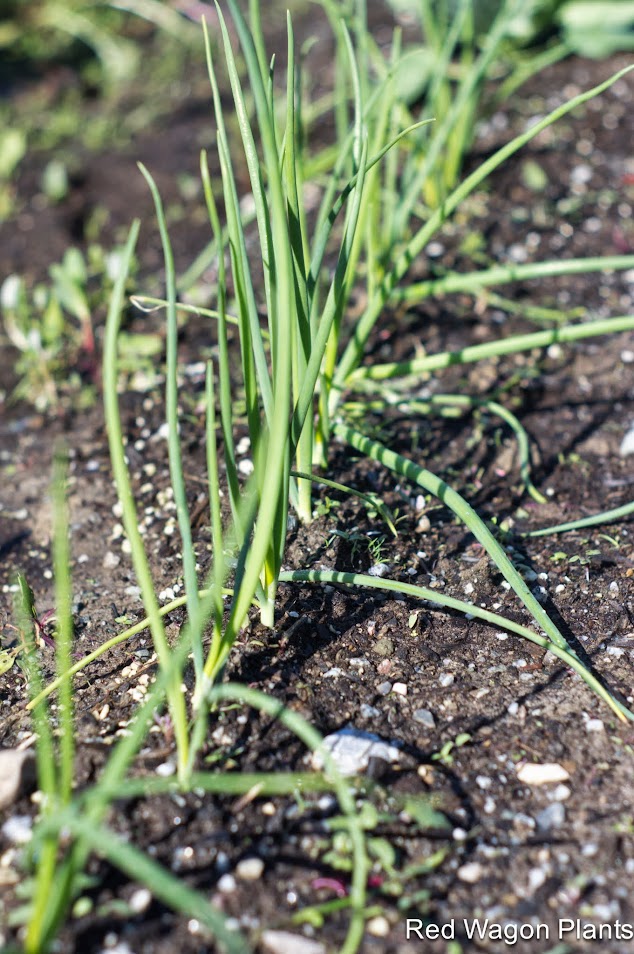
Scallions are another cold hardy, quick to grow vegetable that makes it into all my early gardens. They can be planted in little clumps in tight spaces and harvested over a long period of time. I harvest them three or four at a time and leave the rest to grow for a later picking or two.
Next up are the salad greens, bitter greens and mustards. All of these can take multiple frosts and are happy to go into the garden long before the others.
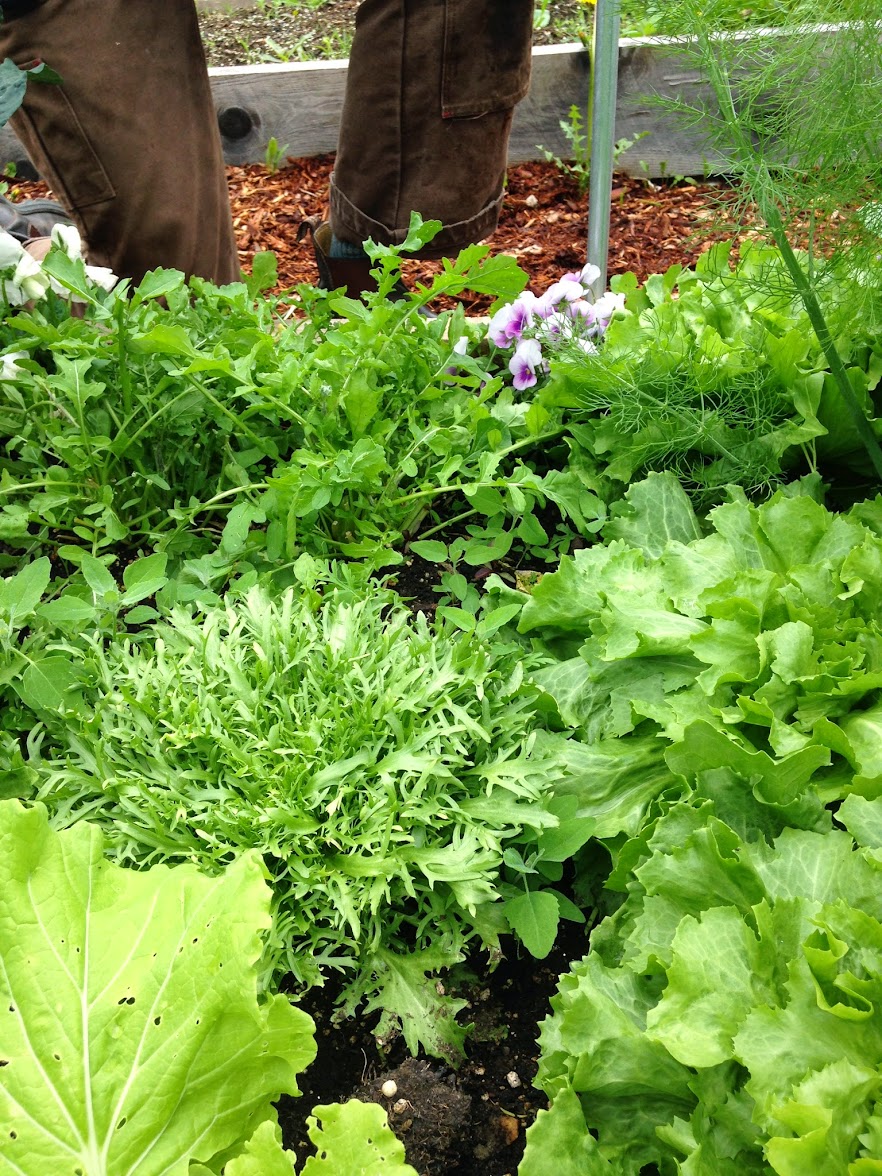
In this picture from last year, we have Tokyo Bekana mustard in the bottom left corner. It is a light green, tender mustard delicious steamed or eaten raw. I especially like it in soups and broths with soba noodles and tofu. In the center is my favorite bitter green, Frisée ('Tres Fine Maraîchère") which I love to eat with a mustardy, garlicky vinaigrette. Behind that is some arugula which really should be planted multiple times throughout the season (just rip out the old plants and sow new seeds or seedlings). In the top right corner is a little bit of bulb fennel Zefa Fino poking into the frame. This is another great option for for those of us needing cold hardy and interesting garden plants. In the kitchen, I simply slice up the bulbs into long, thick wedges and roast in a 400F oven with olive oil, herbs and seas salt. And the bottom right corner is the soldier of the spring garden: Natacha escarole. This chicory relative is huge, easy to grow, and equally perfect cooked in a braise or sautéed or eaten raw in a salad, again with that garlicky Dijon vinaigrette. Escarole withstands multiple hard frosts, grows quickly to a 3 pound head, and is frankly one of the better values in the garden. A small to medium escarole in the grocery store can cost close to $4. And from one 4 pack, you can easily have twelve times the yield for about the same amount of money.

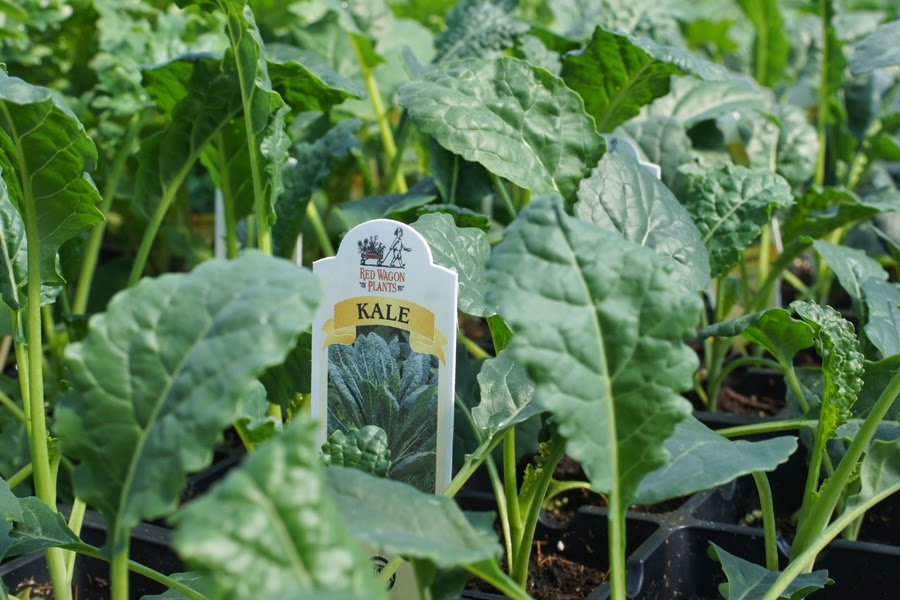
Here we have Lily sampling a bit of Lacinato kale. also known as dinosaur kale, Tuscan kale, or cavolo negro. We love it for its nutty flavor and the fact that a few plants stuck in the ground in April will produce until December. Again, a pretty good value! In front of the kale is more boc choi, Red Choi. And in front of that is ruby red chard. Chard is the least cold tolerant of all these greens, but it can take a few light frosts. The others can survive a few dips even into the 20's and come out fine.
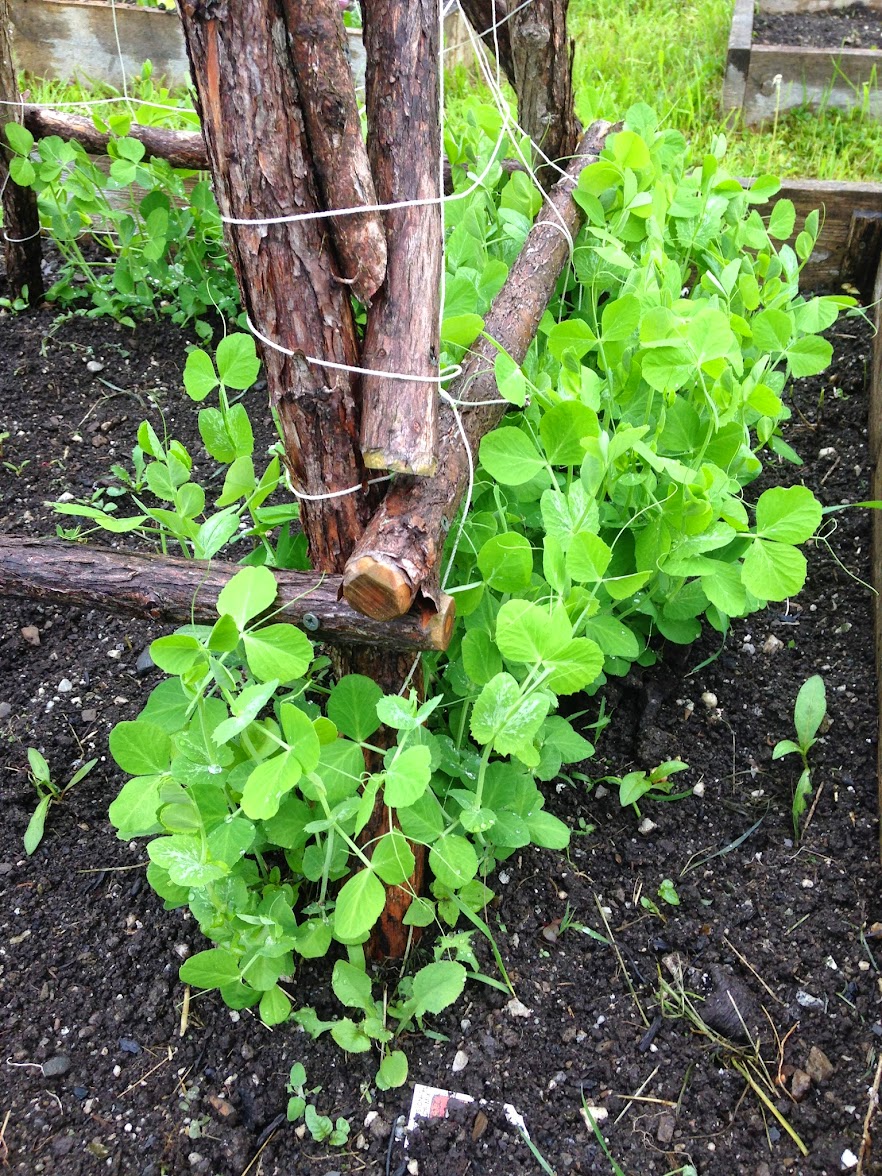
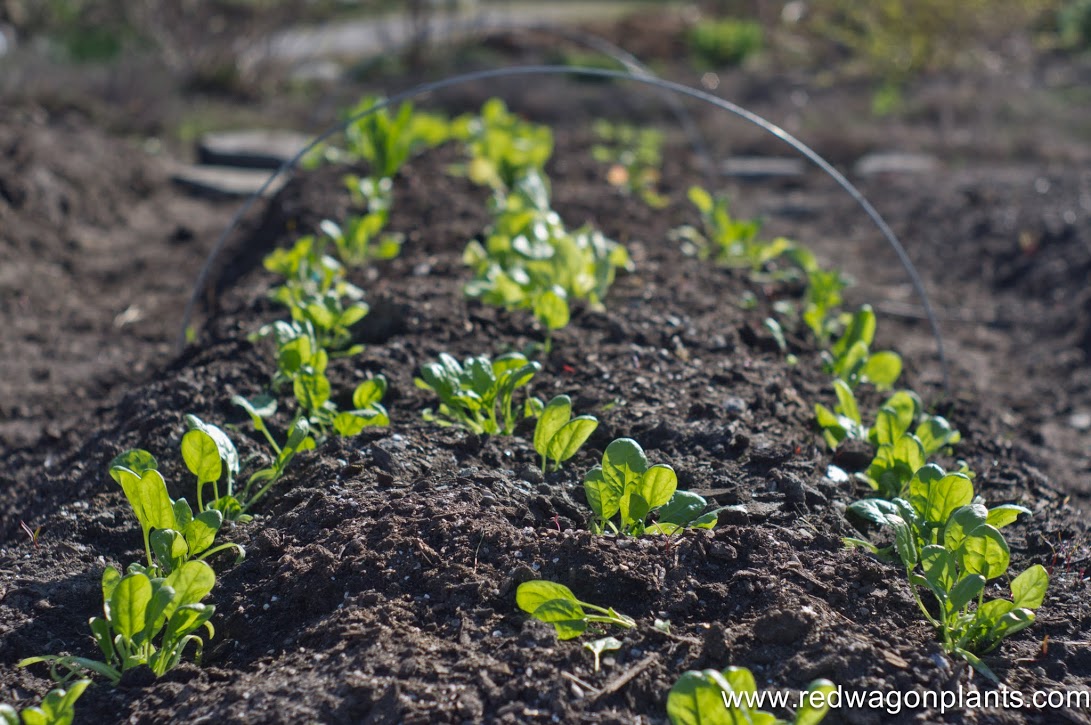
From seed, I like to start radishes and spinach and peas, because really, who can resist this sight:
Get ready, set, go. Spring is coming, and we want to help you get ready. And soon, we will be looking at this:

Herb garden planning is not a lot of work, but here are some thoughts I have put together on the topic. Herbs are easy to grow for the most part, but they are a big category of plants (we grow 100 varieties of herbs) and it helps to break them down and organize them into categories. This will help any gardener plant the right plant in the right place and give it the preferred amount of water, sunlight, food, and water.
Why grow herbs? For flavor, fragrance, and beauty - it is the easiest way to improve the flavor of what you cook. It is also one of the easiest ways to have a container garden on your porch or deck. Herb gardening is intimate - you get close to the plants, smell them, taste them, see them respond to regular clippings. They are a perfect way to better understand plant physiology and the best short cut to great food made with little effort.
Propagation: Plants vs. Seeds
All herbs can be planted from plants, and some can be planted directly into the ground as seeds. The herbs that you can seed directly in the ground and expect great results are: cilantro, dill, and chamomile. Everything else will do much better if you start the seeds in containers in a sheltered environment. You can start your own herb transplants easily if you have grow lights and a heat mat. Many herbs take a long time to germinate and many herbs are propagated only from cuttings. Making your own rooted cuttings is possible too, but that takes a little more of a sophisticated set up with misters, rooting hormone of some sort, and humidity domes. For those herbs, it is generally easier to purchase the plants.
Herbs from Seed:
Herbs from Cuttings:
Containers vs. in the Ground
Some plants love to be planted in the ground and others would prefer to be in pots. Generally speaking, the herbs that like it dry and warm will prefer to be in a clay pot that breathes like Italian terra cotta. Plants that like it wet and cool might prefer to be in the ground, but they can also be grown in pots if the right conditions are given (more watering, a glazed or plastic pot, heavier potting soil, a little shade).
Herbs that like to grow easily in the ground in Vermont:
Cilantro, Dill, Parsley, Rosemary, Savory, and Chervil
Herbs that prefer to be in containers in Vermont: EVERYTHING ELSE!
This does not mean that you cannot grow herbs in the ground, it just means that in containers, it can be a little easier.
Some herbs do really well as tiny shoots for micro-greens: chervil, dill, cilantro, basil, fennel are our favorites. And they are easy to grow indoors year round – just pat down some moist potting soil in a shallow container (only need 2” or so of soil) with holes in the bottom, press in the seeds, cover very lightly with a thin layer of soil, and keep moist. When the first set of true leaves begin to emerge, they are ready to eat. You can also grow pea shoots and sunflower sprouts this way. A south facing, sunny window is sufficient.
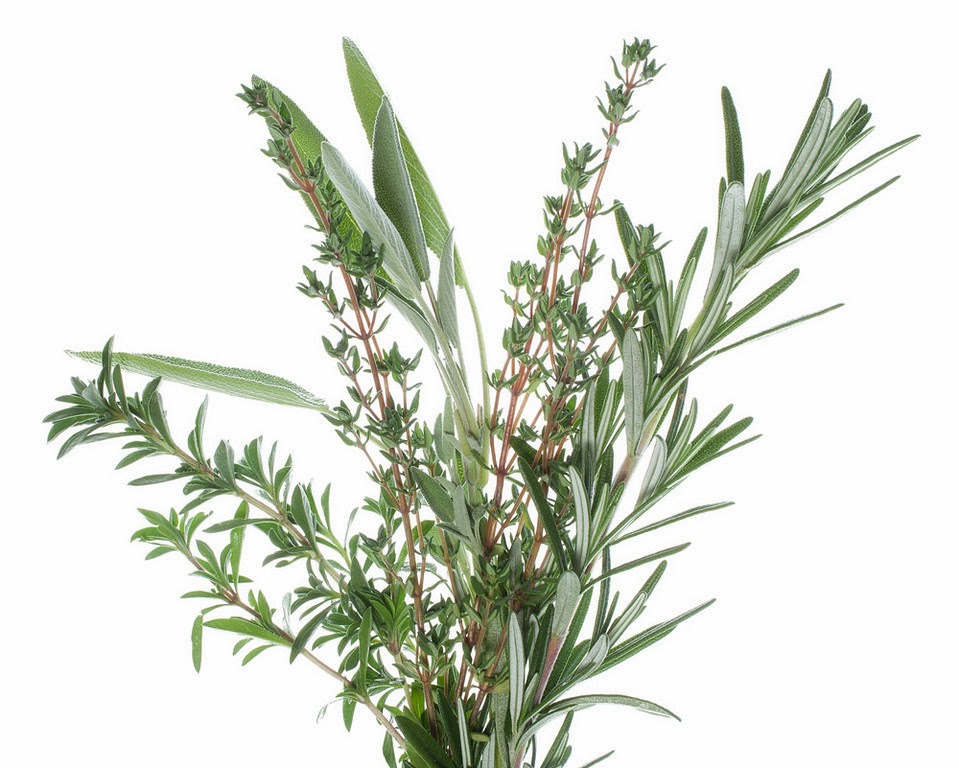
You can bring in potted herbs in the fall and keep them in a sunny window for use during the winter. The herbs that do best with this treatment: sage, parsley, rosemary, thyme, and savory. Basil can be brought in as well, but it won’t be terribly happy unless you have grow lights for it. If you had some of these herbs planted in the ground, you can dig them up and slowly acclimate them to being in a pot and being indoors.
Herbs can be dried or frozen or infused in vinegar or simple syrup for year round use. Pesto or herb pastes made with oil or water can be frozen in small containers. Drying is very simple or very elaborate – you choose! A dehydrator can be used, and the leaves can be stripped off of the stems once dried and stored in jars in a dark place. Or you can go the simple route and just harvest whole branches of the woody herbs such as thyme, oregano, rosemary, sage, and winter savory. Place the branches in woven baskets and keep in a dark, well-ventilated space. They will dry just fine on their own, and you can keep them covered with paper bags or kitchen linens and use as needed.
Related Upcoming Events
Cooking with Herbs with Molly Stevens and Julie Rubaud – a class and dinner.
South End Kitchen, Burlington, Vermont
March 19th., 6pm
Red Wagon Plants pre-season Open House
April 4th 10 am to 3 pm. Tour the greenhouses and see behind the scenes.
Herbal Cocktail Party with Caledonia Spirits
April 17th, Red Wagon Plants 6 pm to 9 pm
Help us kick off our season with a bang!


All of our potato seed stock is grown by the Chapelle Family Farm, and this is our fourth year providing you with this high quality, Vermont grown, potato seed. Barbara and Robert Chappelle have been growing potatoes in Vermont for over 30 years and they are one of the quiet heroes of the vegetable farming world in Vermont. You don't hear a lot about them in the media, but they are incredibly respected for all of their hard work, and the quality of their potatoes. It is from Barbara and Robert that all the best vegetable growers in this area purchase their potato seed. And at Red Wagon, you can too! This is one of the few places home gardeners can purchase Chappelle potato seed. Here are the varieties we have chosen for you this year.
Adirondack Blue
Adirondack Red
La Ratte Fingerling
Amarosa Fingerling
Red Norland
Chieftain
Yukon Gold
Yukon Nugget
Carola
Kennebec
Green Mountain
Russet Burbank
German Butterball

Planting garlic in Vermont is a great way to extend the gardening season and gives you a crop that is perfect in so many dishes, stores well all winter long and even generates its own seed. It is a perfect way to tune into the cycles of the gardening season and feel like you are growing an important part of your diet. Garlic is expensive to purchase so there are savings to be had with your own garlic crop. Please follow this guide for easy, step-by-step instructions that will give you a garlic patch for life. I have been growing out my own garlic for 18 years and usually do not need to ever buy seed stock or garlic in the grocery store. The pleasures of garlic growing are abundant and I encourage you to get familiar with this wonderful and simple crop.
When to start the cycle?
Planting dates in Vermont are anytime between mid October and late October. It is best to wait until then, because if you plant too early, the bulbs will break out of dormancy too soon and this weakens the plant going into our harsh winters. If you plant the cloves during those last two weeks of October, it gives them just the right amount of time to take root and hunker down until spring, but not send out any top growth.
To plant garlic, you need to follow a few easy steps.
1. Bed preparation.
This is the act of making your garden soil ready for garlic planting. You want a nice patch of garden, that is worked deeply so that the soil is loose about a foot down in depth. If your garden is very compacted and hard, the garlic will not be able to grow well and you will be sure to end up with small heads of garlic that are tedious to peel and not all that satisfying. You can prepare the bed with a 3 prong fork by digging in straight down, tilting the handle of the fork back and forth, and loosening the hard pan. This is a good work out! Don’t hesitate to get dirty here by kneeling in the earth and breaking up the clods of soil with your hands so they are not chunky at all. Add a bit of well rotted manure or compost at this time. Not too much. For a 5 by 10 bed, maybe a 5 gallon bucket’s worth. You don’t want to over feed the garlic roots in the fall, but a little compost will add organic matter and that will help the structure of the soil, keeping it loose, able to retain some moisture without staying too wet.
Take your time and your garden will reward you. I always look at garlic planting as a soulful moment in the gardening cycle. It is saying goodbye to summer and embracing the dormancy of winter, when seeds deep below the surface slowly get ready for their spring emergence. Living in a climate with such long winters, I need these small, but important, rituals to remind me that spring will come and the cold barren winter is a necessary part of it all. The seed garlic is planted in the fall because it needs to send roots far into the earth in order to feed itself the following year. I take this as a metaphor for my own winter activities that feed me all year long – catching up on sleep, feeding my mind with more reading time, eating great, nourishing foods, and spending more time with friends and family. I digress here, but these are the thoughts I have as I plant garlic, and after many years of doing it, I find that it is a necessary part of my mental preparation for winter.
2. Mark the rows with a hoe, or hand tool. I usually keep the rows about 12 inches apart and since my beds are about 4 feet wide, I keep 3 rows per bed and can easily reach the center. Just drag your tool through the soil to delineate the rows. You can use string and stakes if it is important to be straight, but I don’t bother with that at all.
3. Break up the garlic heads into individual cloves. Do not peel! And notice that one end is the root end and one end is the stem end. This will be important for planting right side up with the root end pointing straight down and the stem end pointing straight up.
4. Space out the cloves. Lay the cloves on the top of the soil, following the line you have just drawn in the soil. Allow about 6 inches between all the cloves.
5. Planting, spacing, and yields
Now you can start to plant. I always kneel down and take my time to feel the earth under me at this point. It just feels good and is a way to say goodbye to the garden before winter! Then, take a bulb planting tool, or a sturdy, sharp pointed stick, or your hand if your soil is soft and pliable, and poke a hole about 4 to 6 inches down. Shove the clove of garlic deep down, root end down, and cover up with the soil. Continue down the row and repeat until all is planted. Three heads of garlic will turn into about 24 heads next spring – assuming your garlic has about 8 cloves per head. . And with 6” by 12” spacing, a 5’ x 10’ patch of garlic will yield about 60 heads of garlic. That is enough to enjoy one head of garlic per week, all year long, and still have some left over for planting. To plant a patch this big, you will need to plant the equivalent of 7 to 10 heads of garlic.
6. Compost and mulch. I usually add another 4” of compost or well rotted horse manure to the bed. I then leave it like that for about 6 weeks. Then in mid to late December, I cover the bed with a thick layer of straw. You can also use leaves here, but straw is the best insulator with hollow stems that trap air and keep everybody warm down below. Another advantage of straw is that it usually does not have weed seeds in it; mulch hay, straw’s poor cousin, should be avoided since it is laden with all sorts of perennial grass and weed seeds. The straw moderates the winter soil temperature and prevents buckling and heaving which could push those garlic cloves up and out of the ground.
Let winter pass you by now, and next……
7. Spring time chores with garlic. Once the snow melts and the soil warms up a bit, your garlic will break dormancy and magically pop up out of the earth. It is important to pull back the straw to let the garlic see sunlight. If you wait a bit too long, and pull back the straw only to see a bunch of yellowing stems, don’t worry! The garlic shoots will green up in no time and will look fabulously sturdy after a week or so of direct sunlight. I usually pull the straw into the garden path, let it pile up there and then replace it around the growing garlic to block out weeds once the garlic plants are about 8 inches high. I often will add a little granular fertilizer at this time, before putting the mulch back in place. For a 5 by 10 garlic patch about 3 cups of Pro-Gro from North Country organics or one bag of Compost Plus from Vermont Compost Company is just about right. This will insure you get large, easy to peel cloves that taste great.
8. Garlic scapes will appear on stiff neck garlic around late May. These look like green curly cues with a pointy end that gracefully swoops down and around, waving in the breeze. This is the budding and flowering portion of the garlic plant. It should be removed to help the plant spend its energy on sizing up the goods below ground. If it is allowed to flower, the plants’ strength will go towards the flower and the garlic forming below ground will be the weaker for it. The good news here is that the “scapes” as they are called, are good to eat. I usually cut off the pointy tip – it is rubbery and inedible, and then slice up the round stem and use it in stir fries, stews, pasta dishes, or pickles. When cooked, it has the texture of a nice green bean and the flavor of mild garlic. It is absolutely delicious and a once a year treat that marks the beginning of summer – a harbinger of good things to come.
9. When to harvest? Garlic is ready to harvest when about 70% of its leaves have turned yellow. This is somewhat subjective, and should be taken as not a hard and fast rule, but rather a guide. You can dig up one head of garlic and look for signs of well formed skin, plump cloves, and individuation (cloves that are individually formed, and not one big mass). This is usually some time in late July. In very wet and rainy years, sometimes it makes more sense to take the garlic our of the ground a little early so that the skin does not rot in the damp earth.
10. How to harvest? Take out your three prong fork again and use it to loosen the soil around the outside edges of each garlic row. This will break up the soil enough to allow you to pull out each plant with a firm yank. (If the stems break off, it is likely you waited too long and the skin and stems are starting to rot. At that point, just dig up the cloves with a spade and they will be okay in taste; they just won’t store well. ) Lay the plants on the surface of the soil so that they start to dry off. Once all the garlic is pulled up, wipe it with a towel or rag, and get ready to tie it into bundles. I usually take about 8 plants, hold them together in one hand, and with the other hand, wrap twine around the whole bundle. Tie off the twine and then hang the bundle in a dark airy space. The rafters of a garage, shed or barn work well. If you don’t have that type of space, just find a place out of the rain, out of direct sunlight and with good air circulation – a covered porch? a dry basement with a fan running? a spare bedroom that can get a little dirty? (no shag rugs please!).
11. Curing the garlic Curing is the process of letting the garlic dry which makes the papery skin that allows the garlic to keep all winter. The stems will turn brown and brittle and the exterior of the bulbs will become dry and paper-like, just like garlic in the store. At this point, it is okay to cut off those dry stems, wipe off any remaining dirt, cut off the roots, and place your garlic in a crate to store it. This can be done anytime from 3 to 6 weeks after you initially hang up the garlic to dry.
12. Storing the garlic Once the garlic is cured, cleaned and trimmed, you are ready to store it for eating all winter long. Garlic is best stored in the dark. In an airy, dry, cool place. I use milk crates, covered with a piece of burlap, and keep the crate in a very cool part of the basement. Ideal garlic storing temperatures are between 35 and 45 degrees, but a refrigerator is too humid, so please don’t be tempted to use that as a storage method. Other good places to store garlic (and onions for that matter) are unheated attics, attached garages that don’t freeze, but are not heated, or 3 season porches that do not freeze. Root cellars are great, but most of us don’t have one. If well stored, garlic will last until April or May – almost right in time for the garlic scape harvest!
13. Finding seed stock.
Until you build up your own supplies, you will have to purchase seed garlic. There are many great resources for garlic and for finding garlic seed, I recommend Johnny’s Selected Seeds, or locally, Last Resort Farm in Monkton, Hudak Farm in Saint Albans, or any farmer at your local farmers market who has nice looking seed stock. Seed stock is basically sorted out of the garlic harvest and selected for the following the following traits:
If you have been growing out your garlic in your garden, you can pick out the best cloves at cleaning and storing time. Set these aside in a safe place where they will not be eaten and come October, experience the joy of planting your own seed garlic.
14. Plant garlic. Repeat Step 1. above and the cycle starts all over again!

Our greenhouses start up in February, when we begin the bustle that does not end until the final sales of early September. During that 6 moth period, we are in constant motion, putting in 14 hour days at the beginning of our season for a solid three months and gradually tapering down to a normal 8 to 10 hour day for the remainder of the year. Work moves into the office where I am planning out next year's varieties; we are also busy with greenhouse clean up and putting everything to bed for the winter. When the maples signal that autumn is here, I am ready for a little slowing down. A little time to enjoy the fruits of the garden, to eat those fall greens that quietly draw attention amidst shades of yellow, red, and orange. I finally have time to cook, to preserve some of the bounty with the help of the canning pot, dehydrator, root cellar and freezer.
I tend to be a creature of habit and make more or less the same things each year, because I know my family loves them and because I am not willing to give up precious time and space with experiments that might not work, that might join the sad jars and mystery freezer bags that lay untouched. I do try one or two new things each year, but only after they have been enthusiastically recommended by trusted sources.
Sauerkraut. I use this recipe from Sandor Katz, fermentation guru, author, and person of note who just recently spent some time teaching his craft in Vermont.
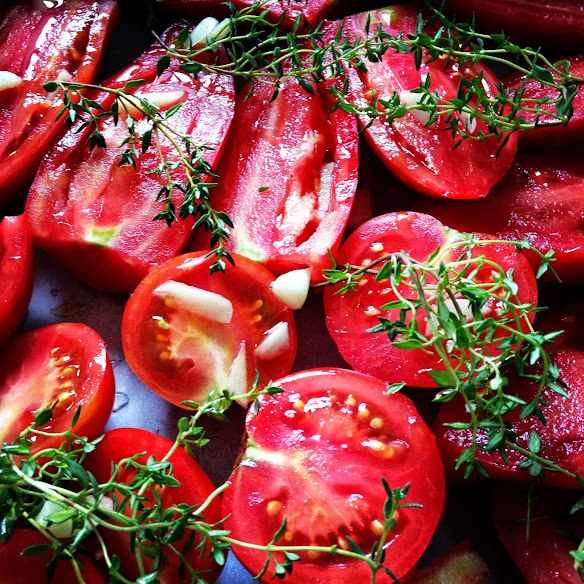
Plain and easy, roasted and frozen tomatoes. I wrote about this one last year, and you can read that here. This is the easiest way to make tomatoes that will taste great in a sauce mid-winter. I have more time to cook in the winter, so I don't bother making sauce to freeze or can during the height of summer. But if i have these in the freezer, I can turn them into sauce, soups, add them to braises, etc.

Fancier, slower, seasoned roasted tomatoes. These are a different beast. The tomatoes are slowly roasted, like 8 hours of slow, in a 240F oven with olive oil, garlic, herbs. I sometimes do different batches and label them as such so that they can be used in various dishes during the winter. For example, I make some that are sprinkled with just oregano, or just cumin. But most of them are made with olive oil, thyme, and garlic. And a little sea salt.
Here are some of the tried and true that show up every year in our winter pantry:
By Hope Johnson (Part 2 of a series. See Part 1 to learn about promoting bee habitat)
Of 339 species of hummingbirds, only two inhabit the area East of the Mississippi-the very rare Rufous and common Ruby-throated hummingbirds. There are many butterfly species in our state (see Vermont Center for Ecostudies’ Vermont Butterfly Survey and The Butterfly Site’s List of Butterflies of Vermont).
Both Hummingbirds and butterflies are attracted to nectar-rich flowers. Butterflies prefer purple and yellow flowers and hummingbirds are attracted more to red and blue. Site your nectar plants in an open area of the yard, and be sure to include host plants which provide forage for caterpillars. Remember, some butterflies don’t live on nectar from flowers but instead feed on soft and over-ripe fruit. (See The Nature Conservancy’s Gardening with Vermont Native Plants.)
Wondering what to plant? Here's a list of Top Ten flowers for Hummingbirds and Butterflies:
1. Yellow cosmos
2. Phlox: Meadow phlox, P. maculata and Garden phlox P. paniculata.
3. Cardinal flower, Lobelia cardinalis
4. Goldenrods, Solidago spp., attract monarchs.
5. Butterfly weed, Asclepius tuberosa.
6. Purple coneflower, Echinacea purpurea.
7. Columbines, Aquilegia spp.
8. Scarlet sage, Salvia splendens.
9. Red buckeye, Aesculus pavia, small tree.
10. Spiderflower, Cleome.

What else do butterflies and hummingbirds need? Water! Hummingbirds naturally use the smooth leaves of deciduous trees such as dogwoods, eastern redbud and sugar maple as birdbaths, but also appreciate misting sprinklers. For drinking, butterflies require a thin film of water such as around puddle edges or in slight depressions on rock surfaces.
What else can we do to provide habitat? Butterflies roost in trees and some hibernate in the winter. Leave sites for overwintering such as sheltered spots where caterpillars or pupae can survive the cold weather. Leaf and plant debris shelter chrysalises and pupae and provide a hibernation box in areas devoid of natural debris. Native shade trees provide protection from hot sun, heavy winds and driving rain. Consider a hedgerow for protection from prevailing winds. Perennials with wide leaves such as hosta provide cover for butterflies. In the East, nest sites for hummingbirds include common native trees such as oaks, hickories junipers, hemlocks and pines. Open branching shrubs such as spicebush (Lindera benzoin), hawthorns (Crataegus spp) and willow (Salix spp) are preferred for perching sites. You can provide a source of nesting materials by putting out a suet feeder filled with natural fibers such as cotton fluff and small feathers.
Lastly, avoid use entirely of insecticides in gardens intended for butterflies. These include malathion, Sevin and diazinon. Bacillus thuringiensis is lethal to caterpillars. Most butterfly caterpillars do not cause the leaf damage like that made by tent caterpillars and gypsy moths. Let those butterfly caterpillars do their thing and watch as these pollinators enjoy your garden!
References
Attracting Native Pollinators: Protecting North America’s Bees and Butterflies, The Xerces Society Guide, Storey Publishing, 2011.
Attracting Butterflies and Hummingbirds to Your Backyard, Roth, Sally. Rodale, Inc., 2001.
Website: How to Attract Butterflies to Your Garden, National Wildlife Federation, nwf.org.

2014 has been a fabulous garden season, don't you think? Once we got over that initial cold period - a.k.a. November through April - it seems like we have had abundant sunshine and weekly rains. Moving towards August, we are seeing some drier weather in the Champlain Valley and needing to take a few precautions to make sure that plants stay healthy. Whenever customers ask me a question about watering, I always have to stop myself from giving them a 45 minute lecture! Watering is something I do for hours a day, every day. I think about watering probably more than any other single task in our greenhouse business. It is a meditative and lovely way to spend part of each morning, and it is the best way I know to commune with plants, to get to know them, to check on them and see what else they might need in order to thrive. I will spare you the 45 minute lecture, and instead give you a few tips that will make your plants healthy and will save you time every time you water.
1. Mulch - whenever you can, lay down some old hay, straw, burlap bags, wet cardboard, newspapers or bark mulch around your plants. This will not only help keep weeds down, but it will also help keep moisture near the root zone.
2. When you water, aim the stream of water under the plant's foliage. Getting leaves wet is not the goal of watering...getting the roots drenched is what you are going for. I know this seems obvious, but so many people just water the top part of the plants and don't actually get the soil wet. It takes a lot of water right at the base of the plants to actually soak the soil. If you waste all the water on the leafy part of the plant, it sheds off, with the leaves acting like an umbrella and keeping the root zone dry. Not exactly efficient. Get the hose nozzle or tip of the watering can under all that foliage and you will be giving the plants what they want and where they want it.
3. Use a good nozzle on the end of your hose. We recommend this style:

They are made by Dramm and can be found locally at garden centers and on-line here. These nozzles are great for pots, window boxes, raised beds and small gardens. They are gentle enough so that soil doesn't wash away, but allow enough volume of water to flow out so that you don't have to wait too long for the ground to be saturated. If you have a larger garden, consider investing in soaker hoses or even an over head sprinkler to save time. Overhead sprinklers do get the leaves wet, but they are cheap, can be moved easily, and can water a large area in a relatively small amount of time. If you have long rows and a garden that is organized in straight lines, you can invest in drip irrigation, like what professional growers use. You will need a pressure regulator and a filter with it, but most supplier are happy to help you put together a simple system. We recommend Drip Works - they do a great job at explaining drip irrigation systems and are committed to helping gardeners save water and time.
4. Ideally, keep the foliage dry and water in the mornings. This will allow the foliage to dry out before evening falls. Wet foliage on warm nights is an invitation to fungal diseases. Powdery mildew and other assorted pathogens love those conditions. It is an old wives tale that watering mid-day will burn the plants. In 20 years of farming and owning a greenhouse business, I have never seen a plant burned by water. I am not sure what that would even look like! I have seen all kinds of diseases sprout up literally over night from damp leaves in warm, dark, humid conditions.
5. If you water with a watering can, take that rosette off! The stream of water, uninterrupted by all those little holes, will make watering the base of the plant much easier. The only time you need that rosette is when you are germinating seeds and don't want a stream of water to wash away all those seeds.
6. If you have plants in containers, water them every single day in hot, dry weather. If they dry out too much, it is very hard to re-hydrate them. Also, keep them deadheaded and fertilized and they will cope much more easily with the heat. If you are going away for a few days, place each container in a pan or dish and add an inch or two of water so that they do not dry out (but only for a couple of days - they will drown if watered like that every day). And please don't be stingy with the water - the averaage 10" to 12" hanging basket needs about 1/2 to 1 gallon of water per day during these hot dry days. That is a lot of water!
Overall, I love this time in the gardening season. The hot weather crops like tomatoes, peppers, cucumbers and corn are ready but we still have some nice spring crops like peas, scallions, and lettuces. Watering can be relaxing, and it can provide you with some nice bonding time with your plants. Let us know if you have any questions.
By Hope Johnson
(Part 1 of 2. See Part 2 for information about promoting butterfly and hummingbird habitat).
Habitat loss, degradation, and fragmentation are serious threats to the survival of pollinators. There are three basic pollinator habitat requirements:
1. Flower-rich foraging areas and water source.
2. Suitable host plants or nests where they can lay eggs and/or raise brood.
3. Environment free of pesticides.
This blog series will focus on the habitat needs of bees (social and native solitary), and the butterflies and hummingbirds which are the pollinators we most often encounter and recognize in our home gardens.

Bees
Of the 20,000 species of bees worldwide, 4,000 are native to the U.S. and 90% of these are solitary. These include bumble, mason, and ground-nesting bees. The domesticated honeybee is a European import.
Bees prefer purple, yellow and white flowers and see ultraviolet color patterns, such as shape and color ‘nectar guide” patterns that provide clues to the location of nectar in the flower. Not surprisingly, sequential bloom is important for forage all season long. So, what to plant?
Here's a list of Top Ten Perennials for bees and other pollinators from Annie White at University of Vermont:
1. Monarda fistulosa, Bee Balm. More resistant to powdery mildew than M. didyma (red).
2. Aster Nova-angliae. late season nectar source (for Monarchs, too).
3. Eupatorium purpureum, Joe Pye weed.
4. Penstemon digitalis, foxglove beardtongue, native.
5. Veronicastrum virginicum, Culver’s root. Blooms late summer.
6. Helenium autumnale, Sneezeweed. Deer and rabbit repellant.
7. Lupinis premis, Sundial lupine. Host plant for butterflies and native to Vermont.
8. Lonicera sempervirens, Trumpet honeysuckle. Native and blooms June to September.
9. Echinacea purpurea, purple coneflower. native to NY and CT, composite flower.
10. Agastache foeniculum, anise hyssop. Native to NY and NH.
Other ways to promote habitat? Seventy percent of bees live in the ground and these include the squash bees that nest in the ground near the squash and cucumbers they pollinate. Preserve areas of bare or sparsely vegetated well-drained soil and avoid compaction of same. Also preserve dead or dying trees and hold the fall clean-up since tunnel nesting bees rest in the debris. Create your own wooden net blocks or bundles of hollow stems.
Avoid using insecticides containing systemic neurotoxin neonicotinoids especially Imidacloprid and Clothianidin that linger in the soil and can remain active for a year or more. Neonics are absorbed by the plant and dispersed in plant tissues including pollen and nectar and they are toxic to bees and beneficial insects. Although there is conflicting evidence that neonicotinoids cause colony collapse disorder for honeybees, there is increasing evidence that topical or ingested exposure in bees retards colony growth, impairs navigation and foraging behavior and may increase their susceptibility to other pathogens such as mites, bacteria and fungal infections. See Friends of the Earth Bee Safe Gardening Tips for a full list of neonics to avoid.

Local Resources
“The Buzz on Designing Pollinator Friendly Landscapes”
Annie White, UVM Graduate Research Assistant. Presented at 2013 Flower and Garden Show, Burlington, VT. At PollinatorGardens.org, see “Top ten perennial plant choices for pollinators” and “Designing pollinator-friendly landscapes”.
“Enhancing Pollinator Populations for Farms and Gardens”, presentation by John and Nancy Hayden of The Farm Between at NOFA Winter Conference 2014. At thefarmbetween.com, see full powerpoint presentation and info on June 30th, 2014 Pollinator Workshop.
“Attracting and Conserving Native Pollinators”, presented by Anne Dannenberg, Pollinator Habitat Consultant, a One Night University class at Access CVU, 3/10/14. Contact: acd@gmavt.net

Has your garden been producing lots of vegetables yet? We have been harvesting for a while thanks to some season extension and some early plantings. Boc choi, lettuce, escarole, radishes, asparagus, chard and kale have all been making regular appearances in our meals and keeping us out of the produce aisle at the grocery store. So now, there is a little room in the garden where some of these plants have been harvested. What to plant next? There are so many options, and we like to take these "gaps" as a time to experiment, or add some diversity to the garden, or take advantage of short season crops that can be ready before planting a fall crop, or put in another generation of a warm weather crops to ensure a healthy harvest for as long as possible. Here are a few ideas......
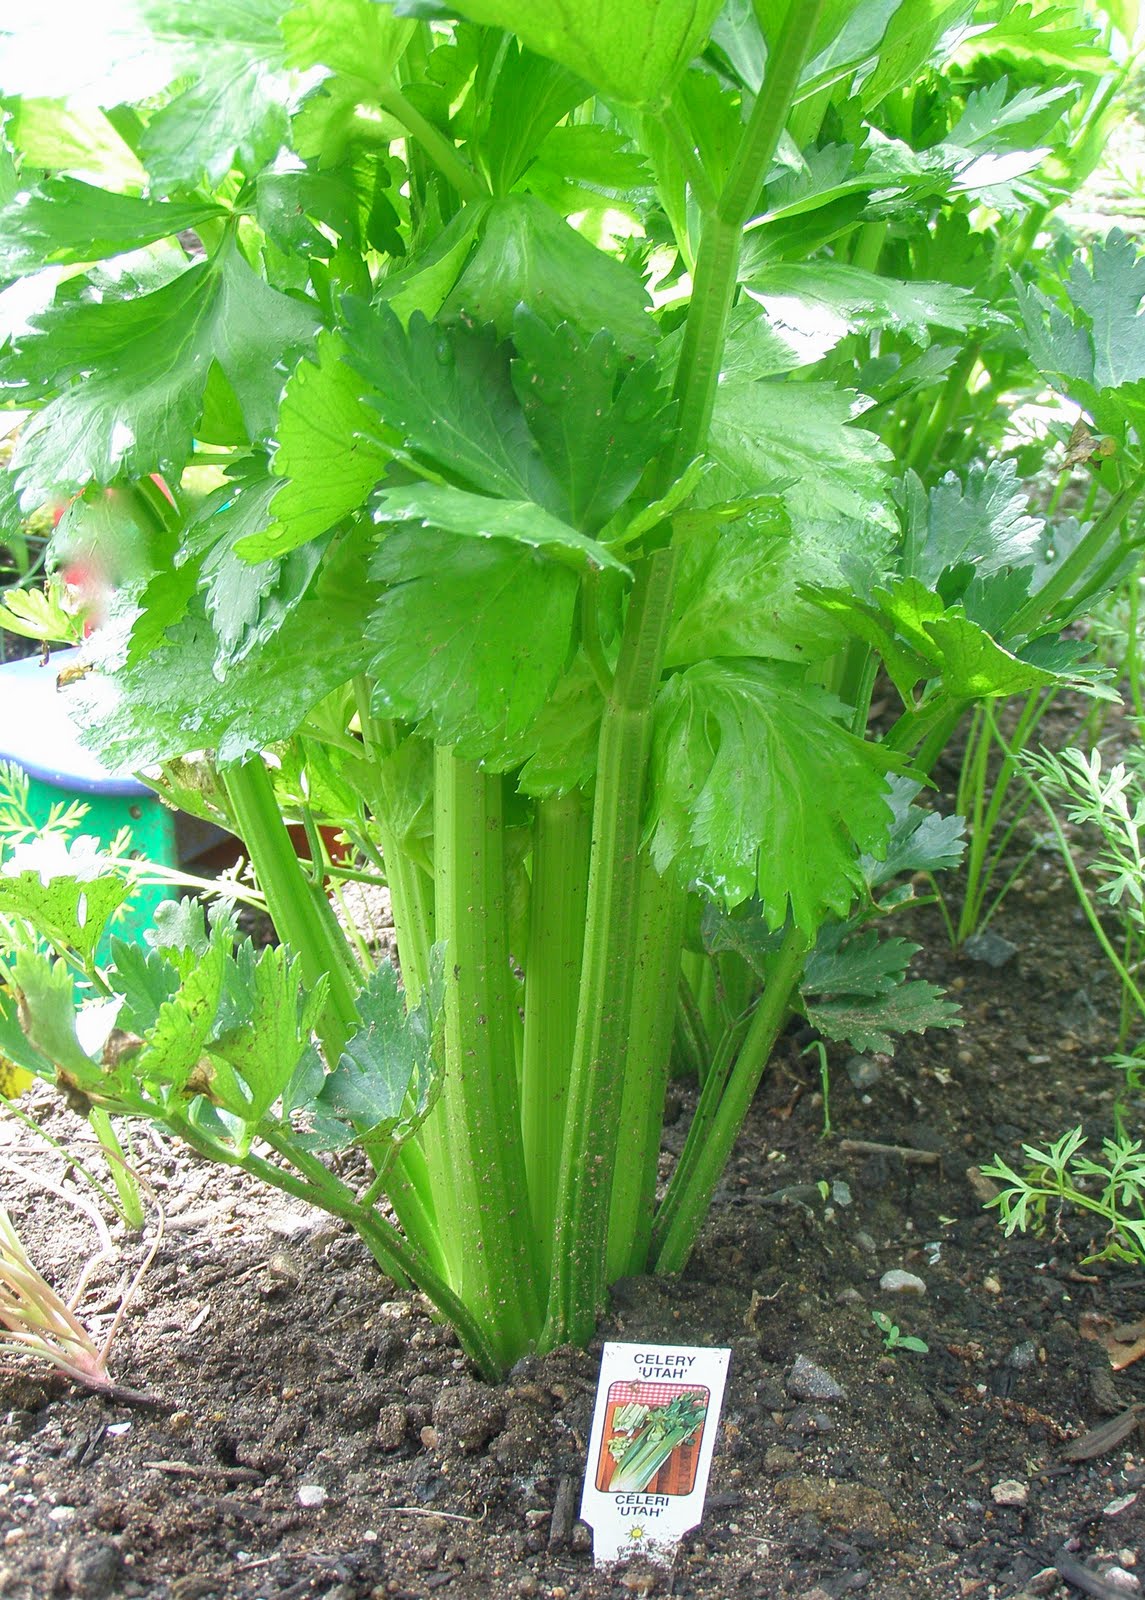
An empty spot or two is the perfect place for planting something new. Preferably something that does not take up too much room, and something that grows vertically so that it does not crowd its neighbors. Celery, fennel, scallions, boc choi and chard are all great candidates. Or a new variety of lettuce, or some arugula or mustard green you've been wanting to try. These are all crops that are fairly quick to harvest and will help maximize your harvest in that precious garden real estate.
Small spots are just perfect for adding flowers to the garden that will attract pollinators, provide habitat for beneficial insects, and will give you blooms to enjoy in the garden or in a bouquet. There are many great annual flowers that grow well in tight places and they break up the wide expanse of vegetable plants. By punctuating the garden with blossoms, you make it harder for predator insects to find your vegetables and you create a more diverse ecosystem, in miniature. Going for the most diversity possible in a small space is a great move in your over all pest control strategy. Some flowers we recommend for tight spaces:
Cosmos

Verbena Bonariensis

Zinnias

Arugula, baby boc choi, spinach, lettuce, radishes, dill, cilantro and scallions all grow quickly and can take a bit of shade from their neighbors. This means you can plant them in close proximity to taller plants, and they won't mind one bit. They even enjoy the shade in the heat of summer. These can all be started from seed or transplants this time of year, and are a great way to add something to your table that you may not have planned on. Keep salads fresh with new lettuces, don't keep eating those bitter old ones! Same with arugula that has bolted or is too holy from flea beetle damage.....start with some fresh ones for those July salads.

This is a great time to plant another round of cucumbers, cantaloupe, a short season tomato, hot pepper, summer squash or zucchini. You can try out a new variety to mix it up, and even grow a vining crop on a trellis to save space. The plants were planted a month ago are going to be producing pretty soon, and when they get tired out or have a pest or disease issue, your new plants will be just maturing and ready to provide you with a new round of goodies. You can maximize the bounty this way, and you won't be tempted to keep an old and diseased plant in the garden if there is a new one ready to report for duty. This will also help with your disease and pest prevention over all.

Remember that the more you keep up with the garden, the tastier your meals, and the healthier your plants. There are so many reasons to garden, and keeping the plot looking and tasting good will keep you motivated to maintain your garden and to eat really well!
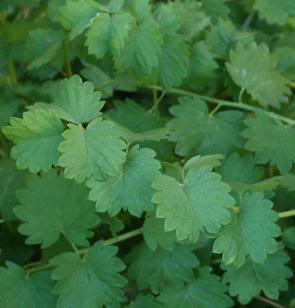
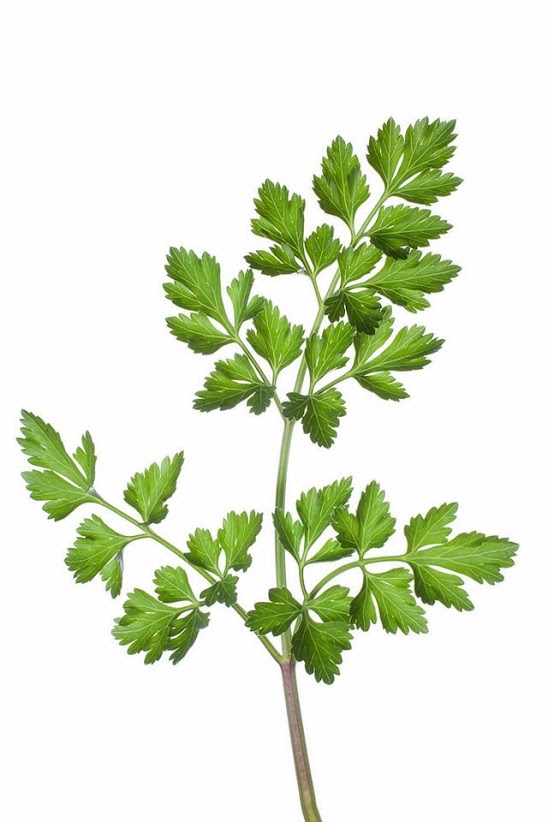
Ruth Henry, one of our many loyal customers, came in a little while ago asking for salad burnet. This is not one of our most popular herbs, and frankly, one that I never grow because I never know what to do with it. She assured me that it is amazing in a special salad dressing she makes. Naturally, this peaked my curiosity and she promised to send along the recipe. Here it is! And now I finally have a reason to plant this pretty little herb that tastes like cucumbers.
Thank you, Ruth, for sharing your "secret" recipe with us! Mum's the word!
" As promised this is my family's recipe for salad dressing using Salad Burnet......It's a big hit with lots of flavor! Enjoy"
Herb Salad Dressing 1 cup salad oil 1 cup honey 1/2 cup basil vinegar 1 clove crushed garlic 1 tsp salt 1 cup of finely chopped green herbs such as burnet, basil, chives, parsley 1 tsp celery seed 1 Tbsp paprika
Shake everything in a jar. Keeps in the refrigerator for a week or so.
Every year, we at Red Wagon Plants partner up with the Vermont Community Garden Network to grow out and sell sweet potato plants that you can then plant in your own gardens.
Many people are surprised that Sweet Potatoes can grow in Vermont, but they do very well when started in a greenhouse to root and then transplanted in June once the soil is warm. They prefer sandy, warm soils in full sun and are not particularly heavy feeders (no need to fertilize them if you have relatively good soil). We have some customers who grow them every year in big containers made out of chicken wire and black landscape fabric. This allows the roots of the plants to get really warm and when harvest time comes around, you can just un-peel the fencing and dig into the mound to harvest the sweet potatoes. You can read all about this method here. They store really well - just let them dry a few days in a dark spot that is well vented. They are best stored around 50F degrees, not in a cool root cellar or refrigerator.
Some of our favorite things to do with sweet potatoes: roast them, mash them, make a pie with them, or grate them up for a vegetable hash with a fried egg. They are so easy to grow and are a wonderful addition to any garden.

Sweet potato slips are cuttings that come from a parent vine. The slips grow best in a loose, sandy or silty soil that drains well. If sweet potatoes are grown in a rich dark soil they may discolor but are still good to eat. • Transplant the slips into garden beds during June, preferably in the late afternoon or on an overcast day. When transplanting, lay the slips on their sides with 2/3 of the slip buried a half inch under the soil. Water enough to keep the soil moist, but not saturated. • Plant the slips 10 to 18 inches apart in rows that are three to four feet apart. The rows or raised bed should be elevated 4 to 8 inches above the ground level to allow the sweet potatoes room to form. • Keep the cuttings watered while they are getting established. The leaves that were originally on the planted slips will dry up and fall off leaving just the vine stem. New leaves will emerge from the cuttings as the slips become established. • The sweet potato vines will cover the ground reaching 5 to 10 feet in length. Hoe around the vines to cultivate weeds and mulch with hay if desired. • Deer love sweet potato leaves, so be sure your planting area is fenced if deer are aproblem. A flying gold colored beetle may chew round holes in the leaves. The vines are tough and will keep growing despite insect damage. • Sweet potatoes are dug and harvested in late September through mid October, a day or two before the first predicted frost. Most of the sweet potatoes will be just below the parent plant. Each plant can produce up to six sweet potatoes. • After harvesting, dry the sweet potatoes on the ground for two or three hours. Allow them another 10 to 14 days to cure at room temperature or above, before storing the sweet potatoes at a temperature between 50 and 60 degrees F. • Unlike Irish potatoes, sweet potatoes should not be kept cold in a garage, refrigerator or outbuilding. If properly cured and stored, they will keep until April. Enjoy!
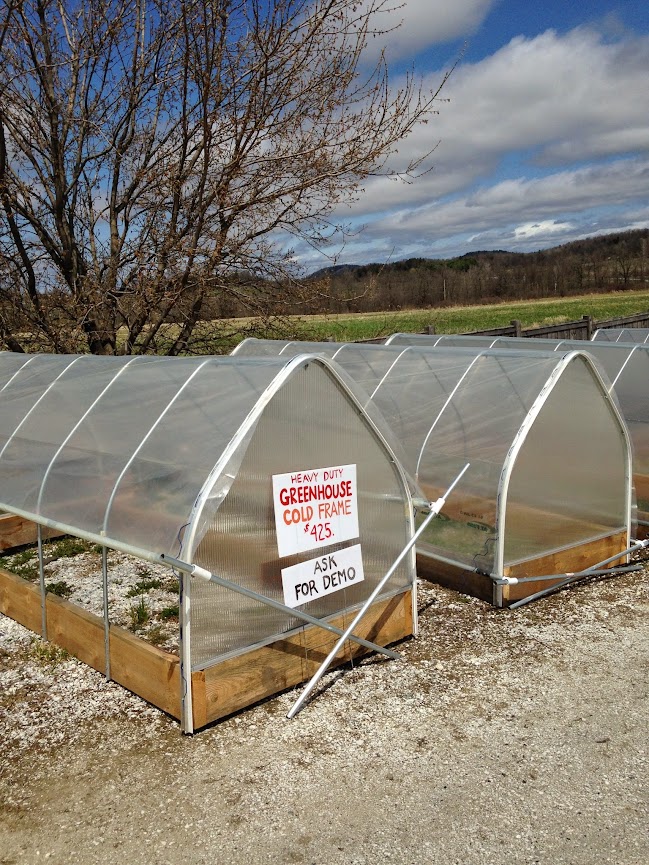
Look at these great greenhouses Eric Denice has built. We are offering four of them for sale this spring. And can deliver them to you, too. We have used the same materials that go into our production greenhouses...6 mil plastic, hoops bent at just the right angle to shed water and snow, polycarbonate end walls, wiggle wire and extruded metal track for securing the plastic closed, and pipes that act as a "brake" for keeping the sides just where you want them. We are happy to give you a demo....or come and peek at ours that is all planted and growing along nicely.
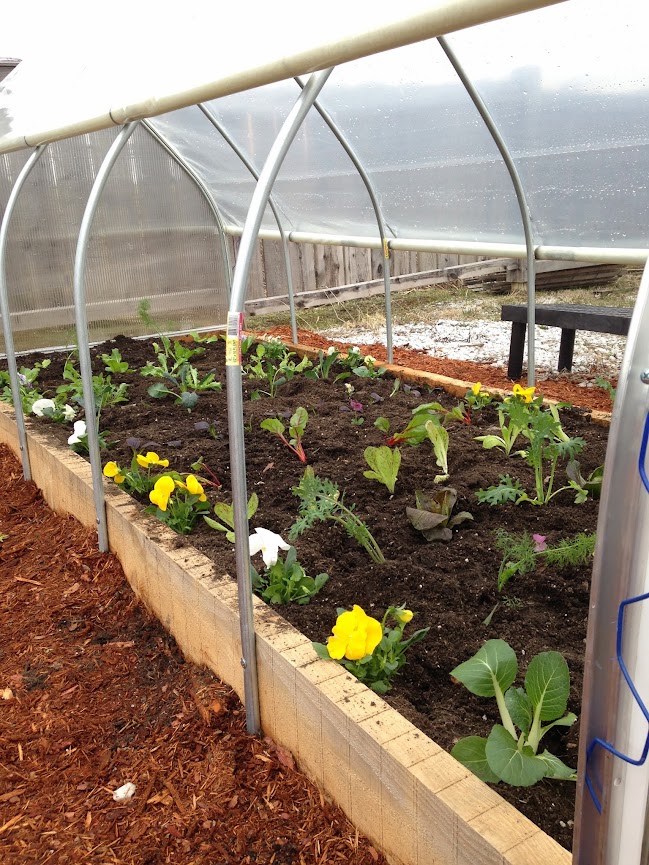
You can roll up the sides, you can close it securely and easily, or even take the plastic all the way off once the weather warms up. The frame can act as part of a trellis system for tomatoes giving them a warm and dry environment as they size up, and then you can take the plastic all the way off and let them grow through the top of the frame. Just add a few horizontal lines of twine and, voila, instant tomato trellis!
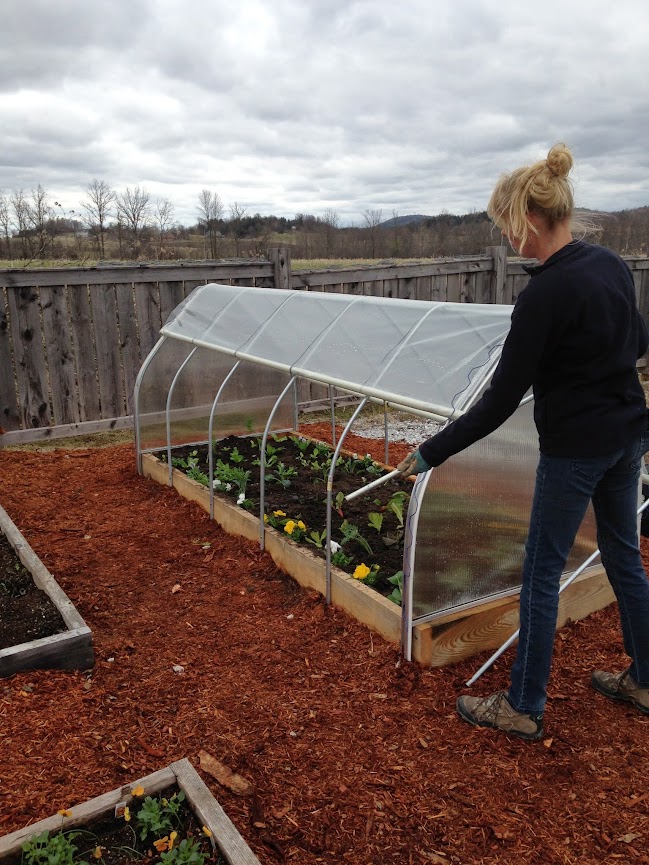
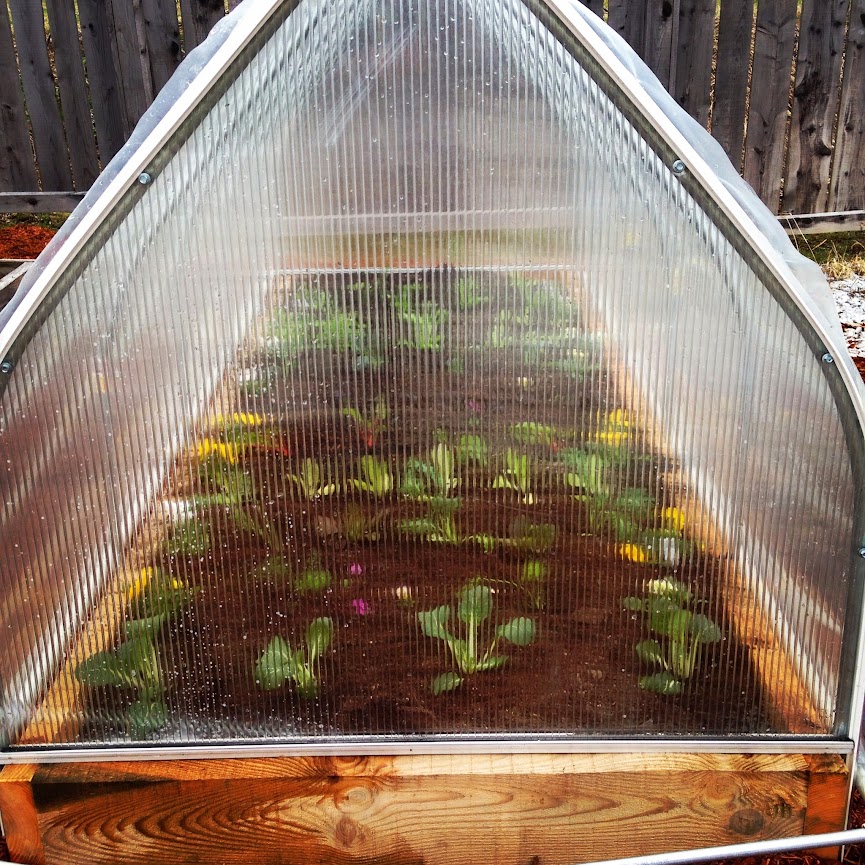
Plants are nicely tucked in and cozy warm, no matter what the weather! You can easily get a 2 to 3 week jump on the season with this kind of season extension. The raised bed means that the soil is dry and warm long before garden beds, and the tight, plastic cover gives you warmth on cold nights. You can keep the sides rolled down on chilly, cloudy days, but it is best to roll them up a bit in the morning. It can get quite warm in there when the sun pops out. This type of greenhouse will allow you to harvest greens almost year round. It can also be used as a spot to start seeds, harden off plants, and gives you an extra zone of warmth if you would like to grow a perennial that is not usually hardy here.
We can deliver, bring you soil, plants, and have your instant garden ready in just an hour or so! Just add water.
Lots of things can go in the garden now. Take advantage of some season extension, gentle April rains, and your spring garden eating will be taking place a little sooner. Season extension - row covers, cold frames, and mini greenhouses......
Crops that like it cold.....
You can use row covers to extend the season and create a little spring heat in this cold year. We use a white, floating row cover (called Reemay sometimes) over hoops made out of 9 gauge wire, which can be found at farm supply stores. You can buy fancier hoops in garden centers, but the home made wire hoops work really well and cost a fraction of the price. You will need bolt cutters to cut the wire.
Happy cold time gardening, and please don't hesitate to get in touch if you have any questions!


Please join us April 18th, our opening day, for an evening tour of the greenhouses and a cocktail party with our friends from Caledonia Spirits. We will start at 5:00, take a walk around the greenhouses at 6:00, and get to see old and new friends to kick off our season with a spring celebration. Heidi Mahoney will be serving up some delicious herb-themed snacks, Caledonia Spirits will be serving sample tastes of their award winning vodka and gin, and we will have a cash bar featuring a special cocktail made with our herbs and more of that special gin and vodka.
I first met Todd Hardie, owner of Caledonia Spirits, in 2001. At the time, he had another very special business called Honey Garden Apiaries. Todd and his staff kept bee yards throughout the Champlain Valley and the St Lawrence Valley and they would extract the honey and bottle it raw and unfiltered. It was the most powerful food, full of the bees' adventures and vitality. His operation was based right next to where Red Wagon Plants is currently located. When I needed a little something extra to do that winter 15 years ago, a friend suggested I talk to Todd about helping him with extracting honey. I fell in love with honey and made a life long friend. As Todd would say, it was a fruit example of cross-pollination as our conversations were instantly filled with all of the possibilities of plants, honey, bees, and all of the various ways these things can interplay. Todd's creativity, energy and brilliance have no bounds. He went on to make incredible plant and honey based medicines as part of his business, which was part apiary and part apothecary. While he has moved on to the world of finely distilled spirits, one thing has not changed: Todd is always making products that vibrate with the powerful energy of bees, plants and people. There is an inspired quality in all he makes that can be tasted and felt, and that sets it apart from all the others.
Please let us know you are coming so that we can plan accordingly. RSVP.
Please join us for a special evening and help kick off the 2014 garden season with a wonderful celebration.
- Julie and the crew
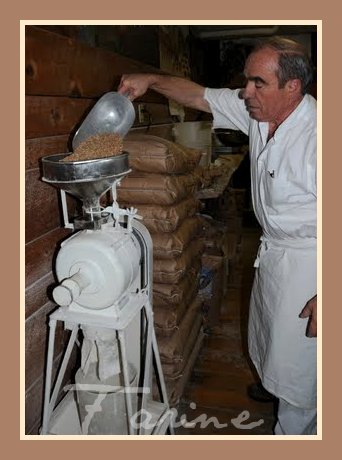
This year we will again be offering a weekly share of Gerard’s Bread!

Gerard Rubaud is Julie’s father and bakes wonderful bread in his wood-fired oven.

He uses a fermentation method that relies on wild (as opposed to commercial) yeast for leavening. The method, traditional in France, involves culturing grains, flour and water to produces a natural starter called levain. He grinds many of his ingredients from whole grains, including rye, spelt and wheat. About a quarter of his dough is comprised of these freshly ground grains, the remainder is white flour. It is simply delicious!
How the Bread Share works:
If you are interested, please send us an email (julie@redwagonplants.com) or send a check made out to Red Wagon Plants to 2408 Shelburne Falls Rd Hinesburg, VT 05461.
Thanks!